Bought a Minor today! - Interior Finished!!
Forum rules
By using this site, you agree to our rules. Please see: Terms of Use
By using this site, you agree to our rules. Please see: Terms of Use
-
Luxobarge
- Minor Fan
- Posts: 363
- Joined: Tue Sep 02, 2008 8:27 pm
- Location: Horne, Surrey
- MMOC Member: No
No worries, my pleasure - I usually "blog" most of my work, there's this and more at www.popular-classics.org too.
Next job is to fit a replacement parcel shelf and quarter-kick panels, also will fit new glove-box liners and other bits and pieces when they arive.
Another looming job is uphostery replacement/renovation - the new trim comes in a slightly different shade of blue to the stuff already in there. I'm replacing the seat cushion covers and front door cards, but will be attempting to re-colour the rest if the existing vinyl interior to match the new stuff, with the help of a re-colouring kit from Woolies.
Won't be doing this for a few weeks, but watch this space....
Cheers!
-
Luxobarge
- Minor Fan
- Posts: 363
- Joined: Tue Sep 02, 2008 8:27 pm
- Location: Horne, Surrey
- MMOC Member: No
They were pre-cut, and very accurately tooPSL184 wrote:Luxo, just one Q. Were the carpets pre cut around the pedals or did you have to cut them. If you cut them, how did you get the correct place for the cut?
Cheers
Cutting this slit involved also cutting through the edging of the carpet, which is stitched on, raising the risk that the stitching will come undone over time and it will start looking tatty - to prevent this, I used a gas cigarette lighter to burn/melt the ends of the threads together thus "fixing" them so they won't pull through.
Hope this helps!
OK thanks - Interesting to know which suppliers provide pre cut holes and which don't. I guess it would be possible to get your column slit re-bound at a carpet shop to secure the edges? Were the pre cut slits for the pedals bound or sealed or just "raw" cuts?
Thanks again...
Thanks again...
[sig]8426[/sig]
Compare the Minors - Simples !! http://mog.myfreeforum.org/index.php
Compare the Minors - Simples !! http://mog.myfreeforum.org/index.php
-
Luxobarge
- Minor Fan
- Posts: 363
- Joined: Tue Sep 02, 2008 8:27 pm
- Location: Horne, Surrey
- MMOC Member: No
They are just "raw" cuts - but the type of carpet used has a very "solid" sort of backing - a kind of rubberised compound, and also the weave/pile of the carpet is very - how can I describe this - "stable"?? What I mean is, that there would be very little chance of the carpet fraying or coming unravelled at all IMO. I suppose that some edging along the pedal holes would be nice visually, but we'd end up paying more for it...PSL184 wrote:OK thanks - Interesting to know which suppliers provide pre cut holes and which don't. I guess it would be possible to get your column slit re-bound at a carpet shop to secure the edges? Were the pre cut slits for the pedals bound or sealed or just "raw" cuts?
Thanks again...
As already said above, I was VERY impressed with the quality of the whole carpet kit, no criticisms at all from me, and not all that expensive in the grand scheme of things - about £106 delivered (ordered from CW but a Newton Commercial product).
Cheers!
Last edited by Luxobarge on Tue Sep 16, 2008 10:41 am, edited 1 time in total.
-
Luxobarge
- Minor Fan
- Posts: 363
- Joined: Tue Sep 02, 2008 8:27 pm
- Location: Horne, Surrey
- MMOC Member: No
OK, back from hoidays now and today the vinyl trim colouring kit arrived from Woolies - a very good service I have to say!
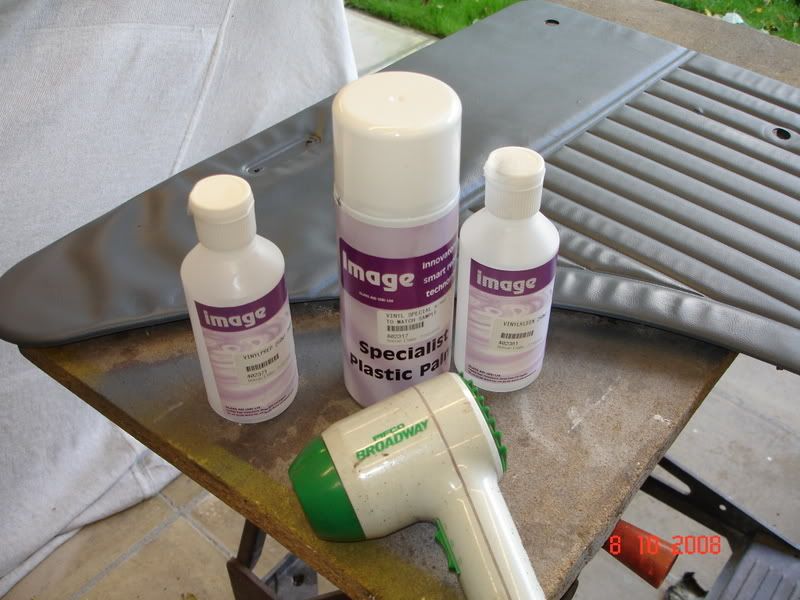
This is basically all you need to do the job, a bottle of vinyl cleaner (spirit), a bottle of vinyl prep/primer (clear spirity stuff) and the colour spray aerosol. The hair-dryer (don't tell the missus!) is to dry it off after spraying:
So I tried it on a spare rear door card. As per instructions I used the vinyl cleaner to thoroughly clean the part of the panel that I wanted to do, then wiped it thoroughly with the "Vinyl Prep" stuff, and then as soon as that looked dry I sprayed it with the aerosol of colouring stuff.
Here's the result - you can see the difference in colour, and against the scrap of "new" coloured material (which is a sample that I'm trying to match) it's a pretty good colour, I like the matt finish too:
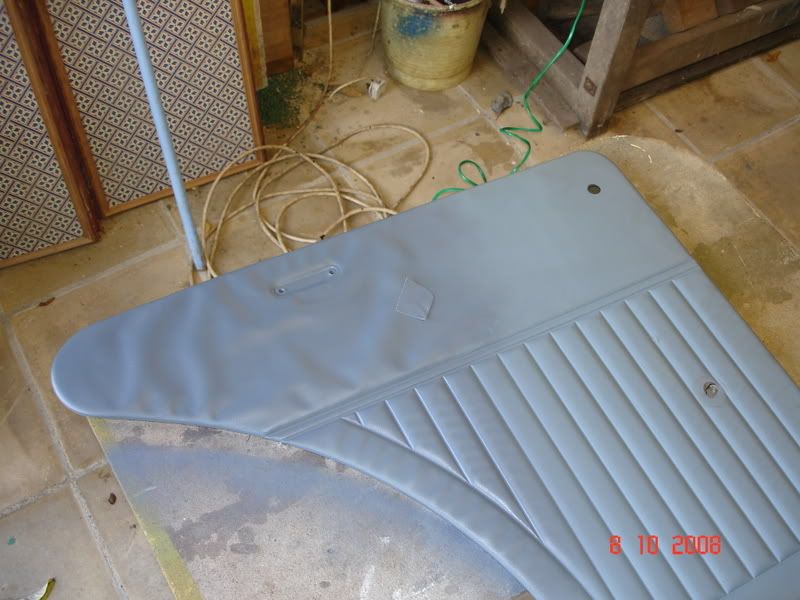
Only one problem - and you can see this - the part that I have done, the vinyl has gone a bit loose and floppy, and in the flat section this has given some wrinkles. I'm not sure how to overcome this, if the rest of the interior goes like this then it's going to look a bit shonky. Maybe I didn't let the cleaner or the prep solution dry off properly first? I'm sure it didn't get hot with the hair-dryer.... Will it shrink back to be a bit tighter in time?
Anybody got any ideas as to how I can prevent this - what have I done wrong?? :?: :?: :?:
Other than the wrinkling, it's looking good for a successful colour change though - it's gonna take time though!
Cheers!
This is basically all you need to do the job, a bottle of vinyl cleaner (spirit), a bottle of vinyl prep/primer (clear spirity stuff) and the colour spray aerosol. The hair-dryer (don't tell the missus!) is to dry it off after spraying:
So I tried it on a spare rear door card. As per instructions I used the vinyl cleaner to thoroughly clean the part of the panel that I wanted to do, then wiped it thoroughly with the "Vinyl Prep" stuff, and then as soon as that looked dry I sprayed it with the aerosol of colouring stuff.
Here's the result - you can see the difference in colour, and against the scrap of "new" coloured material (which is a sample that I'm trying to match) it's a pretty good colour, I like the matt finish too:
Only one problem - and you can see this - the part that I have done, the vinyl has gone a bit loose and floppy, and in the flat section this has given some wrinkles. I'm not sure how to overcome this, if the rest of the interior goes like this then it's going to look a bit shonky. Maybe I didn't let the cleaner or the prep solution dry off properly first? I'm sure it didn't get hot with the hair-dryer.... Will it shrink back to be a bit tighter in time?
Anybody got any ideas as to how I can prevent this - what have I done wrong?? :?: :?: :?:
Other than the wrinkling, it's looking good for a successful colour change though - it's gonna take time though!
Cheers!
-
grumpygrandad
- Minor Addict
- Posts: 553
- Joined: Wed Jun 04, 2008 4:18 pm
- Location: INGLEBY NR LINCOLN
- MMOC Member: No
to much
if you are happy with the car then definatly NOT to much enjoy and drive with a smile,,,grandademmerson wrote:Nice looking car, but as far as price goes, wether or not you could have done better is immaterial. You were obviously happy to pay that much, so that is all that matters! Good luck.
-
Luxobarge
- Minor Fan
- Posts: 363
- Joined: Tue Sep 02, 2008 8:27 pm
- Location: Horne, Surrey
- MMOC Member: No
Well got some more time on the Moggie today, so decided to fit the new glove-box inserts which arrived the other day.
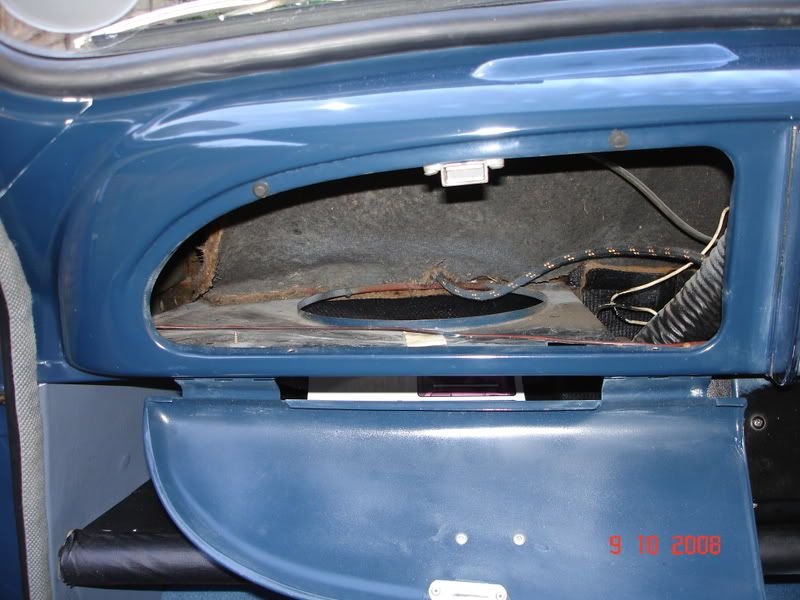
Here is the left hand one - pretty manky, the RH one is even worse:
Just a few screws to remove with a stubby cross-head screwdriver and it's out:
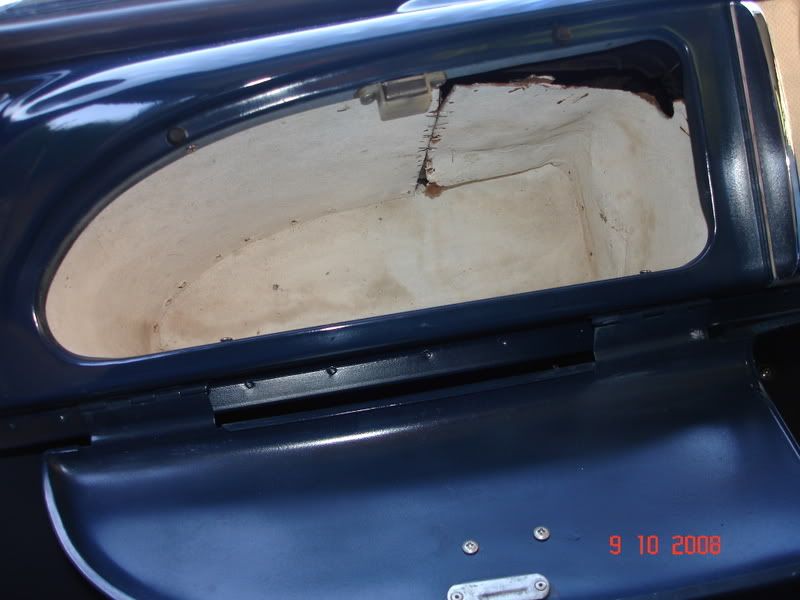
Here's the empty space:
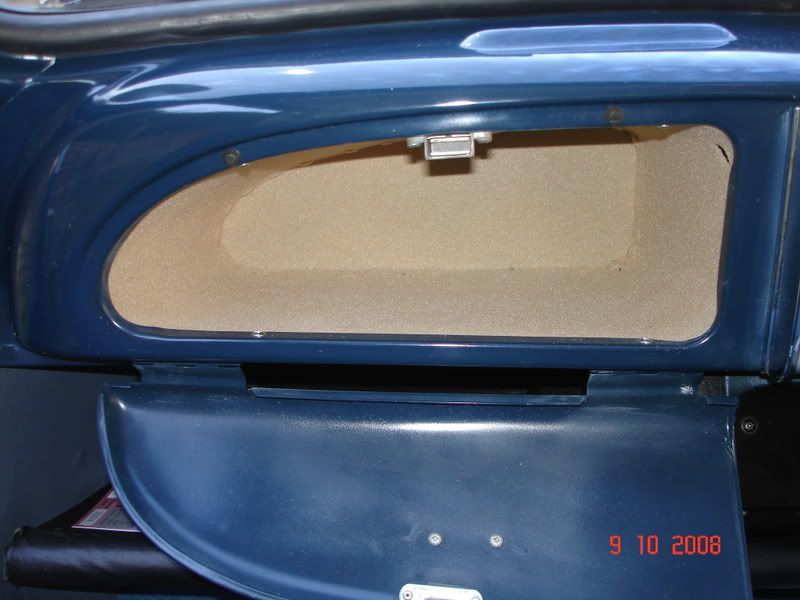
Slide the new one in after attaching the captive self-tapper nuts and put the new screws in - a hand underneath to help lift it into place helps with the top screws, and bingo - all done!
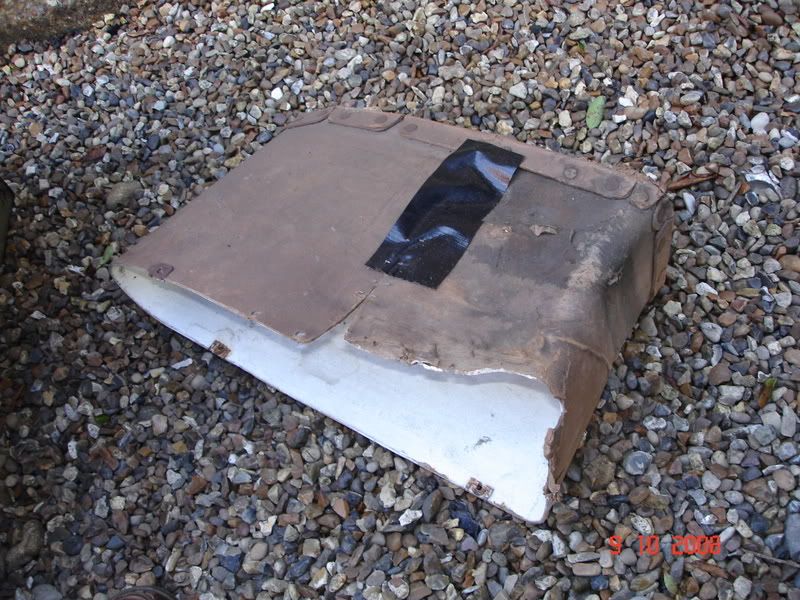
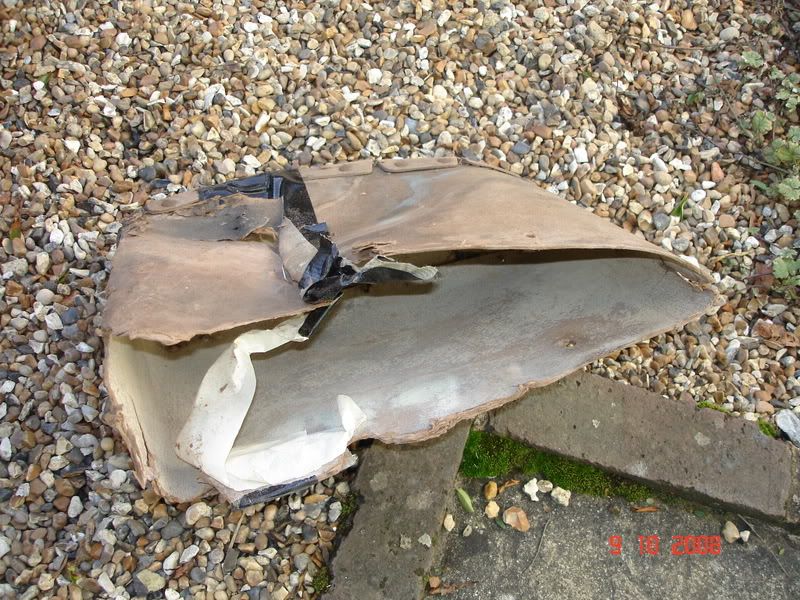
Then out with the RH one - I took off the glove-box surround and lowered the steering column to get this out - here it is out of the car - well manky!
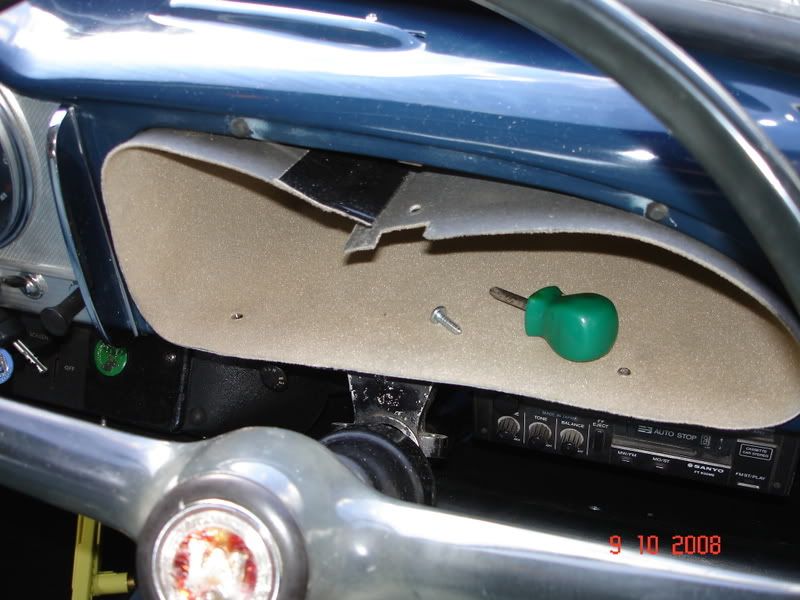
The supplied self-tappers and captive nuts were incorrect for the RH side, so I used some from my own stock. Quite a fiddle to get it to go in properly - here it is mostly screwed in, the floppy bit at the top is held up by a little metal bracket on the front cover which is not fitted yet:
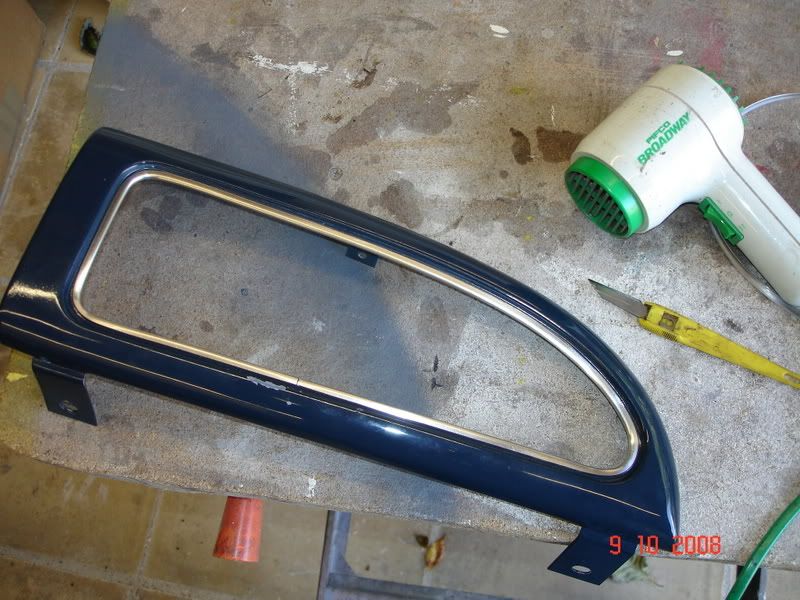
The front cover has a piece of "chrome" plastic round it's edge, which was also manky and I'd ordered a new one. Time to fit this before re-fitting the front - again, a bit fiddly, but holding the first part in place with masking tape then using the good old hairdryer to warm it up soon enables it to flex round the corners, fit it in tight, cut off the excess and all done:
The previous guy had used the wrong screws to fit the front panel, so I sorted some new ones and did the job properly, re-fitted the steering column (also fitting new proper screws to the indicator stalk nacelle while I'm at it) and the job's done - looks smart I think!

Pretty happy with that - the new inserts look wierd when they arrive, but as usual with Newton Commercial's stuff, they are of high quality and fit perfectly, and really look the biz now - they are made of thick cardboard with a sort of "flocked" velvet inside - very nice!
Note to self - try not to get them wet......
Cheers!
Here is the left hand one - pretty manky, the RH one is even worse:
Just a few screws to remove with a stubby cross-head screwdriver and it's out:
Here's the empty space:
Slide the new one in after attaching the captive self-tapper nuts and put the new screws in - a hand underneath to help lift it into place helps with the top screws, and bingo - all done!
Then out with the RH one - I took off the glove-box surround and lowered the steering column to get this out - here it is out of the car - well manky!
The supplied self-tappers and captive nuts were incorrect for the RH side, so I used some from my own stock. Quite a fiddle to get it to go in properly - here it is mostly screwed in, the floppy bit at the top is held up by a little metal bracket on the front cover which is not fitted yet:
The front cover has a piece of "chrome" plastic round it's edge, which was also manky and I'd ordered a new one. Time to fit this before re-fitting the front - again, a bit fiddly, but holding the first part in place with masking tape then using the good old hairdryer to warm it up soon enables it to flex round the corners, fit it in tight, cut off the excess and all done:
The previous guy had used the wrong screws to fit the front panel, so I sorted some new ones and did the job properly, re-fitted the steering column (also fitting new proper screws to the indicator stalk nacelle while I'm at it) and the job's done - looks smart I think!
Pretty happy with that - the new inserts look wierd when they arrive, but as usual with Newton Commercial's stuff, they are of high quality and fit perfectly, and really look the biz now - they are made of thick cardboard with a sort of "flocked" velvet inside - very nice!
Note to self - try not to get them wet......
Cheers!
-
Luxobarge
- Minor Fan
- Posts: 363
- Joined: Tue Sep 02, 2008 8:27 pm
- Location: Horne, Surrey
- MMOC Member: No
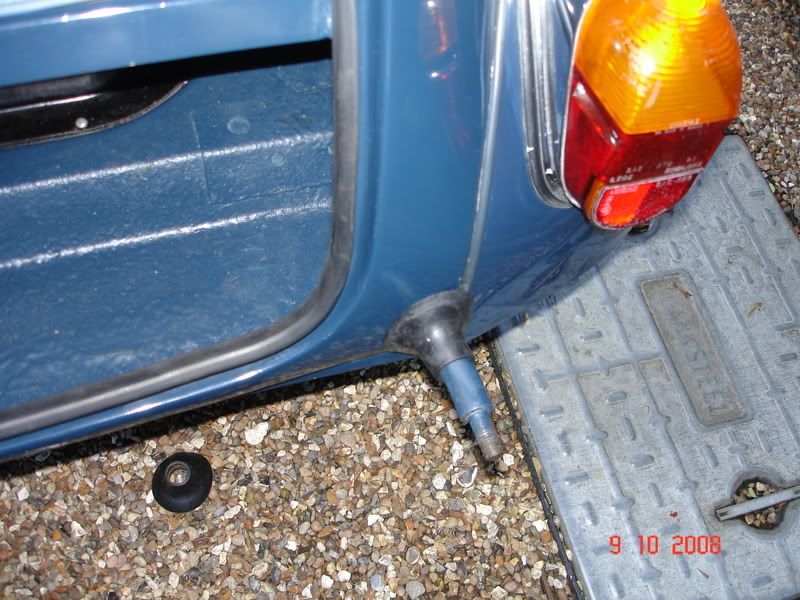
Well, I still had some time, so the next job was to replace the rubber cover things that go against the body where the rear bumper irons come out. Here's why I wanted to replace them:

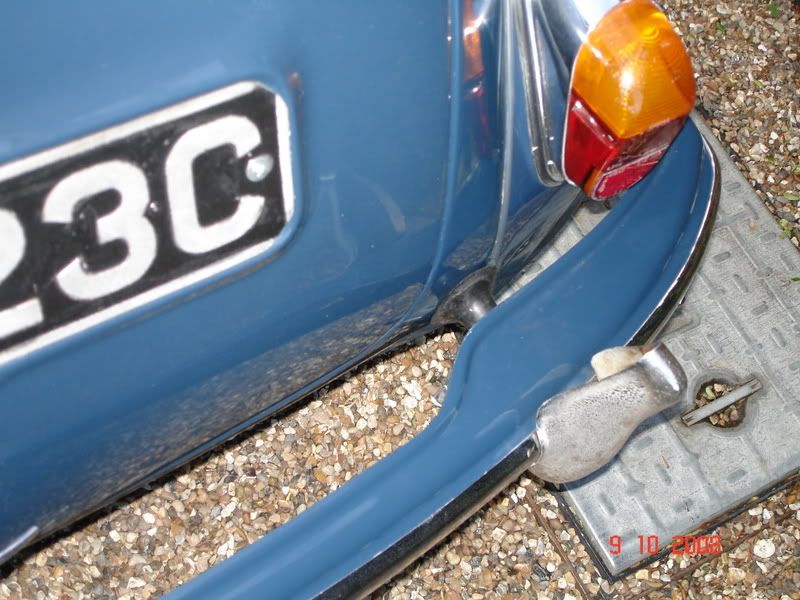
They have a thin grooved grommet that goes around the hole in the bodywork, the one on the LH side was new, but the one on the RH side was missing - the hole was just filled up with underseal gunge, so I cleaned this out and fitted the new grooved grommet that comes with the bumper iron covers, this was quite a fiddle, but we got there in the end. Then slide the new cover over the bumper iron and here it is:
Then back on with the bumper using lots of clear waxoyle on the nuts and washers to keep them from rusting and the job's finished:
Another job ticked off! Great stuff. Next job is to take large bits of the interior out and start the vinyl re-colouring process. Watch this space!
Cheers
-
alex_holden
- Minor Legend
- Posts: 3798
- Joined: Tue Jul 25, 2006 9:46 am
- Location: Burnley
- MMOC Member: No
The reason they get wet and go manky is because the wiper stalks tend to leak a bit in heavy rain and drip onto them.Luxobarge wrote:Note to self - try not to get them wet......


Alex Holden - http://www.alexholden.net/
If it doesn't work, you're not hitting it with a big enough hammer.
-
Luxobarge
- Minor Fan
- Posts: 363
- Joined: Tue Sep 02, 2008 8:27 pm
- Location: Horne, Surrey
- MMOC Member: No
Ah, right, I didn't know that - thanks a lot. I'll bear it in mind - any tricks for stopping the wiper spindles from leaking?alex_holden wrote:The reason they get wet and go manky is because the wiper stalks tend to leak a bit in heavy rain and drip onto them.Luxobarge wrote:Note to self - try not to get them wet......
Cheers!
-
alex_holden
- Minor Legend
- Posts: 3798
- Joined: Tue Jul 25, 2006 9:46 am
- Location: Burnley
- MMOC Member: No
New rubber gaskets where they pass through the body might help, but they didn't completely cure the problem on mine.
Alex Holden - http://www.alexholden.net/
If it doesn't work, you're not hitting it with a big enough hammer.