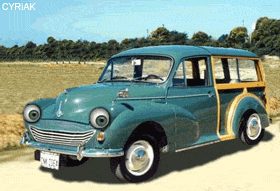
I've had the car about 10 years and bought it as a rolling restoration. In that time I've had the wood replaced, Woodies (great job) and put a reconditioned engine in.
First of all I found some rot on the nearside wheel arch and further poking and scratching uncovered rotten sills and hinge post..[frame]
Then some more on the other side.. Including a lovely aluminium plate pop riveted over the hole.
[frame]
I never stripped it back as it always felt very solid.
The sills are knackered on both sides too. As well as the rear wheel arches.
So to cut a long story short, I bought a Mig welder and learnt to weld, still learning but getting somewhere..
First job was to strip it right down and then engine and gearbox out. Up on axle stands and remove offside suspension, taking time for a clean down and repaint.
[frame]
Cut out the rotten panels. As a novice I found it easier to replace rather than repair any panels that were gone.[frame]
Then cleaning back and rust proofing.[frame]
Had to make a small repair on the offside bulk head aperture (there's probably a proper name for this).
[frame]
Then fixing and fitting the new panels.[frame]
That's enough for now.. more to follow shortly.