Page 1 of 1
replacing engine steady bar
Posted: Sun Oct 13, 2019 10:41 am
by rjt1951
Hi, I want to replace the rubbers on my standard engine steady bar. I am worried that I have to undo one head nut to remove bracket from engine. If I just undo one head nut do I risk head issues as usualy they are all slackened off in a set order?
Re: replacing engine steady bar
Posted: Sun Oct 13, 2019 11:18 am
by geoberni
If you're only replacing the rubbers, I don't see why you need to remove the bracket from the engine.
There does seem to be some variation in fitment, some people seem to have the head bracket upwards (as with this image I just lifted from the internet

- Engine Bracket 1.JPG (15.23 KiB) Viewed 1692 times
Whereas mine appears to be mounted as per the Manual.
Either way just dismantle it in-situ.
Or are you trying not to disturb the setting of the turnbuckle in the centre?
I assume that like most turnbuckles, you can adjust enough to separate it?
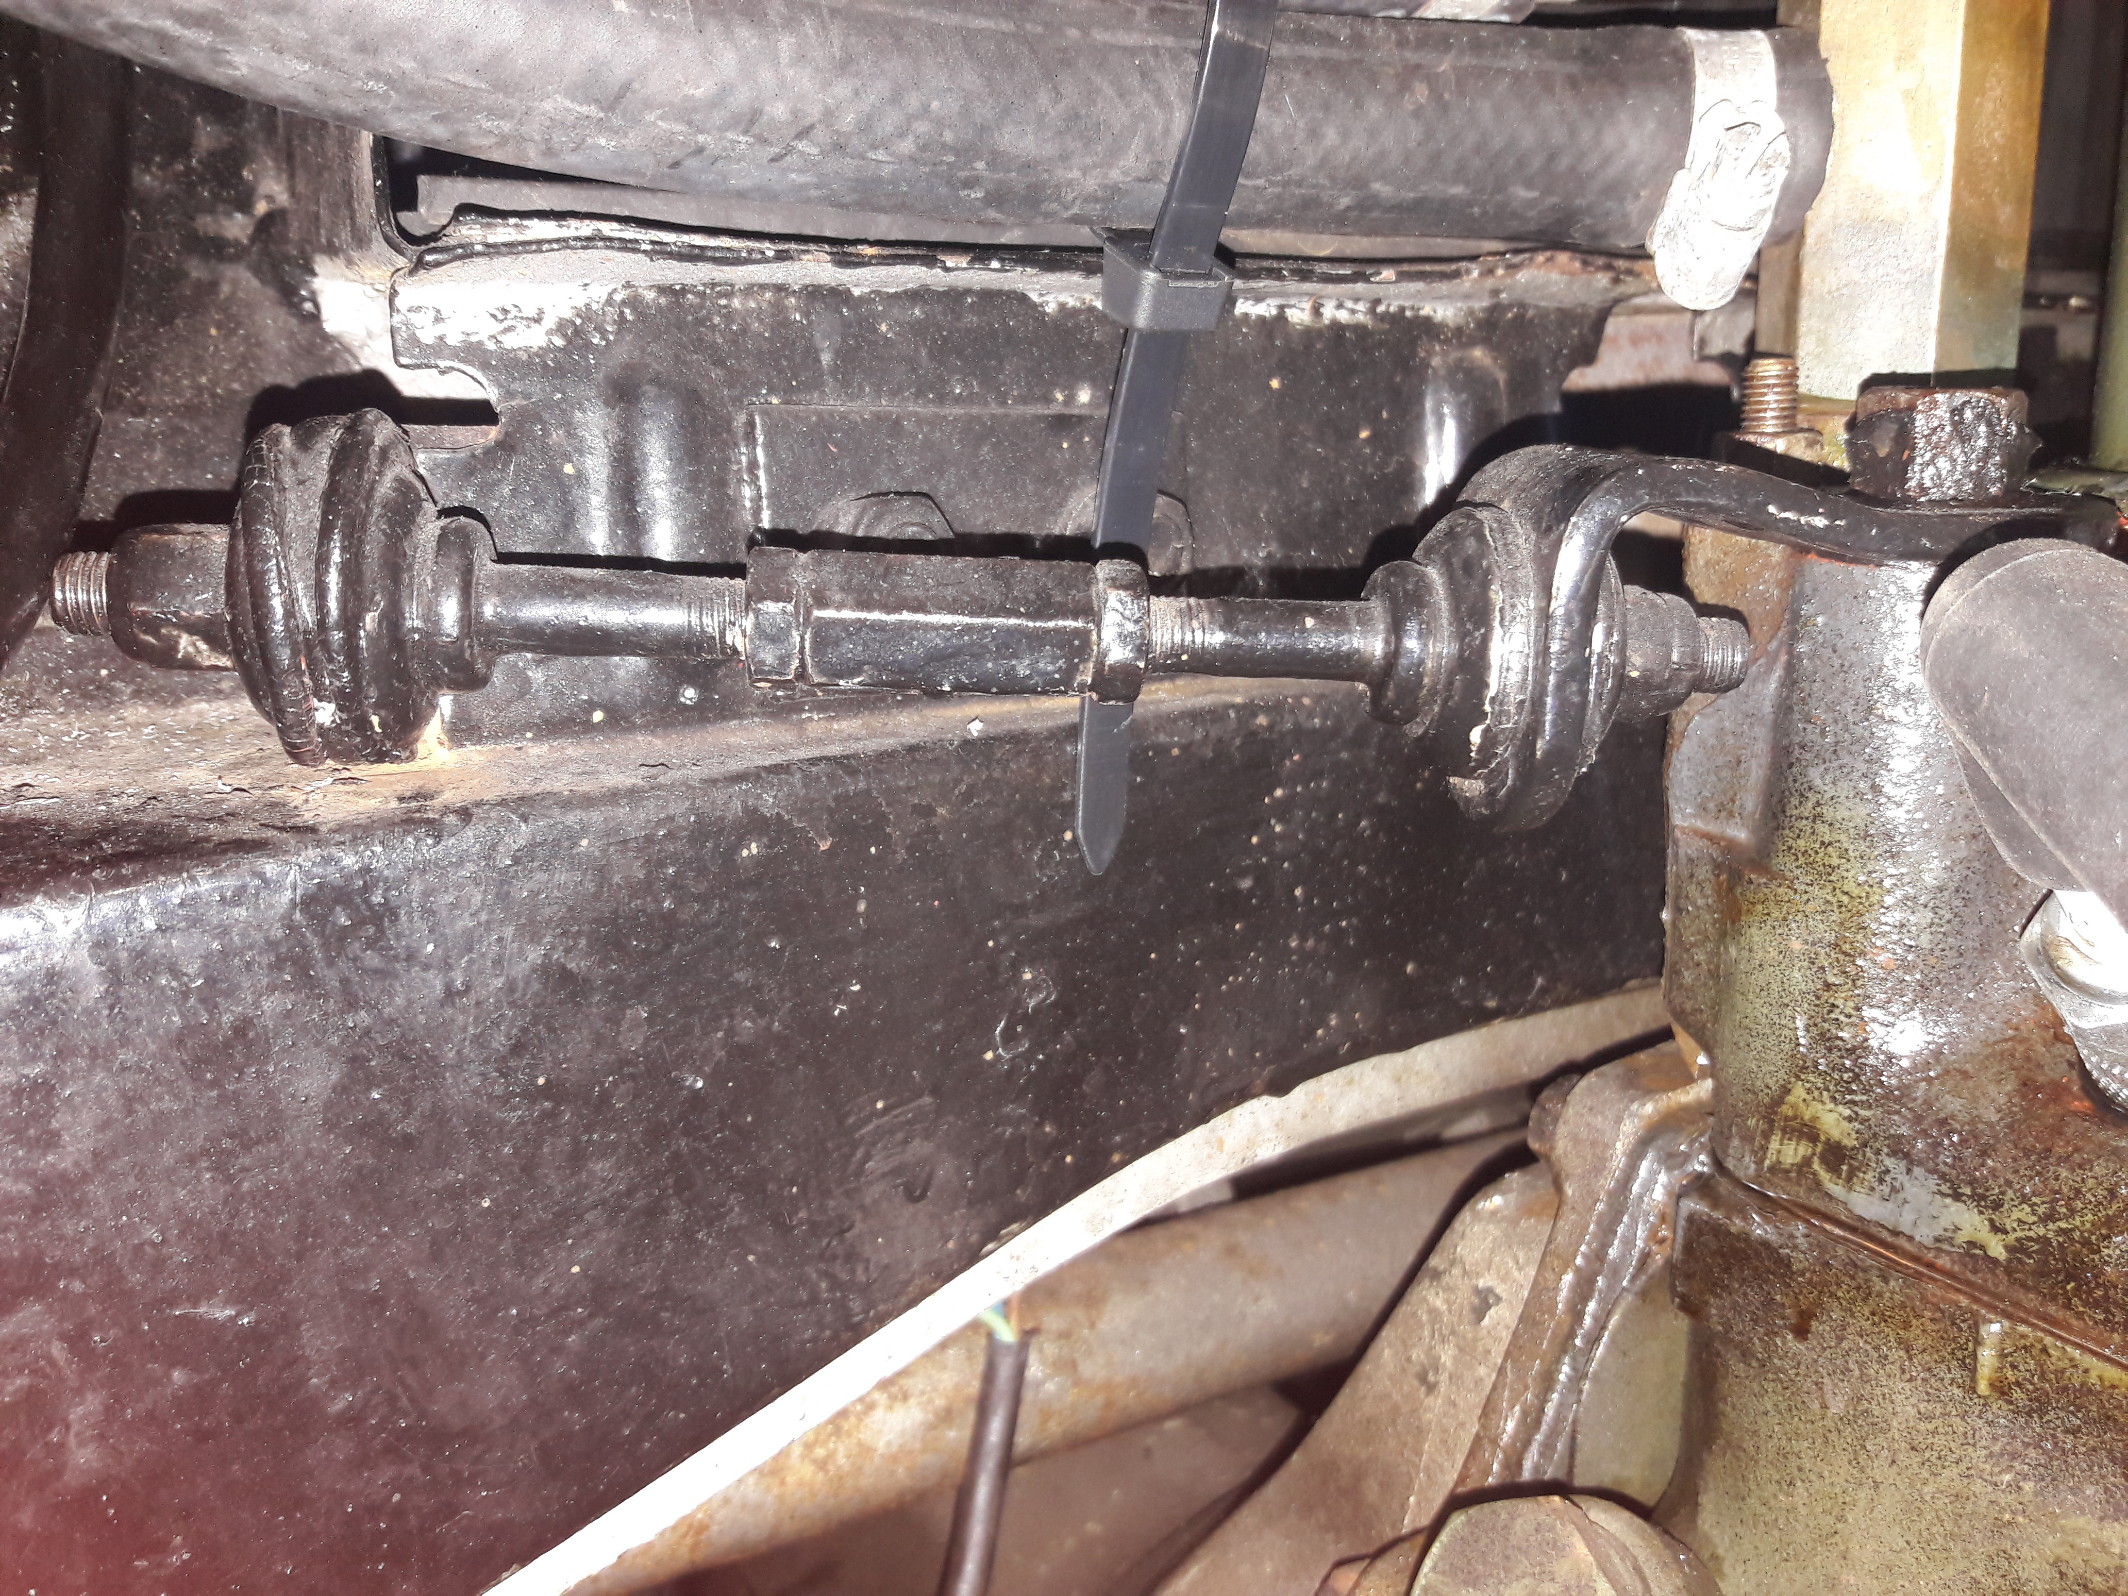
- 20191013_104945.jpg (1.07 MiB) Viewed 1692 times

- Engine Bracket 2.JPG (56.95 KiB) Viewed 1692 times
Re: replacing engine steady bar
Posted: Sun Oct 13, 2019 11:45 am
by rjt1951
Thank you for your help. Mine is set up as per your first illustration. I will try again but not sure I can turn it enough to seperate. Will report back Monday as other demands on time today!
Re: replacing engine steady bar
Posted: Sun Oct 13, 2019 12:07 pm
by Phil-1954
Hello rjt1953
My engine steady broke and I also had to undo one head bolt. Like you I was apprehensive, but no troubles followed afterwards. I made sure the actual time the nut was taken off was as short as possible, in the belief, maybe mistakenly, that this would also help guard against warping.
I did it on a cold engine though, and best done using a torque wrench.
Re: replacing engine steady bar
Posted: Sun Oct 13, 2019 12:10 pm
by geoberni
It may depend on how it was fitted, because the way shown is not how the manual illustrates it. The car mounted bracket should be under the battery box, not on the cross member, but you do see cars like that. Perhaps they changed it for factory fit items on production..?.
So if the fitter/mechanic made it up as they went along, the settings might be off.
In accordance with the manual, it implies it was all assembled in-situ.
If you read the 1st part of it, it implies by omission that the head stud was changed for a longer one without touching the head. I think that might be incorrect. But who knows!


- Engine Bracket 3.JPG (198.34 KiB) Viewed 1678 times
Re: replacing engine steady bar
Posted: Sun Oct 13, 2019 12:52 pm
by rjt1951
Thanks again guys for the input. Mine is set up as per drawings so will give it a go on Monday, think mine may have been over tightened as bushes are well squashed up.
Re: replacing engine steady bar
Posted: Sun Oct 13, 2019 2:10 pm
by myoldjalopy
As per 'Phil-1954', I don't think there will be any problems just taking off and replacing the one nut, as long as the engine is cold when you do it.
Re: replacing engine steady bar
Posted: Sun Oct 13, 2019 2:24 pm
by Banned User
myoldjalopy wrote: ↑Sun Oct 13, 2019 2:10 pm
As per 'Phil-1954', I don't think there will be any problems just taking off and replacing the one nut, as long as the engine is cold when you do it.
This ^^^^. If it worries you at all, drop the water level, but I honestly wouldn't bother for that one nut on the corner of the head.
Re: replacing engine steady bar
Posted: Sun Oct 13, 2019 4:28 pm
by rjt1951
Spare half hour and managed to remove the bar but it ruined the end of the thread on one half. Have shortened the thread length on both halves to make re-assembly possible and ordered new rubbers and cup washers. Think will leave bracket on head as is as looking at lots of engine bays just as many have bracket facing upwards as have it facing downwards. Facing downwards I guess puts the bar at a true horizontal as opposed to a slight upward angle.
Thank you all again and sorry ttto make a big thing out of a small part!
Re: replacing engine steady bar
Posted: Sun Oct 13, 2019 4:36 pm
by philthehill
Fit a Grumpys engine steady bar kit and forget.
Comes with all the parts required to complete the job
https://www.morrisminorspares.com/engin ... it-p830094
Much better than the standard item and you do not have to undo any head nuts to fit. The bracket outboard of the engine uses the two spare 5/16" BSF threaded holes in the main cross member.
I fitted one to my Ser2 and did not look back.

So long as the tension bar is horizontal and no strain is placed on the bushes it does not matter if the head bracket is up or down.
Re: replacing engine steady bar
Posted: Sun Oct 13, 2019 4:55 pm
by ampwhu
why did they fit this steady bar to the MM and not the Austin A30/35's and midgets? seems strange...….
Re: replacing engine steady bar
Posted: Sun Oct 13, 2019 5:13 pm
by philthehill
The steady bar was a retro fitment to the Minor due to engine judder when taking up the drive.
The other vehicles mentioned above did not suffer with the same problem possibly because of the different gearbox mountings which held the gear box tighter especially given that their gearbox mounts had three rubber mountings against the Minor two which being further apart did nothing to help reduce any torque reaction. See link below.
https://www.ebay.co.uk/itm/MG-MIDGET-SP ... Swa0ddlnkB
The cylinder head stud used with the engine steady bracket was slightly longer than the other cylinder head studs on the spark plug side of the engine and was supplied under Pt No: 51K244.
Re: replacing engine steady bar
Posted: Tue Oct 15, 2019 2:03 pm
by IslipMinor
The 'other' cars have hydraulic clutch operation, so any movement of the engine/gearbox during the drive take-up has no effect on the clutch operation. The Minor's mechanical linkage must stay in the same place during the clutch operation, otherwise the take-up can be intermittent and juddery. Anyone experienced this? Joking of course!
Re: replacing engine steady bar
Posted: Tue Oct 15, 2019 2:23 pm
by Biggles1957
Geoberni's is the correct way up. It is more difficult to get at the securing nut of course, but if you mount it upside down (like yours is) then the angles are all wrong and it puts pressure and strain in the wrong place. No problem taking the single head bolt out if you have to but agreed do it with a cold engine.