Bob's '62 Convertible - Full Restoration

Let us all know what you are up to with your current restoration project. Get that Minor on the road!
Forum rules
By using this site, you agree to our rules. Please see: Terms of Use
rich-legg
Minor Fan
Posts: 113
Joined: Wed May 13, 2009 1:45 pm
Location: Devon
MMOC Member: No

Bob's '62 Convertible - Full Restoration

Post by rich-legg »

Back in July I went down to Cardiff to Pick Bob's '62 Convertible up for a restoration. It's taken me a while to get started on it as I've been having a new workshop built.

Image
Image
Image


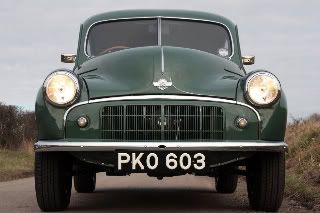
It had been in a front end crash before Bob bought it, so he took it to the collage where he works for it be restored, the students get cracking on it, but did a pretty poor job, welding in patches where Bob had asked for new panels to be welded in. Rather than sending it to Charles Wares to finish the job, Bob sent it to me to do.

A lot of the front panels have been cut out without any bracing being done, so that was the first thing I did.
Image


Land side first...
I've started yesterday by cutting out the inner sill, keeping the boxing plate in place for a little strength & alignment.

First thing is to drill the spot welds out, and cut the previously patched floor away. Boxing plave will also be removed, so keeping it straite wasn't an problem.
Image
Image
Image

You can see here where the B-post strengthener panel has taken some of the stress in the accident, I cut this out, 1 to replace it, and 2 to make a better repair of the inner sill.
Image
Image
Image
Image
Image

From factory the inner sill panel goes all the way to the back of the car, obviously it's not economically viable to replace the whole thing. The repair panels are made to lip onto the rear under-seat cross member, but this is not factory correct & will show an obvious repair, as the cross member is supposed to lip onto the sill & not visa versa.
I will therefore fab this to look correct.

Image
Image
Image

The inside of the will has a sthrenghening panel, which we will also replicate.
Image

I also found a nasty surprise under some filler.
Image
Image
Last edited by rich-legg on Tue Nov 24, 2009 9:14 am, edited 1 time in total.
bmcecosse
Minor Maniac
Posts: 46561
Joined: Wed Feb 16, 2005 11:24 pm
Location: ML9
MMOC Member: No

Post by bmcecosse »

Quite a project - keep the pics coming!
ImageImage
Image
borderblue
Minor Friendly
Posts: 48
Joined: Tue Aug 25, 2009 11:48 pm
Location: scottish borders
MMOC Member: No

Post by borderblue »

this is great,i have not long had my morris and need to do a lot of welding,and not having a clue really it was good to see some pictures,they show pretty much whats to do.Keep them coming

thanks
[sig]10362[/sig]
MarkyB
Minor Maniac
Posts: 7845
Joined: Thu Jan 25, 2007 3:18 pm
Location: South East London
MMOC Member: No

Post by MarkyB »

"Some filler" is a bit of an understatement.
It looks like they invested in a family sized economy bucket of it.
webbnuts
Minor Fan
Posts: 132
Joined: Sat Mar 10, 2007 6:54 pm
Location: Dorset
MMOC Member: No

Post by webbnuts »

Good luck!
rich-legg
Minor Fan
Posts: 113
Joined: Wed May 13, 2009 1:45 pm
Location: Devon
MMOC Member: No

Post by rich-legg »

Not had much time to update the progress on Bob's Convertable, been too busy in the garage working on it.

I had a major problem that the nearside door wouldn't line up correctly, it was fouling terribly on the rear quarter panel (I didn't get a pic though :( ) Several reasons for this:
Worn hinge, floor had dropped due to several repairs which had lost the strength to the cross member. This caused problems with the finishing strip not lining up with the rear quarter. But the biggest problem was the rear quarter bottom repair was 'pulling' the quarter out of the correct shape, I cut this out and sorted the other issues, the gap is now spot on.

I'd have hated to see the car when it was on the road previously, the panels must have all been a terrible fit.
Image <BR>
Image <BR>

The boxing plate, inner sill step & boxing plate extension were all cut out, and the new boxing plate & inner sill are now fitted. I wanted to get the profile on the rear under seat section to join the inner sill correctly (described in my previous post), so I flattened the inner sill lips and seam welded to the existing inner sill under the rear seat. I will reinforce this inside later.
Image <BR>
Image <BR>
Cut repair
Image <BR>
Image <BR>
Image <BR>
Image <BR>
Image <BR>
Image <BR>
Image <BR>

The rear part of the inner sill still need some local repairs, so the boxing plate extension is not fitted yet (it is in the pics just for alignment).


I then started cutting out the previously replacement floor and original floor. I cut large sections out, then drilled the spotweld on the smaller sections.
Image <BR>
Image <BR>
Image <BR>
Image <BR>
Image <BR>
Image <BR>
Image <BR>
Image <BR>


Checking alignment, the new floor will have the side sill step section cut off, so it joins the floor as it would in the factory.
Image <BR>
Image <BR>

MarkyB wrote:"Some filler" is a bit of an understatement.
It looks like they invested in a family sized economy bucket of it.
This is the inside of that repair :(
Image <BR>
Image <BR>
alfabob
Minor Friendly
Posts: 75
Joined: Mon May 19, 2008 7:07 pm
Location: cardiff
MMOC Member: No

Post by alfabob »

My beauty is getting there, did not know it was that bad, Rich is doing a cracking job & I will continue the pics when I get struck into the mechanical bits
2lrminivan
Newbie
Posts: 3
Joined: Wed Nov 25, 2009 3:32 pm
MMOC Member: No

Post by 2lrminivan »

hi little legs
keep up the good work but remember the wife and kids are in doors .
but they prob glad you not inside in the way lol

alfabob is lucky he got you to do his car i seem to remember you were going to help me do my car about 4 years ago !!!!!
rich-legg
Minor Fan
Posts: 113
Joined: Wed May 13, 2009 1:45 pm
Location: Devon
MMOC Member: No

Post by rich-legg »

2lrminivan wrote:hi little legs
keep up the good work but remember the wife and kids are in doors .
but they prob glad you not inside in the way lol

alfabob is lucky he got you to do his car i seem to remember you were going to help me do my car about 4 years ago !!!!!
Cheers Bro :D

If I had given you more help with your car, would it be on the road now? :lol:
2lrminivan
Newbie
Posts: 3
Joined: Wed Nov 25, 2009 3:32 pm
MMOC Member: No

Post by 2lrminivan »

it may well be on the road in a week but can i drive it :lol:
alfabob
Minor Friendly
Posts: 75
Joined: Mon May 19, 2008 7:07 pm
Location: cardiff
MMOC Member: No

Re: Bob's '62 Convertible - Full Restoration

Post by alfabob »

More progress on the floor. The repair panels come with lips front & side in case you’re not replacing the inner sill & toe panel, to make the repairs as ‘factory’ as possible, the side lip came off, and the front lip was corrected. The panel has the lip facing upwards, but for a factory fit needs to face downwards, and should be shorter. So this was trimmed & panel betted to face down.
<br />
<br />
Image
<br />
<br />
Image
<br />
<br />
Image
<br />
<br />
Image
<br />
<br />
<br />
<br />The inside of the chassis leg has surface rust, so this was cleaned up & painted with rust prevention paint.
<br />
Image
<br />
<br />
Image
<br />
<br />
<br />
<br />You can see here where the original floor was spot welded to the teo board. This was removed, and the new floor trial fitted again.
<br />
Image
<br />
<br />
Image
<br />
<br />
Image
<br />
<br />
<br />
<br />To make way for the sill strengtheners fitted to convertibles, the seatbelt mounting point had to be removed from the new repair inner sill. You can see here where rust is trapped when they made & painted in transit paint.
<br />
Image
<br />
<br />The strengtheners have the seatbelt mounting point, but they’re not welded in very well, and have little or no penetration, so this has seen some new weld, and good penetration.
<br />
Image
<br />
<br />
Image
<br />
<br />This is the strengtheners with transit paint removed, ready to be fitted.
<br />
Image
<br />
Image
<br />
Image
<br />
<br />A poorly repaired floor edge under the A-post, now removed to make way for the new outer floor section.
<br />
Image
<br />The outer under-sill & B-post repair & rear quarter were tacked in to line up the outer floor edge,
<br />
Image
<br />
Image
<br />
Image
<br />
<br />The floor edge was originally part of the floor, so this has been replicated, by trimming & butt welding the floor edge to the floor before fitting to the car. Obviously trial fitted to get alignment correct.
<br />
Image
<br />
Image
<br />The correct style drain hole has also been added (lost the photo for now).
<br />
<br />The same has been done with the rear floor section. Removal of old repairs, found some horrors.
<br />
Image
<br />
Image
<br />
Image
<br />
Image
<br />
<br />The new floor, has now been trimmed of the inner step & rear sections, so it will fit as per factory like the front.
<br />
Image
<br />You can see here rust coming out of the seem.
<br />
Image
<br />
Image
<br />
<br />The rear outer floor section came with some ripples, which was nice (not), so they have been panel betted out.
<br />
Image
<br />
Image
<br />
<br />The correct style drain holes have been made… There are 3 of these on each side (thanks Taupe for the info!)
<br />
Image
<br />
Image
<br />
Image
rayofleamington
Moderator
Moderator
Posts: 7679
Joined: Fri Nov 01, 2002 2:55 pm
Location: LEAMINGTON SPA
MMOC Member: No

Re: Bob's '62 Convertible - Full Restoration

Post by rayofleamington »

attention to detail is a rare thing these days. I may be a bit 'sad' but I'm loving those original style drain holes.
It pains me to see sills supplied with no drain holes, but I suppose it helps sell more as they can rust through quickly if they're waterlogged.
Ray. MMOC#47368. Forum moderator.

Jan 06: The Minor SII Africa adventure: http://www.minor-detour.com
Oct 06: back from Dresden with my Trabant 601 Kombi
Jan 07: back from a month thru North Africa (via Timbuktu) in a S3 Landy
June 07 - back from Zwickau Trabi Treffen
Aug 07 & Aug 08 - back from the Lands End to Orkney in 71 pickup
Sept 2010 - finally gave up breaking down in a SII Landy...
where to break down next?
2013... managed to seize my 1275 just by driving it round the block :(
jonathon
Minor Legend
Posts: 4052
Joined: Sun Jan 16, 2005 3:43 pm
MMOC Member: No

Re: Bob's '62 Convertible - Full Restoration

Post by jonathon »

rayofleamington wrote:attention to detail is a rare thing these days. I may be a bit 'sad' but I'm loving those original style drain holes.
It pains me to see sills supplied with no drain holes, but I suppose it helps sell more as they can rust through quickly if they're waterlogged.

Maybe you should contact the manufacturers Ray, to explain the error or lack of attention to detail, "if no one say's anything, nothing will be done" :D :roll:

Rich , are you not using weld through primer between your joints ? It really aids longevity. :D

rich-legg
Minor Fan
Posts: 113
Joined: Wed May 13, 2009 1:45 pm
Location: Devon
MMOC Member: No

Re: Bob's '62 Convertible - Full Restoration

Post by rich-legg »

Thanks Roy, it's all about the detail, as they say.

Hi Jonathon. Yep, any spot welded joints I use weld through first, after stripping the black transit paint off. :D
Rich's Resto Shop
jonathon
Minor Legend
Posts: 4052
Joined: Sun Jan 16, 2005 3:43 pm
MMOC Member: No

Re: Bob's '62 Convertible - Full Restoration

Post by jonathon »

Good man !! :D :wink:

taupe
Minor Legend
Posts: 1188
Joined: Sun Oct 26, 2008 3:20 pm
Location: Bucks
MMOC Member: No

Re: Bob's '62 Convertible - Full Restoration

Post by taupe »

Hi Rich

Your restoration for Bob is coming on well!

Glad youre doing the front floor and drain holes as per factory, I reckon its less prone to rusting when done this way.
I thought my car was rusty until I saw that transmission tunnel rust sandwich on yours :o

Are you going to fabricate repairs for the tunnel ?
alanworland
Minor Legend
Posts: 1438
Joined: Tue Jan 30, 2007 10:09 pm
Location: Essex
MMOC Member: No

Re: Bob's '62 Convertible - Full Restoration

Post by alanworland »

It's the right way to do it - with drain holes. I made up wooden formers and pressed them in before fitting, including the ones in the sill sections where the edges are welded together.
Even if there is no water to drain they promote air circulation which can only be a good thing!
Image
kjm
Minor Addict
Posts: 642
Joined: Wed Feb 18, 2009 9:11 pm
Location: Co Antrim
MMOC Member: No

Re: Bob's '62 Convertible - Full Restoration

Post by kjm »

hi, bob , your making good progress, we have nearly finished our project , the previous owner who did the structeral work did not put in any anchor points for the belts , can these be purchased

taupe
Minor Legend
Posts: 1188
Joined: Sun Oct 26, 2008 3:20 pm
Location: Bucks
MMOC Member: No

Re: Bob's '62 Convertible - Full Restoration

Post by taupe »

Hi

These are available from lots of places its a standard 7/16" UNF thread. The difficult bit is getting it into the sill - but you should be able to feed it in via the sill cover and drill and plug weld it on the inside of the step sill if you cant get in to weld it from the outside.

Try name http://www.rimmerbros.co.uk/Item-- ... edium=feed

Google seat belt anchor plate or search ebay
chickenjohn
Minor Legend
Posts: 4064
Joined: Tue Dec 07, 2004 8:50 am
Location: Margate, East Kent
MMOC Member: No

Re: Bob's '62 Convertible - Full Restoration

Post by chickenjohn »

Just to say great work! Keep it up. I too am liking the details, weld thru spray etc, good stuff. Reminds me of when I did the welding on my convertible, except your car is even worse than mine was!

Great to see a rotten minor that might have been scrapped a few years ago saved.

I am also liking the drain hole detail. Just drilled non-original holes in the sills on mine, but next resto, I will definitely give this cut and bend method a go.
Cheers John - all comments IMHO
- Come to this years Kent branches Hop rally! http://www.kenthop.co.uk
(check out the East Kent branch website http://www.ekmm.co.uk )
ImageImage
Post Reply