Page 1 of 2
Puddles
Posted: Mon Apr 05, 2010 4:51 pm
by pfgiz
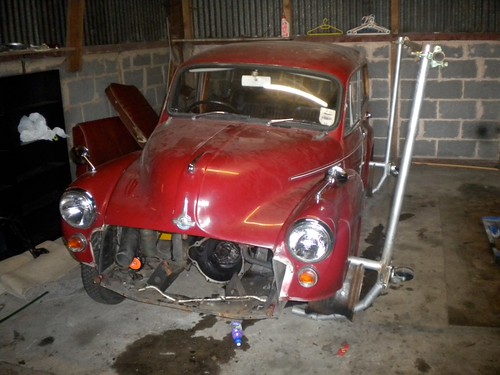
It has started.....
I decided to take the long weekend to start the 'getting back on the road' bit of our Traveler restoration. Other bits will include the application of an alternator and 'modern front seats'....
Back to the job in hand...
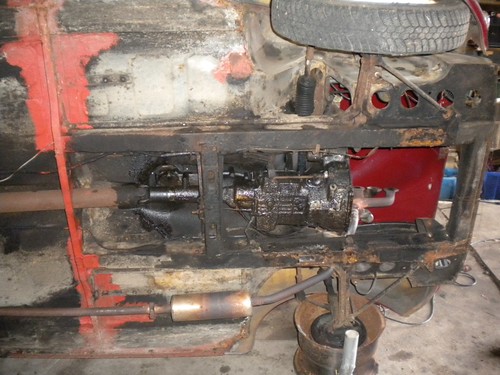
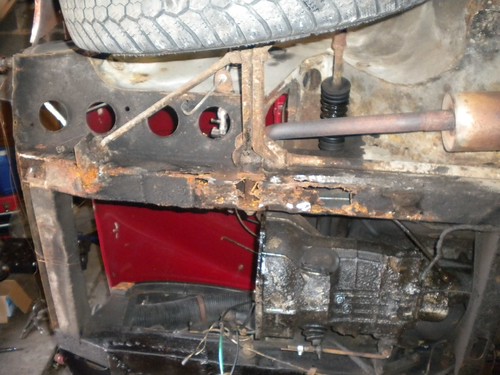
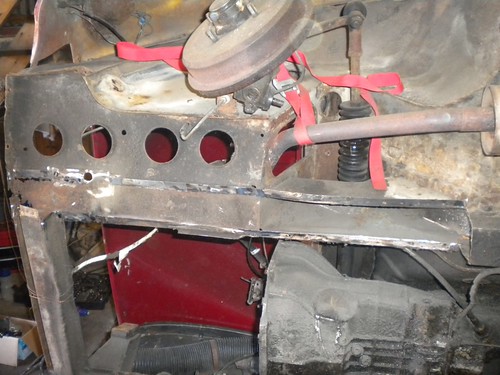
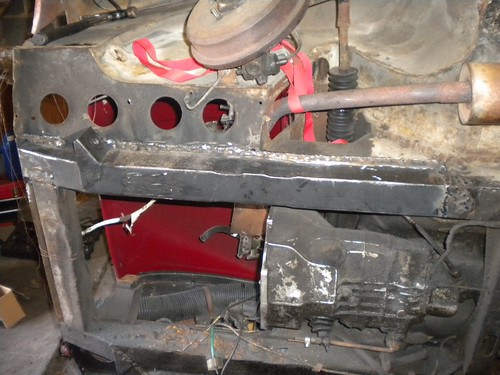
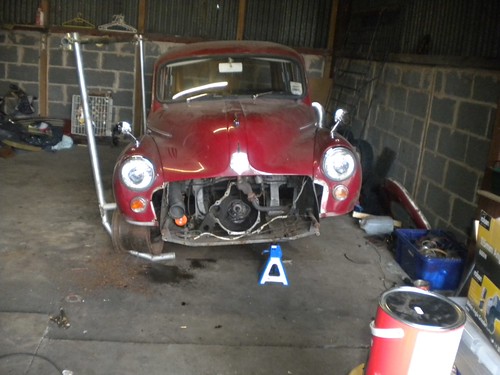
To get a decent idea of what is required I tipped her, after seeking advise from here first. Four of us did it in the end having removed the engine first.
With the frame attached...
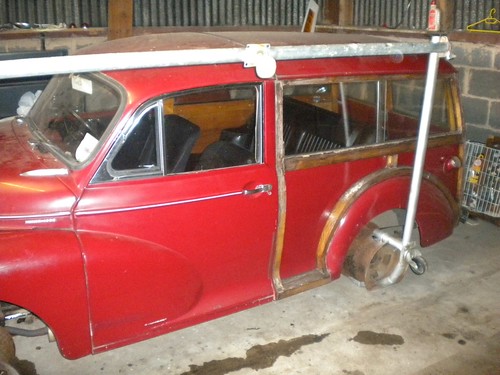
and then over.....
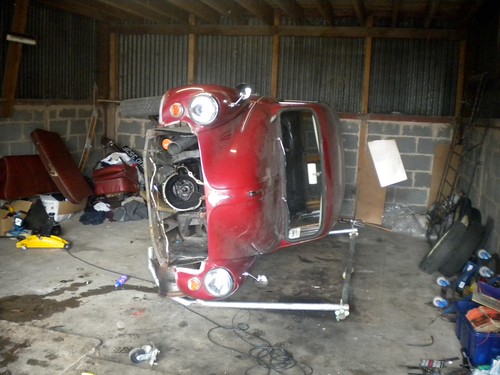
Now I can see what the floor is like. Someone has done some work to her in the past as she has what looks to be a new center piece, but a lack of proper rust proofing and under seal have taken their toll on the front legs and rear sills. Not as bad as I was expecting but still work that is required for the MOT.
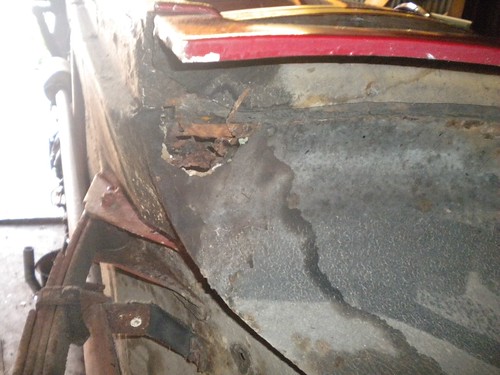
The underside....
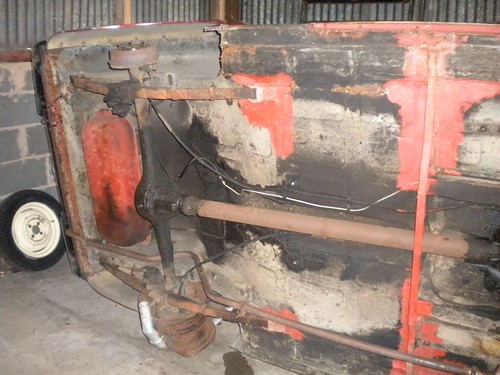
The rusty bits.....


So now it's time to fabricate and weld.....
More pictures to follow....
Re: Puddles
Posted: Mon Apr 05, 2010 6:11 pm
by davidmiles
Great pictures, plenty there to keep you busy. Keep them coming its great to see.
Re: Puddles
Posted: Sun May 23, 2010 4:36 pm
by pfgiz
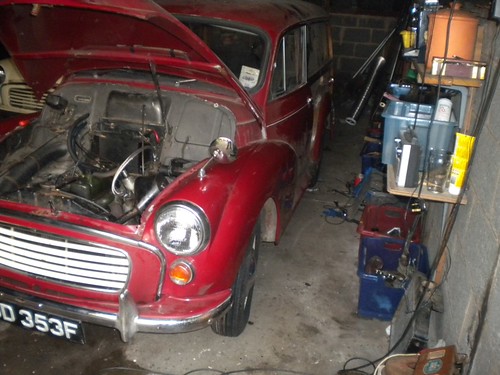
Updated Photos....
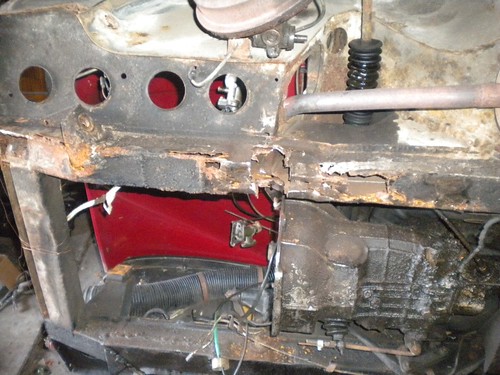
Drivers side done....
Just got the Passenger side to sort out...
MOT booked in for Wednesday.... I'll keep the pictures coming....
Re: Puddles
Posted: Mon May 24, 2010 12:51 am
by polo2k
Good to see someone as mad as me!
Have you thought of new replacement panels, it loks like you are plating over existing steel, that can cause problems futher down the line.
Heres something to keep you inspired
Re: Puddles
Posted: Mon May 24, 2010 6:35 am
by pfgiz
Thank you for your comments.
I do plate but only when the size of the hole is much smaller than the entire panel. It's the same philosophy I adopted when I rebuilt my 2 door saloon 7 years ago and that's not needed any re-welding since.
I feel it's more to do with rust treating and prevention than total removal of basically sound steel. The sill panels of this car have been changed at some point on both sides, as have the spring hangers and the centre cross member, but they seem to only have been red-oxided from the top and not treated within the box section, hence the deterioration seen now. On the saloon, when the welding was complete I doused the chassis legs and sills internally with waxoil to stop the collection of water and the onset of rust, which is what I intend to do here also.
I am replacing the passengers front chassis leg as this is too far gone, more pics to come later today.
I first viewed your photo on my iPhone and thought; "That's a nasty hole behind the drivers seat, and a piece of carpet behind the passenger's"... I see now that what I thought was carpet is the garage floor... Good luck with that.... Luckily I've no such holes in the floor, just the rear arches and the chassis legs.
Re: Puddles
Posted: Mon May 24, 2010 9:14 am
by polo2k
Plenty more pics of the carnage here:
http://www.mmoc.org.uk/viewtopic.php?f=28&t=32242
hopefully ill have all the passenger side structural stuff in place and welded today.
Re: Puddles
Posted: Mon May 24, 2010 10:08 pm
by pfgiz
Update for today...
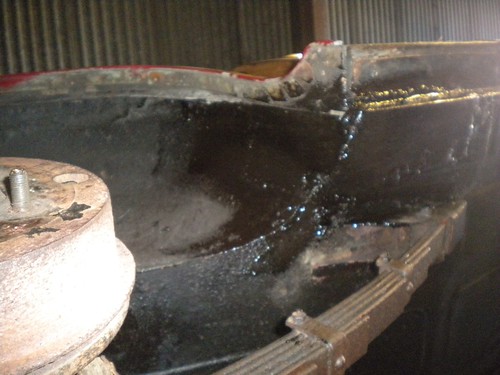
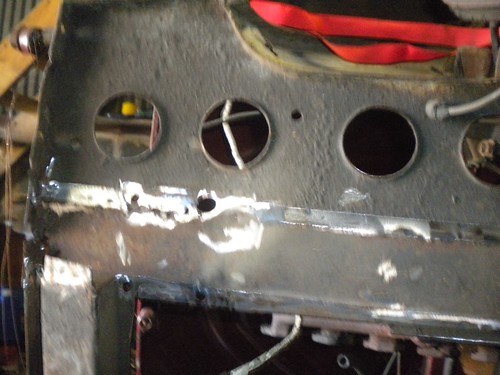
Out with the old....
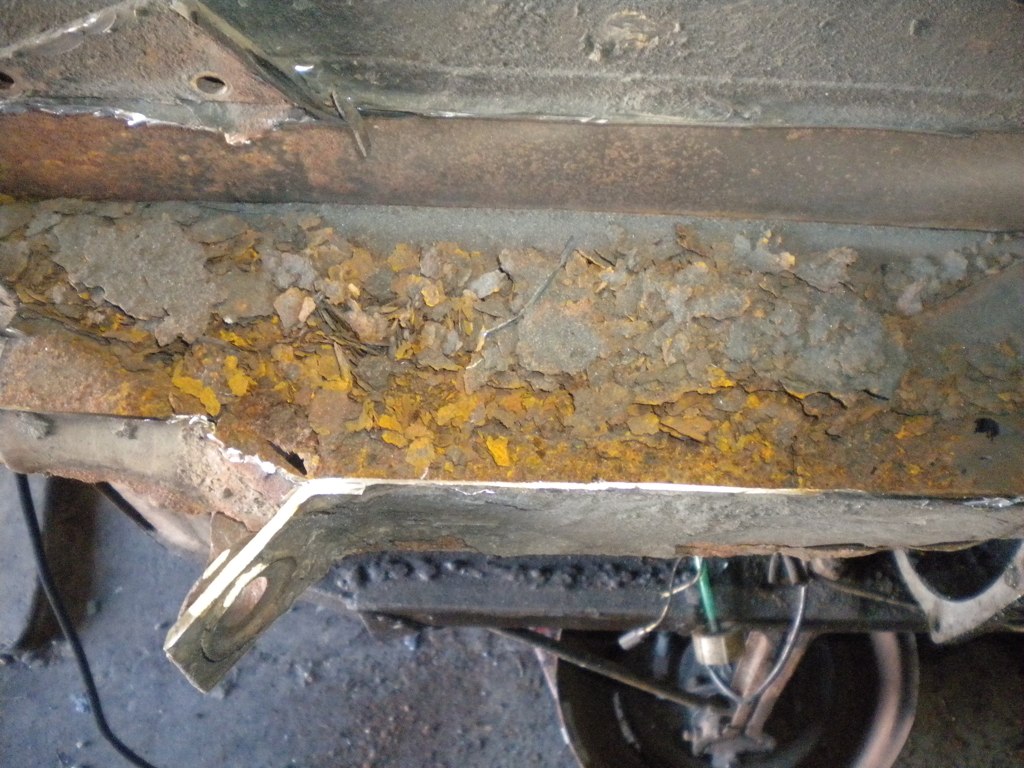
Scary to think that the dust was once a structural part of my car...!!!!!
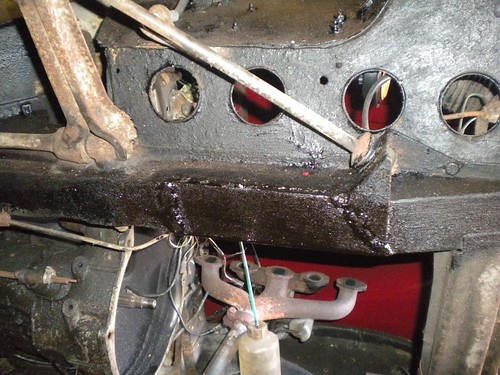
Preparation....
Nice shiny surfaces....
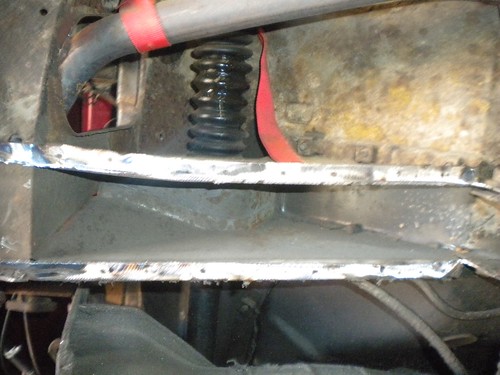
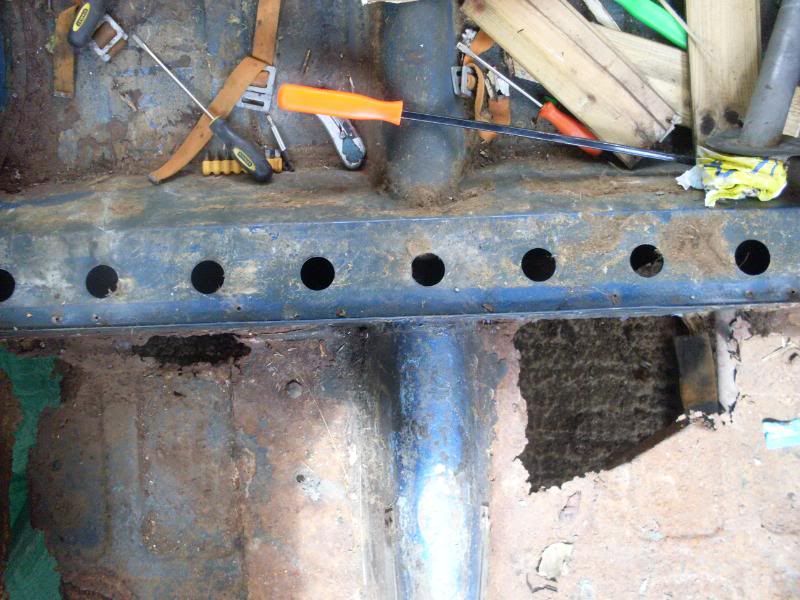
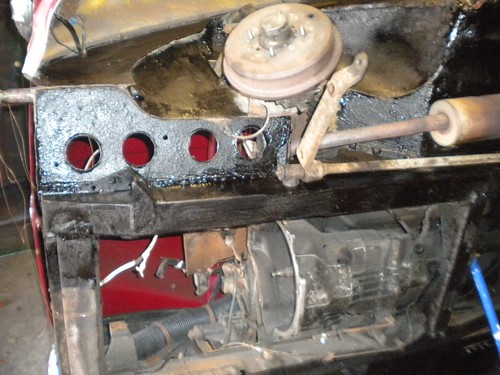
Then, when your ready, mount the new leg and clamp down....
This may look easy but it's taken me all day, with a lot of trying and re-trying, before I was happy with it. All of the measurements align with the other leg and it's square so I'm happy now to start the welding..... should all be done by tomorrow lunchtime...
For reference the holes I'm using as spot-weld type holes are 6mm in diameter. Anything smaller would have been impossible to weld through to the existing metal...
Another update tomorrow.....
Re: Puddles
Posted: Tue May 25, 2010 8:22 am
by kennatt
just a tip ,you may already know,Its a good idea when doing the joint at the rear to the existing rail to fit small fillets into one end of the box spot welded through so that when the sections come together the fillet slides inside one of the sections you can seam weld right through the joint fusing three lots of metal gives a much stronger joint than just a lap or seam weld and stops any burning through. It's what the old cut and shut repairers do,if done properly stronger than the original. I usually put the fillets into the new section cause its easier to handle the spots off the car. actually looking at the photo seems like you have allready done this. Good luck
Re: Puddles
Posted: Tue May 25, 2010 8:58 am
by pfgiz
Thanks for the tip, I'd guess it's always better to have a nice metal re-enforcement strip to ensure the joint is made nicely. In the case of the leg repair that was already fitted, all I did was clean the paint off it so I could weld to it.
Re: Puddles
Posted: Tue May 25, 2010 6:58 pm
by pfgiz
Today......
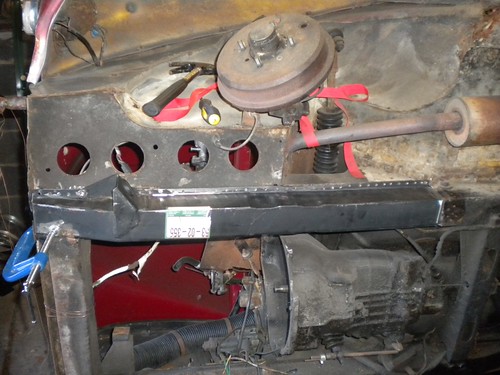
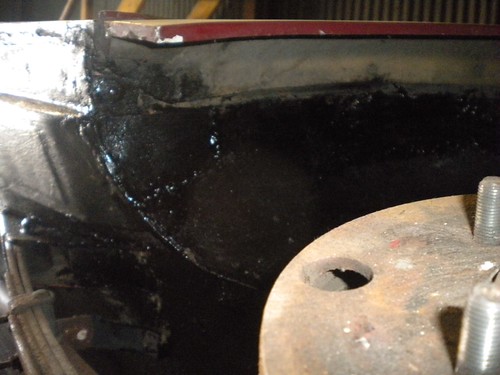
It took a while but finally I was happy with the welding....
So got to underseal it.... (and patch the rear inner wing.....)

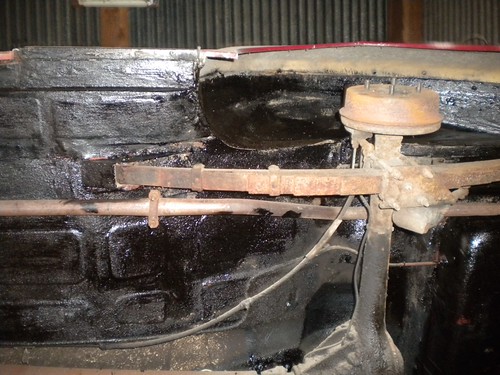
Then lower it back onto an axle stand so I can re-tension the torsion arm.
Hopefully, with a nice day tomorrow, I can have her ready for the MOT that has been re-scheduled for 09:00 on Thursday....
Re: Puddles
Posted: Tue May 25, 2010 9:23 pm
by joeone62
well done really nice job, if ever you come by Paris before summer 2011 drop by for a good glass of champagne, on the house off course.
Re: Puddles
Posted: Wed May 26, 2010 8:47 pm
by pfgiz
Thanks Joeone, I'll remember that.......
OK, Small update today as I've been very busy but still have some things to do before tomorrows MOT... Fingers crossed.....
Pictures say it all....
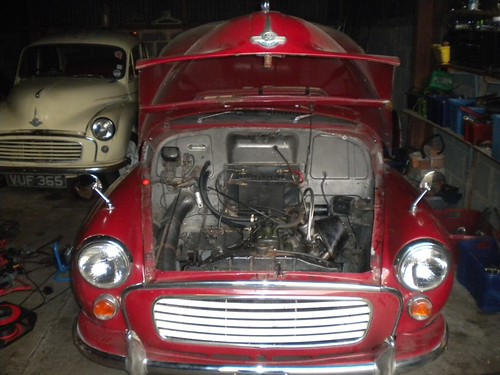

The engine bay is not as tidy as some but is functional....
Work still to do:
Re-fit Rear wing
Fit rear light lenses
Sort out horn, as it's not working
Check seat-belts
That's about it... all before 09:00 tomorrow..
Time for some dinner/lunch/snack now...
Re: Puddles
Posted: Wed May 26, 2010 8:56 pm
by PSL184
Best of luck old chap...
Re: Puddles
Posted: Thu May 27, 2010 7:19 pm
by pfgiz
Thanks mate.....
Well... 09:00 came and the car went through the MOT and failed on the final test, brakes. The rear brakes where not pulling evenly. I sorted this and she's now passed....!!!!!!!!!!!!!!!!
Another one on the road and maybe one you will see at the National.....
Thanks for all of your support....
Now the fun starts, as this is my Girl-Friends she wants things like a radio, better seats and the like.... So more work for me over the coming months and more photos when the work progresses....
First thing now though is a cider.....
Re: Puddles
Posted: Thu May 27, 2010 8:18 pm
by PSL184
Enjoy the drink and well done - This was a mamoth task achieved in only a few days.... My hat comes off to you


Re: Puddles
Posted: Fri May 28, 2010 11:01 am
by ASL642
well done - worth all the hard work

Re: Puddles
Posted: Fri May 28, 2010 4:47 pm
by deano69
A question if i may....
on the replacement chassis leg, how far apart are your plug welds? I'd read that to avoid warping panels they shouldnt be closer than 8 cm, if my memory serves me well, but if your plugs are 6 mm then they appear to be a lot closer together than 8cm. I ask as im likely to have to do the same job and am garnering information in readiness.
Nice job by the way.
Re: Puddles
Posted: Fri May 28, 2010 6:13 pm
by pfgiz
Hi,
Thanks for all of the comments, I've been out driving her today and am very happy...
I drilled my 6mm holes about 2 per inch all the way up both sides, then plug welded and seam welded just to make sure, 'cos I'm cautious like that....
Interesting point.... While at the MOT centre I was advised by the garage man that it is now mandated to seam weld everything and that this should be enforced on old repairs too. A while ago it was customary to 'stitch' weld the panels on, bit of weld - inch gap - bit of weld - etc. This seems now to be frowned on and could cost you your MOT.....!!!!! can anyone collaborate this or is it just hearsay?????
There will be some t-cutting this weekend and perhaps some wood work, I'll post more pics when done...
Thanks again....
Re: Puddles
Posted: Fri May 28, 2010 6:44 pm
by chickenjohn
pfgiz wrote:Hi,
-snip-
Interesting point.... While at the MOT centre I was advised by the garage man that it is now mandated to seam weld everything and that this should be enforced on old repairs too. A while ago it was customary to 'stitch' weld the panels on, bit of weld - inch gap - bit of weld - etc. This seems now to be frowned on and could cost you your MOT.....!!!!! can anyone collaborate this or is it just hearsay?????
-snip-
That has been the case for years. If you let a patch into a section or a part panel then it has to be a continuous weld seam rather than stitches. However, if fitting a new panel then spot welding (or plug welding) of the same frequency as original is acceptable.
Re: Puddles
Posted: Fri May 28, 2010 6:56 pm
by pfgiz
Cheers John for clearing that one up.... send my best to the guys and gals at EKMMOC, I still have my badge somewhere.....