RobThomas wrote:
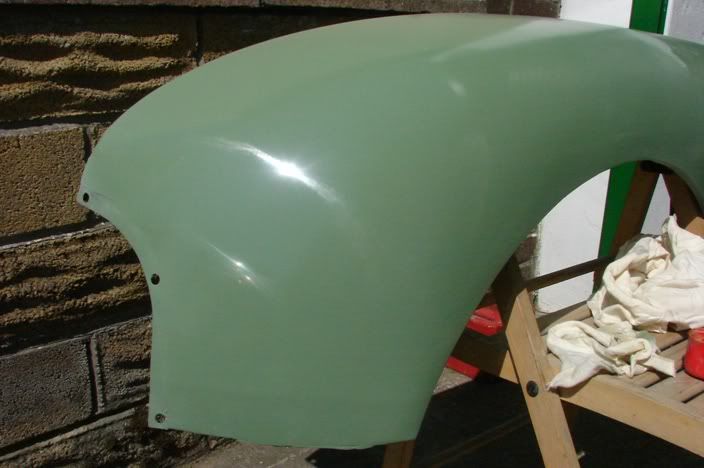
One wing flattened and a first coat on. A bit of T-cut to see how the final colour will look. I had a chocolate biscuit with the last cup of tea so I guess the colour is alright with the management.
I would not use T-cut. There are better products out now for polishing paint, such as Farecla G3 and for the final polish Autoglym paint renovator.
If you can borrow a Polishing machine they save a lot of time (though still tiring to use).
Yes. That pic of the 'dusting' was to empty out the last dregs of a spray can. I also had a run from farting about with the settings on the spray gun. I've got some medium cutting paste from the paint man to try out next. Still on a steep learning curve.
Paste and a rag is easier than the polishing machine because I'm still not able to use my left hand properly and the last machine I saw would have been a bit of a ....handful.
I needed to replace the clutch pivot arm since it was part worn through. I used a steel tube sleeve and lathed down a pin from the inner end of the lower suspension arm which has a thread on each end and is almost the perfect dimension. The original is held in place by a washer and split pin but I've left myself the option of using a nut so that I can also rebush the arm itself if it ever gets too worn. Worth doing this now whilst it is all apart. I think this component is not used on the A-series engine.[frame][/frame]
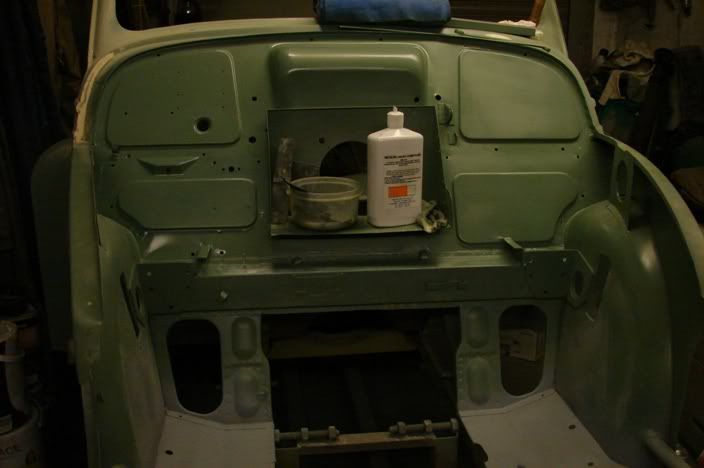
The panel fit on this one is a bit shaky in places and it looks like they neeeded to use quite a bit of force to get everything lined up for spot welding around the suspension mounts. I guess they fine-tuned the press tools during the production run?
If you could incorporate a grease nipple and some holes for the grease to travel down, into that clutch rod, one pump of grease every 10 years would make it last a very long time indeed.
"Once you break something you will see how it was put together"
Good idea but I'm hoping that I've solved the lubrication issue another way. Looking at the original 1949 arm it appears to be the short version of the clutch arm which should be changed for the longer one so I'll fabricate a new arm and put a bronze bush in it. Might also keep down the clutch judder they mention in the manual.
Today I have mostly been f4rting about with door repair panels. I bought some off of ESM and they aren't very good so I'll fold up my own to go along the door bottom and maybe use part of their outer panel in this same area. There is some grot in this outer skin but it cleans off very easily. The sandblaster didn't reach this far.
Here is that edge joddling device sat in the workmate just for the photo. It can roll almost any depth of joddle and roll round curves if you are careful. Once joddled, the skin pins (Cleco pins) hold it all in place for welding. I used to restore aircraft for a living when I left school and have had these pins in a box for more than 20 years, waiting for the day to use them.[frame][/frame]
What a horrible panel to have to make. Getting the 180 degree fold done is fairly easy but then you have to do a 45 degree fold and then round the panel to curve up the door. About 2 hours on this one panel. Once the bottom skin is lipped under I can fold it flat with a BFH and the lip will sit much flatter than the slightly iffy ESM panel. Very satisfying!
If I weld all those spotwelds up I can then bend the door back until the whole of the bottom of the door lines up, I hope.
These Roloc sanding discs made light work of blending in the join [ Same panel in picture above but upside down]. Some lead work ought to finish it off.
[frame][/frame]
Getting the bottom edge flat and level seems to have been one of the harder parts of the job. Taking time to line it all up before welding has paid off. A tiny skim of lead should get everything looking right.
[frame][/frame]
Hung the other front wing and the previous repair is as bad as the other side. Lining up the wing on the car and hanging a stright-edge on it shows how the plate welded in kicks up at the back. Once again I'm going to have to redo all of the work I paid to have done before. Lesson of the day...if you want it done right then you have to do it yourself.[frame][/frame]
I hung the door and the filler strip at the door base. Nice to see that it all lines up. I had to apply a couple of adjusting strokes from my BFH to set the edge of the door against the rear bodywork. [frame][/frame]
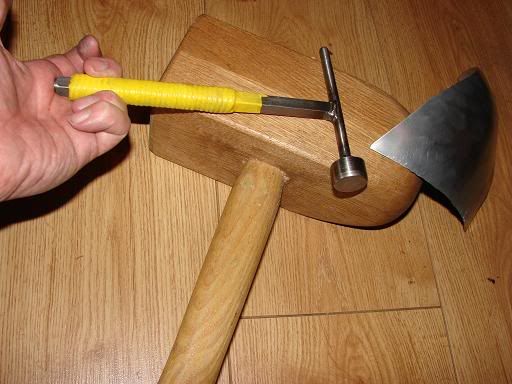
Here is the first BFH during construction of my new toolkit. It is made from a piece of Oak post from a new set of stairs that a friend fitted to his house. It is very hard and you can get quite a lot of persuasion from it. The other hammer has a small tip to squash down any dimpled bits of bodywork and a very flat silver steel face to then flatten out the lumps and bumps. Works quite well.
were the repairs done without the rest of the body, to make sure the shape was correct after fitting repair panels and before welding, you can not rely on thinking you have the shape correct without some reference to the doors
RobThomas wrote:Hung the other front wing and the previous repair is as bad as the other side. Lining up the wing on the car and hanging a stright-edge on it shows how the plate welded in kicks up at the back. Once again I'm going to have to redo all of the work I paid to have done before. Lesson of the day...if you want it done right then you have to do it yourself.[frame][/frame]
I think, to be fair on the professional restorer you paid to repair the rear of the front wings, it is very hard to get the rear of the wing exactly right unless it is possible to mount the wing and door on the car as you've done to check the fit. Moral of the story is "fit all the panels together on the car before fully welding any repair sections in".
I sort of assumed that he'd hang the wings on another car to do the job since all Minors are the same shape here and his reputation is for doing a good job. The whole point of paying someone pro to do a job is to get it done right since I could get it wrong all by myself without difficulty! No names, BTW.
Anyway, one glance shows that the tail edge isn't anywhere near the right shape.
1 he didn't check the repaired wing on a Minor, or
2 the Minor used for the test fit was slightly different to yours.
I don't think all Minor bodies are that close to each other! Especially after the ravages of time and past restorations. I seem to remember hearing that on the Cowley line the workers had a pile of doors and found the ones that fit each car individually!
Again, it looks to me as though the lifting of the rear edge of the wing was due to weld distortion.
It is a bit like making a map of the world on a flat piece of paper. If you try and make a straight line on a 3D shape you find that you actually need a curve.[Does this make sense?]
What looks like a straight rear edge to the wing actually has to be folded in a curve to follow the 3D contour of the wing. This pic doesn't fully explain it but it lies flat to the wing yet isn't parallel to the trailing edge. If the bottom rear of the panel was set to the rear edge then the middle would rise up just as can be seen on those previous repairs. Heat distortion isn't a factor in this.
Don't get me wrong; I don't bear any grudge. I'm hoping someone else along the way will learn from my experiences.[frame][/frame]
Yes, agreed, it is impossible to judge from a 2-D photo what is going on with a 3-D panel, but there is clearly heat distortion centering on what appears to be a gas weld seam where the repair section was joined to the rest of the wing. The wing appears to dip down into a v, the bottom of which is the weld seam.
Yes, and I agree, the rear of the wing is actually a gentle double curve, it curves back down to meet the door gap. This is where a shrinker/ stretcher machine and some careful hammer and dolly work would re-form the correct profile, again, not a job that can be done on the wing in isolation without the car and door to get the shape right.