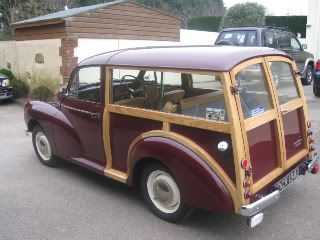
Pickup restoration part three
Forum rules
By using this site, you agree to our rules. Please see: Terms of Use
By using this site, you agree to our rules. Please see: Terms of Use
-
davidmiles
- Minor Legend
- Posts: 2731
- Joined: Mon Mar 23, 2009 4:54 pm
- Location: Sussex
- MMOC Member: No
Re: Pickup restoration part three
The wheel off, I can now unbolt the timing chain cover with its two different size of bolts[frame] [/frame]
smile, you never know, you might be winning.[IMG]http://i67.tinypic.com/2ro3j37.jpg[/IMG]
-
davidmiles
- Minor Legend
- Posts: 2731
- Joined: Mon Mar 23, 2009 4:54 pm
- Location: Sussex
- MMOC Member: No
Re: Pickup restoration part three
the culprit, this little innocent looking rubber seal is the cause of it all. I hope someone else learns from my silly mistake, you could save yourself a lot of time and money.[frame] [/frame]
smile, you never know, you might be winning.[IMG]http://i67.tinypic.com/2ro3j37.jpg[/IMG]
-
davidmiles
- Minor Legend
- Posts: 2731
- Joined: Mon Mar 23, 2009 4:54 pm
- Location: Sussex
- MMOC Member: No
Re: Pickup restoration part three
the rubber seal has hardened over the years and become brittle, it had probably shrunk back from the pulley wheel spindle and wasn't making a seal. It started breaking up the moment I tried to remove it. Not sure how these come out, or fit in, advice anyone?[frame] [/frame]
smile, you never know, you might be winning.[IMG]http://i67.tinypic.com/2ro3j37.jpg[/IMG]
-
davidmiles
- Minor Legend
- Posts: 2731
- Joined: Mon Mar 23, 2009 4:54 pm
- Location: Sussex
- MMOC Member: No
Re: Pickup restoration part three
the oil thrower is located further down the spindle shaft, I'll check thats on right before I re-fit the cover tomorrow[frame] [/frame]
smile, you never know, you might be winning.[IMG]http://i67.tinypic.com/2ro3j37.jpg[/IMG]
-
davidmiles
- Minor Legend
- Posts: 2731
- Joined: Mon Mar 23, 2009 4:54 pm
- Location: Sussex
- MMOC Member: No
Re: Pickup restoration part three
the oil seal taps out from outside to inside, after a coat of protective BMC engine green, it's hanging up to dry[frame] [/frame]
smile, you never know, you might be winning.[IMG]http://i67.tinypic.com/2ro3j37.jpg[/IMG]
-
ian.mcdougall
- Minor Legend
- Posts: 3287
- Joined: Tue May 20, 2008 9:24 pm
- Location: Co.Mayo Ireland
- MMOC Member: Yes
Re: Pickup restoration part three
I notice you have blocks of wood to protect the chassis legs .Take them out!!! as the car could slide sideways off the stands use the channel in the stand to locate the leg and it should not slide sideways. I think they are correct on the rear springs although I would have used them on the rear axle
-
davidmiles
- Minor Legend
- Posts: 2731
- Joined: Mon Mar 23, 2009 4:54 pm
- Location: Sussex
- MMOC Member: No
Re: Pickup restoration part three
I have done a safety check, each leg sounds off as fully loaded, the metal tops to the axle stands are not wide enough to take the width of the chassis legs, so there is more area of contact between the two like this with wood slips in there, there is no movement at all. But I take your point Ian, I'll take another look at it.
smile, you never know, you might be winning.[IMG]http://i67.tinypic.com/2ro3j37.jpg[/IMG]
-
chrisryder
- Minor Legend
- Posts: 2217
- Joined: Mon Nov 15, 2010 11:44 pm
- Location: West Midlands UK
- MMOC Member: No
Re: Pickup restoration part three
we use wooden blocks on our chassis legs, but ours have a little 'runner' on both sides screwed on to stop the car sliding off.
i'd never dream of putting the chassis legs directly on the axle stands. there's nothing to spread the load.
there's nothing on the underside of our blocks to locate them on the stands, but the weight of the car soon makes the stands dig into the blocks.
i'd never dream of putting the chassis legs directly on the axle stands. there's nothing to spread the load.
there's nothing on the underside of our blocks to locate them on the stands, but the weight of the car soon makes the stands dig into the blocks.
-
davidmiles
- Minor Legend
- Posts: 2731
- Joined: Mon Mar 23, 2009 4:54 pm
- Location: Sussex
- MMOC Member: No
Re: Pickup restoration part three
Ive done another check and the pickup is steady as a rock, the rear axle stands fit the width of the rear leaf springs perfectly, but the front ones need a slip of soft wood to help make better contact. The timber deforms to the shape of the stand and the chassis leg. I even tried to rock the whole assembly and it was as steady as the Rock of Gibralter.[frame] [/frame]
smile, you never know, you might be winning.[IMG]http://i67.tinypic.com/2ro3j37.jpg[/IMG]
-
davidmiles
- Minor Legend
- Posts: 2731
- Joined: Mon Mar 23, 2009 4:54 pm
- Location: Sussex
- MMOC Member: No
Re: Pickup restoration part three
the only time I was worried was when I positioned the axle stands, it was only the jack holding the weight up above my head, once the stands were in it was secure and I felt safe. There is a real danger when you are jacking something this heavy up, I try and keep every part of my body clear until it's time for the axle stands to go under.[frame] [/frame]
smile, you never know, you might be winning.[IMG]http://i67.tinypic.com/2ro3j37.jpg[/IMG]
Re: Pickup restoration part three
You may already know this,----- when you refit the front cover, slide the front pulley in first before tightening the cover screws, that way the new oil seal can centralize. Tighten screws opposite one another, for even seating.
-
drivewasher
- Minor Addict
- Posts: 519
- Joined: Fri May 07, 2010 10:47 pm
- Location: Golborne Nr Wigan
- MMOC Member: No
Re: Pickup restoration part three
You asked how it went in. The spring "garter" inside the oil seal goes inside the engine towards the oil.
-
davidmiles
- Minor Legend
- Posts: 2731
- Joined: Mon Mar 23, 2009 4:54 pm
- Location: Sussex
- MMOC Member: No
Re: Pickup restoration part three
Thanks for that, Ive been waiting for these parts to arrive and they got here at Two this afternoon.[frame] [/frame]
smile, you never know, you might be winning.[IMG]http://i67.tinypic.com/2ro3j37.jpg[/IMG]
-
davidmiles
- Minor Legend
- Posts: 2731
- Joined: Mon Mar 23, 2009 4:54 pm
- Location: Sussex
- MMOC Member: No
Re: Pickup restoration part three
while I was waiting this morning I tightened up the nut on the clutch bar to provide some tension on the foot pedal.
I did question at one point if I had the right spring in place, as the nut went on the bar further and further with no effect.
[frame] [/frame]
I did question at one point if I had the right spring in place, as the nut went on the bar further and further with no effect.
[frame]
smile, you never know, you might be winning.[IMG]http://i67.tinypic.com/2ro3j37.jpg[/IMG]
-
davidmiles
- Minor Legend
- Posts: 2731
- Joined: Mon Mar 23, 2009 4:54 pm
- Location: Sussex
- MMOC Member: No
Re: Pickup restoration part three
then all of a sudden the foot pedal started to get some pressure and after a couple more turns it has the right feel with about 1and 3/4 inches of play. After that I tidied up the footwell and fitted the cover plate over the accelerator pedal, that took some fiddling to get it to sit right and not interfere with the smooth operation of the pedal bar.[frame] [/frame]
Last edited by davidmiles on Wed Nov 02, 2011 7:03 pm, edited 1 time in total.
smile, you never know, you might be winning.[IMG]http://i67.tinypic.com/2ro3j37.jpg[/IMG]
-
davidmiles
- Minor Legend
- Posts: 2731
- Joined: Mon Mar 23, 2009 4:54 pm
- Location: Sussex
- MMOC Member: No
Re: Pickup restoration part three
the brake cable needs to be re positioned to avoid it chafing against the engine, soft copper pipe won't take long to rub through and leak. So thats going to be re sited.[frame] [/frame]
smile, you never know, you might be winning.[IMG]http://i67.tinypic.com/2ro3j37.jpg[/IMG]
- ptitterington
- Minor Fan
- Posts: 391
- Joined: Thu May 12, 2005 9:59 pm
- Location: Jersey Channel Islands
- MMOC Member: No
Re: Pickup restoration part three
David,
On the clutch, the return spring usually goes in the other hole so it is in line, it also looks like the lock nut is at the end of the threaded rod instead of tight on the other once adjustment is sorted.
Dont forget ear defenders when you take your first drive, I was quite suprised how noisy the pickup was compared to the traveller. Still trying to find someone who will send the thick rubber self adhesive sound deadening pads to jersey!
Traveller rebuilt in 2007 by Charles Ware's Morris Minor Centre
Pickup Fully restored 2011 by Rich Legg


http://WWW.minor1000.com
http://www.morrisowners.co.uk/

Pickup Fully restored 2011 by Rich Legg


http://WWW.minor1000.com
http://www.morrisowners.co.uk/

-
davidmiles
- Minor Legend
- Posts: 2731
- Joined: Mon Mar 23, 2009 4:54 pm
- Location: Sussex
- MMOC Member: No
Re: Pickup restoration part three
I'll check that out Tommorow Pete, thanks. The new pulley wheel painted ready to go in[frame] [/frame]
smile, you never know, you might be winning.[IMG]http://i67.tinypic.com/2ro3j37.jpg[/IMG]
-
davidmiles
- Minor Legend
- Posts: 2731
- Joined: Mon Mar 23, 2009 4:54 pm
- Location: Sussex
- MMOC Member: No
Re: Pickup restoration part three
oil seal seated in position[frame] [/frame]
smile, you never know, you might be winning.[IMG]http://i67.tinypic.com/2ro3j37.jpg[/IMG]
-
davidmiles
- Minor Legend
- Posts: 2731
- Joined: Mon Mar 23, 2009 4:54 pm
- Location: Sussex
- MMOC Member: No
Re: Pickup restoration part three
as per advice, the cover plate in position only hand tight so I can use the pulley wheel to centralise the oil seal before I tighten the bolts to 6ft lbs and the smaller bolts to 14ftl bs[frame] [/frame]
smile, you never know, you might be winning.[IMG]http://i67.tinypic.com/2ro3j37.jpg[/IMG]
