2 Door Split screen restoration 621 XUT

Let us all know what you are up to with your current restoration project. Get that Minor on the road!
Forum rules
By using this site, you agree to our rules. Please see: Terms of Use
robby
Minor Friendly
Posts: 52
Joined: Sun Jan 27, 2013 1:38 pm
Location: Ripley, Derbyshire
MMOC Member: No

2 Door Split screen restoration 621 XUT

Post by robby »

This is a customers vehicle, in for a pretty full restoration. Looking to share the project and turn to you guys for any stumbling blocks we come across, especially in the harder to get parts department :)

Image


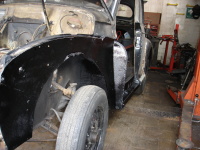
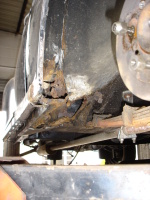
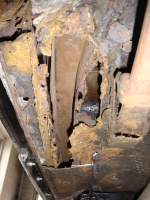
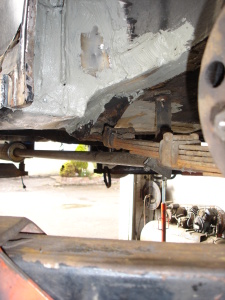
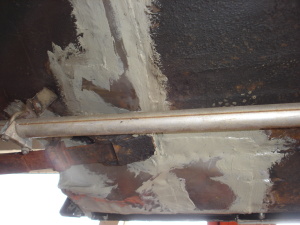
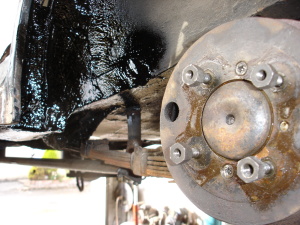
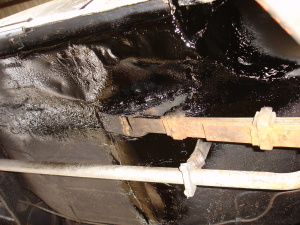
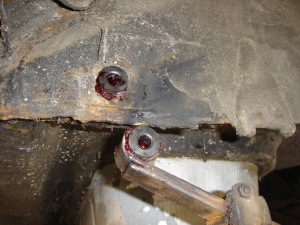
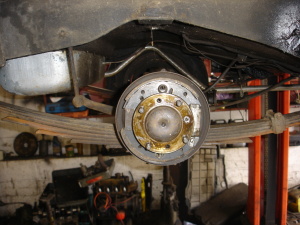
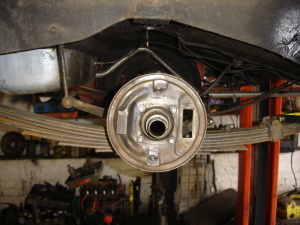
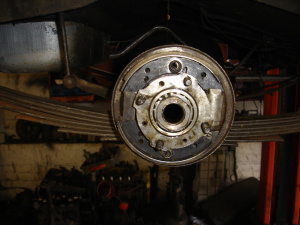
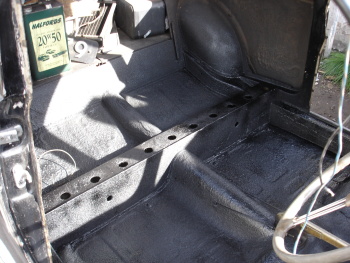
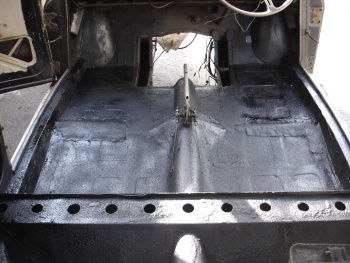
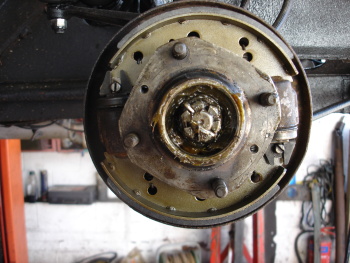
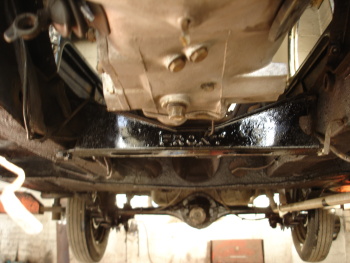
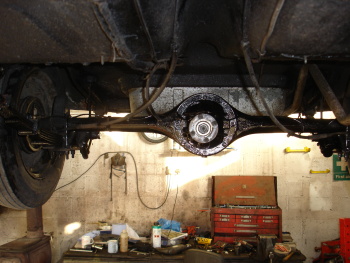
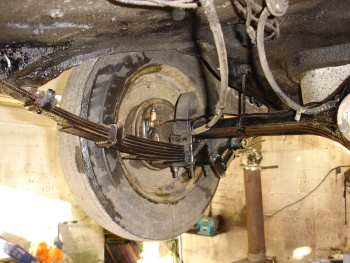
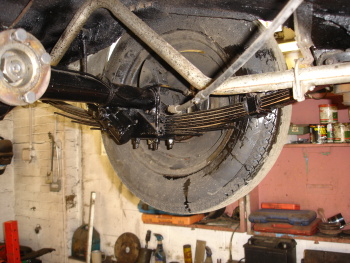
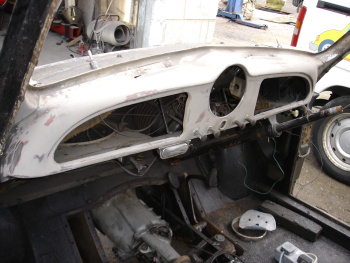
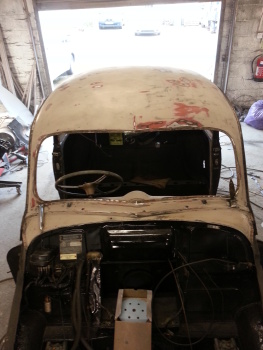
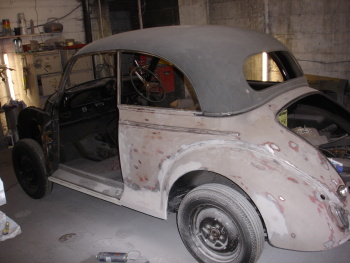
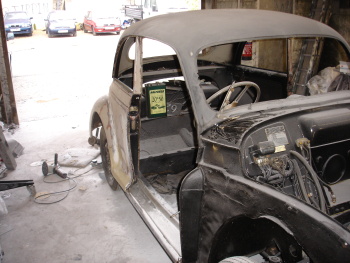
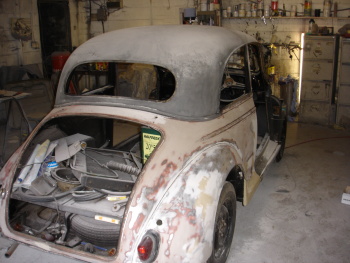
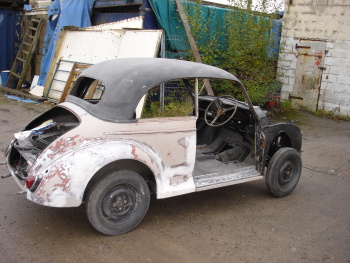
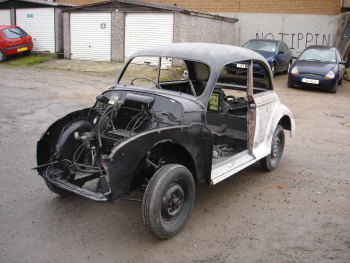
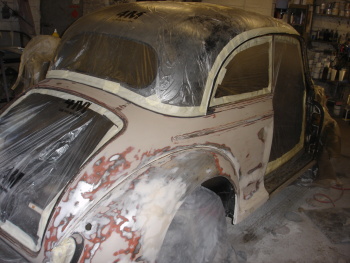
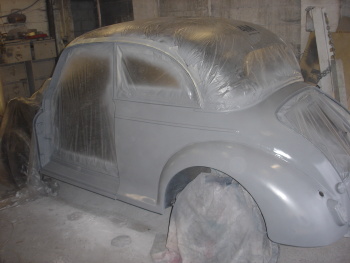
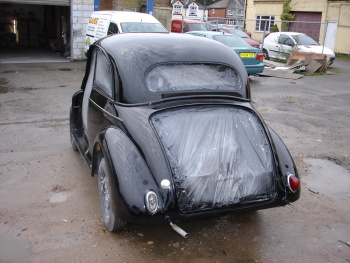
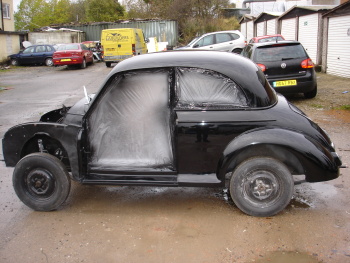
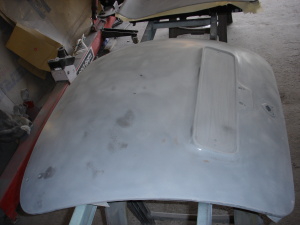
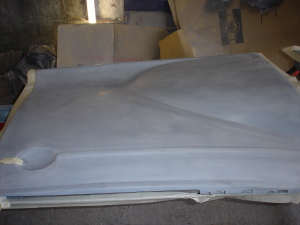
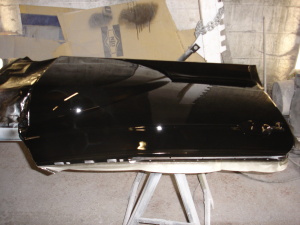
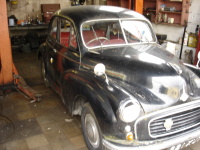
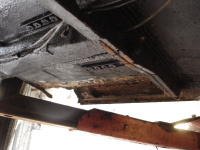
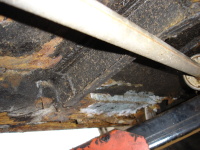
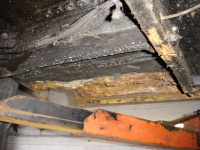
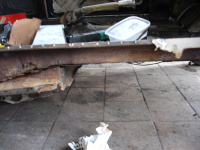
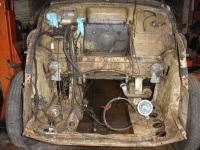
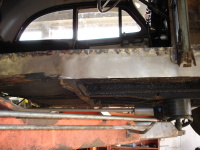
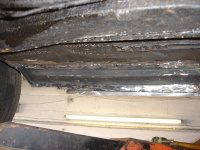
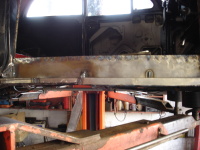
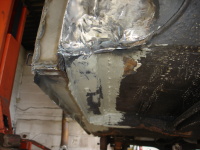
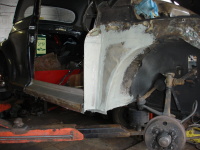
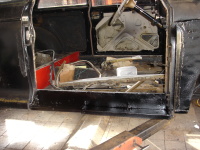
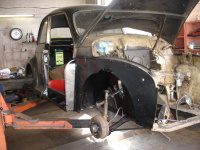
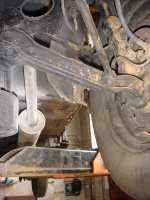
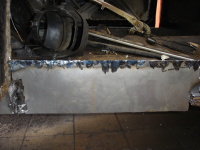
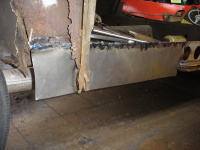
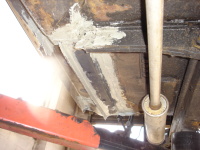
Will put more pictures up and some more info in the morning, just testing out posting at the moment
horologiumwatches
Minor Fan
Posts: 133
Joined: Sun Feb 08, 2009 11:10 pm
MMOC Member: Yes

Re: 2 Door Split screen restoration 621 XUT

Post by horologiumwatches »

Looking forward to seeing it.
Tommy
1951 Series MM Lowlight
1954 Series II Four Door De Lux 'The Bomb'
irmscher
Minor Legend
Posts: 3773
Joined: Wed Jul 14, 2010 10:53 am
Location: South Manchester
MMOC Member: Yes

Re: 2 Door Split screen restoration 621 XUT

Post by irmscher »

I think xut was on ebay not long ago
robby
Minor Friendly
Posts: 52
Joined: Sun Jan 27, 2013 1:38 pm
Location: Ripley, Derbyshire
MMOC Member: No

Re: 2 Door Split screen restoration 621 XUT

Post by robby »

Ok, Can`t tell you much about the history of the car, (apart from the fact it`s called Monty) but we were contacted by the customer to see if we`d be interested in bringing him back to life. After agreeing, we recovered him back to the workshop. This was the general state of him when we got him back

Image Image Image Image Image Image Image Image


So, the first thing was to see if he was a runner. I put a good battery on, removed a plug lead and put a new plug in to see if there was a spark. The engine turned twice and burst into life. Didn`t half give me a shock. Stuck the plug lead back on and away he went again, and after a couple of minues of rough running it sounded sweet as a nut. The clutch worked and it went into gear and drove no problem. The engine isn`t original, it`s a gold seal and up to now, I don`t know the size. The Gold Seal numbers mean nohing and there is no size embossed onto the engine block. In some ways it looks like an 803cc, but in others it looks like a 948cc, but will measure it up to find out when I take the head off.
robby
Minor Friendly
Posts: 52
Joined: Sun Jan 27, 2013 1:38 pm
Location: Ripley, Derbyshire
MMOC Member: No

Re: 2 Door Split screen restoration 621 XUT

Post by robby »

The big strip down was started. The interior removed, then the front panel, engine and gearbox so it was basically a rolling chassis. It started to become obvious as to why the wings didn`t fit correctly by the door pillars. They were full of filler and all along the inner wheel arches were just the same, or so we thought. As we hacked away at the filer/fibreglass we uncovered cut up Tennants Extra cans and the undersill panel had been replaced with bits of a Zanussi washing machine, not even welded, simply pop riveted and covered with sealant an filler. Oh dear. We decided to carry on and just rip it apart until we could get an idea on how far this was gone. As you can see, it`s not a pretty sight at all

Image Image Image Image Image Image Image Image Image Image Image Image Image

All this and the fact we needed 2 wings as well pretty much threw the budget we were given out of the window, so we contacted the customer to show them amd see what they wanted to do, or what they wanted to sacrifice to stay in budget, as in leave the interior and engine (as it was a good runner) and concentrate on the bodywork and rot. As it happens, they upped the budget. It still made it tight, but we could make it work
robby
Minor Friendly
Posts: 52
Joined: Sun Jan 27, 2013 1:38 pm
Location: Ripley, Derbyshire
MMOC Member: No

Re: 2 Door Split screen restoration 621 XUT

Post by robby »

As the budget was still tight, we decided to make as many hidden panels as we could, just buying the 2 undersill sections to get the right lines. So that was it, rebuild began. As it happened i had a couple of jobs cancel and on top of being a little quiet due to the holiday period, it meant I could get stuck into the cleaning and welding. My mate is a panel beater/painter, so he cut and shaped the panels, they were offered up, tweaked into position and the welder was fired into action. These pictures pretty much show where the car is as of now


Image Image Image Image Image Image Image Image


We`ve got hold of a pair of NOS wings, a really good front panel and the doors are now completely stripped ready for refurb as and when we get the parts.

Thankyou for looking in and look forward to any feedback and help in any areas as the project progresses. More pictures and commentary to come as and when

Rob
robby
Minor Friendly
Posts: 52
Joined: Sun Jan 27, 2013 1:38 pm
Location: Ripley, Derbyshire
MMOC Member: No

Re: 2 Door Split screen restoration 621 XUT

Post by robby »

irmscher wrote:I think xut was on ebay not long ago
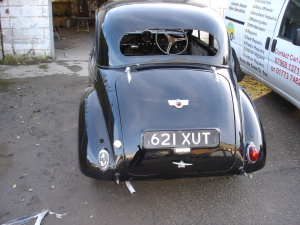
Very possibly, our customer had just bought it before they contacted us about the refurb, but that`s all we know about it`s history for now
irmscher
Minor Legend
Posts: 3773
Joined: Wed Jul 14, 2010 10:53 am
Location: South Manchester
MMOC Member: Yes

Re: 2 Door Split screen restoration 621 XUT

Post by irmscher »

There is an xut registered traveller on ebay now
robby
Minor Friendly
Posts: 52
Joined: Sun Jan 27, 2013 1:38 pm
Location: Ripley, Derbyshire
MMOC Member: No

Re: 2 Door Split screen restoration 621 XUT

Post by robby »

After a couple of decent coats of shultz, the nearside was chopped away and some new metal welded in and given a good dose of seam sealer, schultz will be applied tommorrow. Just a couple of areas of the floor to cut out ansd replace and the welding should be complete. This is where we're at as of today

Image Image Image Image Image Image Image Image Image

More to come.

Rob
George Smathers
Minor Fan
Posts: 126
Joined: Wed Jun 20, 2012 5:18 am
Location: Spokane, WA USA
MMOC Member: No

Re: 2 Door Split screen restoration 621 XUT

Post by George Smathers »

Wow, you move quickly!

George
JOWETTJAVELIN
Minor Legend
Posts: 2775
Joined: Mon Dec 12, 2011 7:20 pm
Location: LANCASHIRE (paradise)
MMOC Member: Yes

Re: 2 Door Split screen restoration 621 XUT

Post by JOWETTJAVELIN »

If it is an 803 then an oil pressure restrictor is essential if the engine is to last for any length of time. I was strongly advised to fit one by a member and am glad I did.
robby
Minor Friendly
Posts: 52
Joined: Sun Jan 27, 2013 1:38 pm
Location: Ripley, Derbyshire
MMOC Member: No

Re: 2 Door Split screen restoration 621 XUT

Post by robby »

George Smathers wrote:Wow, you move quickly!

George
We do try :)

Actually, the truth is, I`ve had a few jobs cancel/put back due to holidays etc, so it`s freed up the last couple of weeks quite a bit. Quite surprising what you can get done in a few 8 hour days. Most of the jobs are coming back in over the next couple of weeks, so will probably not get that much done to it for a while. Keeping it to "spare time" work has helped keep the budget lower

JOWETTJAVELIN wrote:If it is an 803 then an oil pressure restrictor is essential if the engine is to last for any length of time. I was strongly advised to fit one by a member and am glad I did.
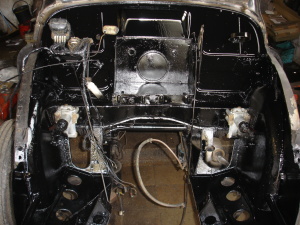
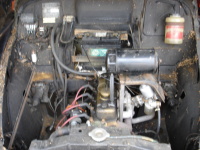
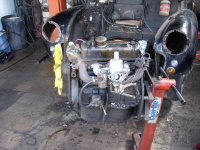
Thanks, that`s something worthwhile knowing and will look into that more when I`ve found out which engine it is.
Mind you, the rebuild costs of an 803 are probably a bit too high for the budget we have so I`m hoping it turns out to be a 948. If it isn`t, I do have a spare 948 that I can recondition for them and they`re quite happy to go down that route, with it not having the original engine fitted.

Rob
robby
Minor Friendly
Posts: 52
Joined: Sun Jan 27, 2013 1:38 pm
Location: Ripley, Derbyshire
MMOC Member: No

Re: 2 Door Split screen restoration 621 XUT

Post by robby »

Not had much chance to do a deal to the moggy lately, people keep bringing those pesky modern things in for repair ;)
After cutting out a couple of sections of the front floor and welding in some new plates, I thought we`d broke the back of the welding. After giving the front end another good coating of shultz, I thought I`d have a look at the back end, especially the rather large plate that had been glued (and I mean glued not welded) to the nearside rear. Oh dear, the plate was hiding a bit of a mess.
Ah well, looks like it`s out with the trusty cutting discs again this week:)

Image Image Image

Hopefully get a bit more done this week.

Rob
robby
Minor Friendly
Posts: 52
Joined: Sun Jan 27, 2013 1:38 pm
Location: Ripley, Derbyshire
MMOC Member: No

Re: 2 Door Split screen restoration 621 XUT

Post by robby »

Time for an update. Been fairly busy in the garage generally, but managed to pull the Moggy in every now and then to get a bit more done. It is finally all welded up now, so we have a solid, strong vehicle to work with at last :)

Image Image Image Image


Everything was removed from under the bonnet and a couple of coats of paint applied. Put most things back in position ready to fit correctly when the engine is put in

Image Image

Started a bit of the bodywork. the drivers door is off and stripped, so rubbed over with the DA and put a skimming of filler over a crease to the lower front of the door. Also prepped and primed the wings.

Image Image

So we`re onto the oily bits. New set of rear axle rubber and pins fitted. While I was at it, I gave the springs a good run over with the wire wheel attachment in the drill.

Image

Stripped down the rear hubs. the brakes are in excellent condition, so it was strip, clean, new seals in the wheel cylinders purely because it has been stood and not because they were worn, then rebuilt. I`ve changed the hub seals and bearings, again because the hubs haven`t turned a wheel in a long time so not taking any chances. The bearings felt a little notchy, so again, not taking any chances.

Image Image Image Image

Finally, the leaking diff pinion seal was changed and the axle given a going over with the wire wheel meaning the rear axle is all done and ready for a coat of paint

Image

More as and when :)

Rob
robby
Minor Friendly
Posts: 52
Joined: Sun Jan 27, 2013 1:38 pm
Location: Ripley, Derbyshire
MMOC Member: No

Re: 2 Door Split screen restoration 621 XUT

Post by robby »

Update time again :)

The floor has been given a good coating of schultz, including inside the chassis legs, so that`s safe for a while now.

Image Image Image

Front hubs and brakes were stripped. 3 wheel cylinders fine and dandy, so kits were fitted to those, but one cylinder was beyond repair and replaced. The front shoes wer replaced and the drums skimmed up on the lathe. New wheel bearings and seals fitted and all greased up nicely. Spot of bother bleeding the brakes though. 3 corners went no problem, but the N/S front wouldn`t go. Traced that to a collapsed brake hose. that was replaced and they all bled up great. New seals were also fitted to the otherwise fine master cylinder by the way.

Image Image Image

Gearbox member, rear axle, springs and propshaft all given a nice coat of gloss black paint and decided to put the gearbox in while I was at it.

Image Image Image Image Image Image

Finally, the remainder of the glass was removed and it`s now next door in the bodyshop, being prepped up ready for painting.

Image Image

Been on my travels today and fetched the newly unleaded cylinder head from Peter Burgess and the rebored block and ground up crank from Bates, so as soon as my engine parts arrive, building the engine will be my next update :)

Rob
stevey
Minor Legend
Posts: 1502
Joined: Fri Apr 28, 2006 10:59 am
Location: Northern Ireland
MMOC Member: Yes

Re: 2 Door Split screen restoration 621 XUT

Post by stevey »

excellent work, well done

robby
Minor Friendly
Posts: 52
Joined: Sun Jan 27, 2013 1:38 pm
Location: Ripley, Derbyshire
MMOC Member: No

Re: 2 Door Split screen restoration 621 XUT

Post by robby »

So, Bull Motif screwed my engine parts order up. They sent everything apart from the locktab kit, which is of course rather vital to the engine build, so am a bit delayed. However, there`s still plenty to do so we got cracked on with the body.
Firstly, it was all rubbed down and filler/stopper applied as and where needed to give a smooth surface.

Image Image Image Image Image Image Image Image

Then it was bagged up, wiped down with panel wipe and 2 coats of filler/primer was applied

Image Image Image Image Image Image


Finally, 3 good coats of 2 pack direct gloss was applied. When hard, this was wet flatted with 1200 DA disks and buffed up to give the shine that it has. Have to give credit where it`s due, my mate has done a pretty good job there :)

Image Image Image Image

More as soon as

Rob
Blades
Minor Fan
Posts: 106
Joined: Thu Jan 29, 2009 1:37 pm
Location: Sheffield
MMOC Member: No

Re: 2 Door Split screen restoration 621 XUT

Post by Blades »

Rob

Whilst looking at the last four photos at first I thought there was some thing wrong with the paint on the roof

When I looked again I could see it was the reflection of the clouds above

Nice work

Nick
[sig]9332[/sig]
robby
Minor Friendly
Posts: 52
Joined: Sun Jan 27, 2013 1:38 pm
Location: Ripley, Derbyshire
MMOC Member: No

Re: 2 Door Split screen restoration 621 XUT

Post by robby »

Yeah, have to say the cloud reflection wasn`t something I noticed when I took the pics, but I had exactly the same thoughts when I first looked at the pics on the computer until I too realised what I was looking at. Phew!! :)
robby
Minor Friendly
Posts: 52
Joined: Sun Jan 27, 2013 1:38 pm
Location: Ripley, Derbyshire
MMOC Member: No

Re: 2 Door Split screen restoration 621 XUT

Post by robby »

Right, apologies for not keeping this updated, but being busy is an understatement. However, the next few posts i`m making will take the project from where I last posted up to the conclusion, so here we go.

With the body of the car painted, the doors, boot, bonnet and wings were prepped, primed and given their coats of gloss. The paint used was a 2 pack direct gloss black, so no laquering required. We actually had the bonnet and boot shot blasted, as the original paint had been brushed on, both poorly and very thick. I was a bit nervous of getting the boot back as I expected the lower part of it to look like a pepper pot top, but all was good and had a good surface to key the paint to

Image Image Image Image Image

and once painted, the parts were hung on the car, loosely so we could get all the lines right when the front was fitted


Image Image Image Image
Post Reply