Pick up Restoration (Part 1)
Forum rules
By using this site, you agree to our rules. Please see: Terms of Use
By using this site, you agree to our rules. Please see: Terms of Use
-
davidmiles
- Minor Legend
- Posts: 2731
- Joined: Mon Mar 23, 2009 4:54 pm
- Location: Sussex
- MMOC Member: No
The next area for a patch is this forward area of the f/o/s inner wing, I tried to unbolt that outer wing securing bolt, but as is so often the case with this resoration project, it sheared off. so its nice and flat now ready to take the patch, once i've been over it again with the wire wheel.<br> <br>
<br>
smile, you never know, you might be winning.[IMG]http://i67.tinypic.com/2ro3j37.jpg[/IMG]
-
davidmiles
- Minor Legend
- Posts: 2731
- Joined: Mon Mar 23, 2009 4:54 pm
- Location: Sussex
- MMOC Member: No
Ive found that using a jigsaw fitted with a blade for steel is a quick accurate way of cutting out shapes from a cardboard template. this patch covers the wing bolt hole, that will have to be re-drilled through the new metal.
<br> <br>
<br>
<br>
smile, you never know, you might be winning.[IMG]http://i67.tinypic.com/2ro3j37.jpg[/IMG]
-
davidmiles
- Minor Legend
- Posts: 2731
- Joined: Mon Mar 23, 2009 4:54 pm
- Location: Sussex
- MMOC Member: No
-
davidmiles
- Minor Legend
- Posts: 2731
- Joined: Mon Mar 23, 2009 4:54 pm
- Location: Sussex
- MMOC Member: No
Great progress on the welding!!davidmiles wrote:here's a couple of shots of the wing welding results, the top picture is the seam welded inner wing, while the lower picture is of the plug welded outer, as Dean suggested.
I'd suggest cutting the rust out completely before welding a patch on. The rust needs to be cut out or neutralised, otherwise it will grow back. I'd also say seem weld the other side of the patch as well, or use seam-sealer on it, otherwise moisture will get in the gaps & rot it again, and before the patch goes on paint the panel with weld through zink primer.
You don't want to be having to do this all again in a few years time!
Why not try butt-welding, or using a joggler, rather than patching it? It might be a little harder to get the hang of, but the results will be much more pleasing to the eye.
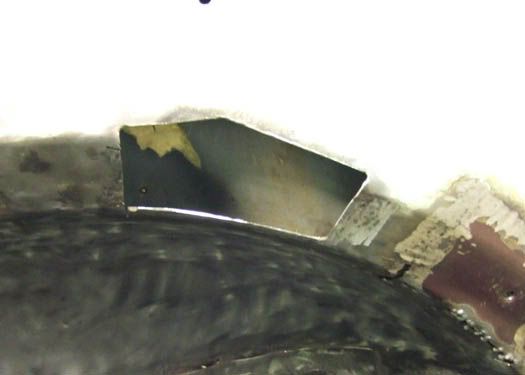
Here is an example for you...
This was a new dash butt-welded in.

And repairs to wing fixings, which aren't that great.
-
davidmiles
- Minor Legend
- Posts: 2731
- Joined: Mon Mar 23, 2009 4:54 pm
- Location: Sussex
- MMOC Member: No
-
davidmiles
- Minor Legend
- Posts: 2731
- Joined: Mon Mar 23, 2009 4:54 pm
- Location: Sussex
- MMOC Member: No
-
davidmiles
- Minor Legend
- Posts: 2731
- Joined: Mon Mar 23, 2009 4:54 pm
- Location: Sussex
- MMOC Member: No
I take the point about pleasing to the eye,the other two previous patches are hidden under the flange, but this area is apparent the moment you lift the bonnet to show off your immaculately restored engine (yeah, dream on Dave) so butt welding is the next step.<br> <br>
<br>
smile, you never know, you might be winning.[IMG]http://i67.tinypic.com/2ro3j37.jpg[/IMG]
-
alex_holden
- Minor Legend
- Posts: 3798
- Joined: Tue Jul 25, 2006 9:46 am
- Location: Burnley
- MMOC Member: No
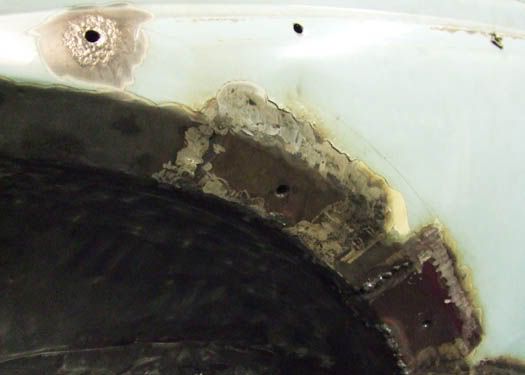
I don't want to put you off, but that is possibly the most difficult area I've had to repair on my cars. It's a complex compound curved shape where three panels meet, it needs to be the right profile for the bump stop to sit in the right place and at the right angle, and it needs to be structurally strong because the bump stop can get bashed pretty hard. If I were you I'd be tempted to practise on some of the easier bits first.davidmiles wrote:It's the f/o/s inner wing top curve under the re-inforcing plate, that plate makes this the most complex area Ive dealt with up to now, I'll try out your suggestions on this one.<br><br>


Alex Holden - http://www.alexholden.net/
If it doesn't work, you're not hitting it with a big enough hammer.
-
davidmiles
- Minor Legend
- Posts: 2731
- Joined: Mon Mar 23, 2009 4:54 pm
- Location: Sussex
- MMOC Member: No
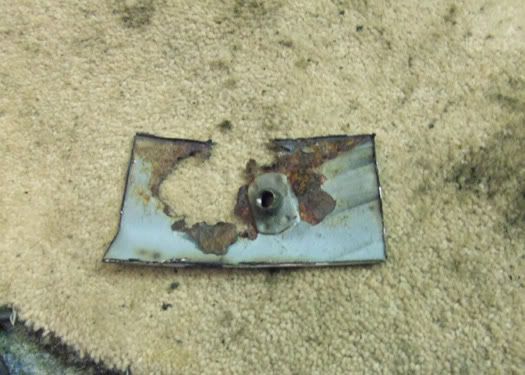
So how do I start with this one? that reinforcing plate with the hole stamped in it will have to come away first, it needs a bottom repair patch itself. There are rusted bolts in there that attach the front rubber bump stop. they'll have to come off first I guess.
<br> <br>
<br>
<br>
smile, you never know, you might be winning.[IMG]http://i67.tinypic.com/2ro3j37.jpg[/IMG]
-
davidmiles
- Minor Legend
- Posts: 2731
- Joined: Mon Mar 23, 2009 4:54 pm
- Location: Sussex
- MMOC Member: No
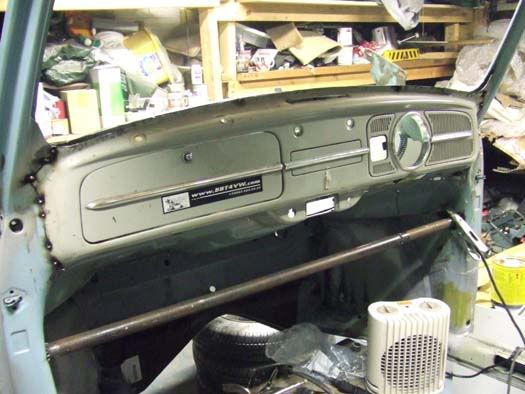
Yes Alex you're quite right this does look difficult, compound curve an all, wouldn't it be ironic if that pickup pfqiz found on his latest thread was going for free and its got a better cab than this. It's not far from me and I'm going to check it out soon, I'll post some pics here maybe, see what you all think.
smile, you never know, you might be winning.[IMG]http://i67.tinypic.com/2ro3j37.jpg[/IMG]
-
davidmiles
- Minor Legend
- Posts: 2731
- Joined: Mon Mar 23, 2009 4:54 pm
- Location: Sussex
- MMOC Member: No
just before I start my late shift this afternoon, Ive got to show you all... best weld so far, ok its only 3/4 inch long, but as Dridon said in Lawence of Arabia, "big things have small beginings", ok he was talking about the Arab revolt, but it works with welding too.<br> <br>
<br>
smile, you never know, you might be winning.[IMG]http://i67.tinypic.com/2ro3j37.jpg[/IMG]
-
rayofleamington
- Moderator

- Posts: 7679
- Joined: Fri Nov 01, 2002 2:55 pm
- Location: LEAMINGTON SPA
- MMOC Member: No
I tried and failed to make a good repair piece for that area on my pickup last year. The other side was a mess so I replaced the complete section - which took less time and effort!It's the f/o/s inner wing top curve under the re-inforcing plate, that plate makes this the most complex area Ive dealt with up to now, I'll try out your suggestions on this one.
Lesson learned the hard way again...
For those with panel beating expertise, a 3D curve is probably OK. For those like me who don't and think that cutting a few darts in sheet steel and using a big hammer with a round end will help make a 3D complex curve - It usually doesn't.
Ray. MMOC#47368. Forum moderator.
Jan 06: The Minor SII Africa adventure: http://www.minor-detour.com
Oct 06: back from Dresden with my Trabant 601 Kombi
Jan 07: back from a month thru North Africa (via Timbuktu) in a S3 Landy
June 07 - back from Zwickau Trabi Treffen
Aug 07 & Aug 08 - back from the Lands End to Orkney in 71 pickup
Sept 2010 - finally gave up breaking down in a SII Landy...
where to break down next?
2013... managed to seize my 1275 just by driving it round the block
