Have just begun the traveller body restoration and have started by fitting a donor kidney (panel).
Ive found other peoples posts so helpfull that I felt dutybound to share some details of my restoration as it proceeds.
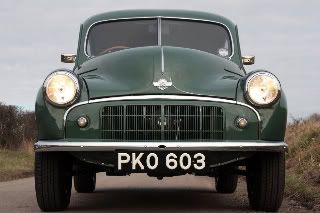
Its a '63 delux traveller in Rose Taupe.
The car was a fleabay cheapie (under £100 including delivery) but after fitting a battery and cleaning the points it runs sweetly and drives! (off Road)
What attracted me was that it is good and unmolested/unbashed and mechanically quite sound - but it is also very rusty.
I figured that any cheap traveller would need new floors, chassis rail & sill repairs and new timber. So I might as well get a real cheapie and get stuck in.
The only real problem with the car alignment wise was that the passenger door had seized hinges and the door pillar had seperated from the fitch/kidney panel. So thats where I have started.
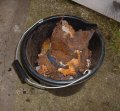
The kidney panel was complete lace on this side but fine and solid on the other side so I decided to fit a donor kidney panel from a scrap car (with an amazingly good kidney panel) hoping to help getting the alignment right. I have now repaired the hinge pillar with a new bottom section and have trial fitted a replacement fitch panel. - it all lines up!
The donor kidney fitted prefectly after a bit of jiggling around and trial fitting and included part of the inner wheel arch again helping with alignment. I had to jack up the sill rail to meet as it had dropped about 1/2" but the door opening now matches the other side.
Ive trial fitted the hinge pillar, fitch and door and the next job is to line it all up before welding in place. Im going to repair the inner wheel arch flange and weld to the fitch afterwards as I figured that I would otherwise never get the door fit/alignment right.
Will post more pics as repairs proceed.
- Image053.jpg (674.38 KiB) Viewed 4161 times
- Image065.jpg (584.72 KiB) Viewed 4161 times
- Image064.jpg (594.17 KiB) Viewed 4161 times
- Image066.jpg (466.73 KiB) Viewed 4161 times