Project "Madelaine" 1970 4-door saloon!

Let us all know what you are up to with your current restoration project. Get that Minor on the road!
Forum rules
By using this site, you agree to our rules. Please see: Terms of Use
chickenjohn
Minor Legend
Posts: 4064
Joined: Tue Dec 07, 2004 8:50 am
Location: Margate, East Kent
MMOC Member: No

Project "Madelaine" 1970 4-door saloon!

Post by chickenjohn »

I've been working on the panels first at college.

If a rear wing had rust all along the the bottom rear of it and it was rusty and perforated all along the mounting flange, you'd quite rightly throw it away and buy a new one wouldn't you?? Unless you were completely mad, or looking for a challenge to stretch your skills on the Advanced Year of the Vehicle restoration course at Mid Kent college, maidstone.

Image

Wing is showing repairs to the inner wing mounting flange here and the rear base. All sections were made up by folding a flange on the folding machine and then using the shrinker stretcher and a bit of hammer and stake/ dolly work to shape them, then carefully butt-gas welded in with minimal filler rod.

<a href="http://www.flickr.com/photos/58217441@N03/5349249532/" title="Untitled by johnnyguitarman1965, on Flickr"><img src="http://farm6.static.flickr.com/5003/534 ... c3f230.jpg" width="500" height="375" alt="" /></a>
Cheers John - all comments IMHO
- Come to this years Kent branches Hop rally! http://www.kenthop.co.uk
(check out the East Kent branch website http://www.ekmm.co.uk )
ImageImage
chickenjohn
Minor Legend
Posts: 4064
Joined: Tue Dec 07, 2004 8:50 am
Location: Margate, East Kent
MMOC Member: No

Re: Project "Madelaine" 1970 4-door saloon!

Post by chickenjohn »

here you can see a close up of the gas welded join. This was first tacked in place (with the help of Brian!), requires a bit of fiddling to get the new neatly mated to the old.


Image

Here you can see that after hammer and dollying the join, the new section preserves the shape of the original wing. It took a lot of shaping on the shrinker/stretcher and hammering over stakes and dollies to get the right shape before welding in the new section.

Image

This picture shows a close up of the rear section of the wing that was previously repaired. This section was again formed from flat sheet steel (~1mm) folded and then shaped on the shrinker stretcher to get the correct curve. Finally the rusty section was cut off the wing (tin snips) and the new section again gas butt welded in.

Image

Views of the inside of the welded repairs to the rear wing.

Image

Close up view of rusty and holed front section of the wing. I told you it would be more sensible to thow it away!!!

Image


I made this piece from flat sheet steel at college :-

Image Was quite tricky to make as it curves both ways and is quite small as well.

It will be welded in like this;

Image

Last piece of the rear wing. These pictures shows the rear wing stiffener piece and how it fits to the wing. It will be spot welded and seam sealed in place (with zinc weld thru spray between the piece and wing ), once it has been cut to length and the rear wing has the curved section formed as well. (next week).

Image

and this gives you the idea where it goes.
Image
chickenjohn
Minor Legend
Posts: 4064
Joined: Tue Dec 07, 2004 8:50 am
Location: Margate, East Kent
MMOC Member: No

Re: Project "Madelaine" 1970 4-door saloon!

Post by chickenjohn »

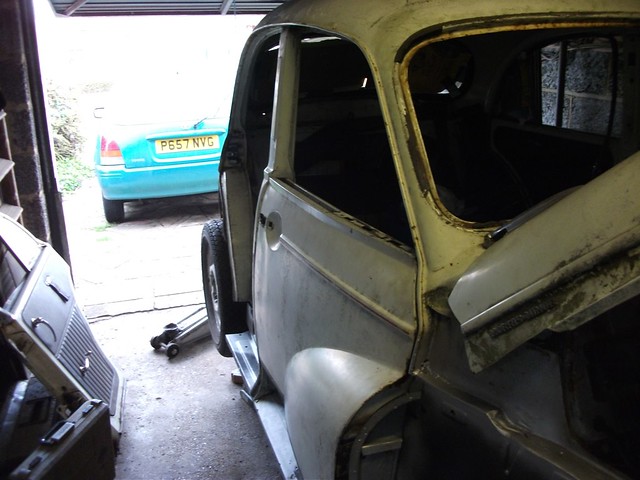
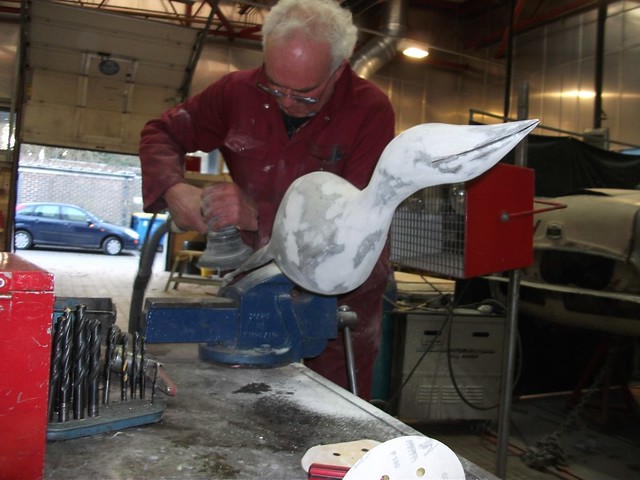
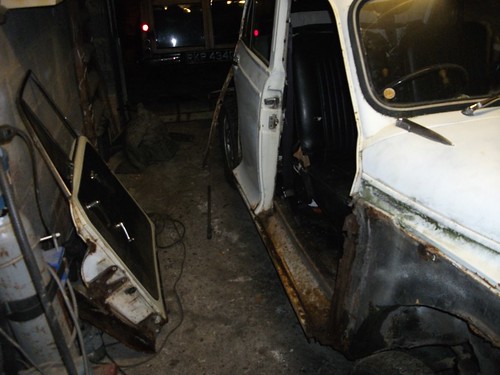
With the help of my neighbour and his son (and a tow using the traveller) I've managed to get the main bodyshell of Madelaine inside the garage for the restoration work to begin.

And not a moment too soon. When trying to move the car myself (she currently has no fuel pump, a dodgy fuel pipe that needs replacing and no starter solenoid) the A pillar and drivers door fell off!  :shock:  :shock:  :shock:

Image[/quote]

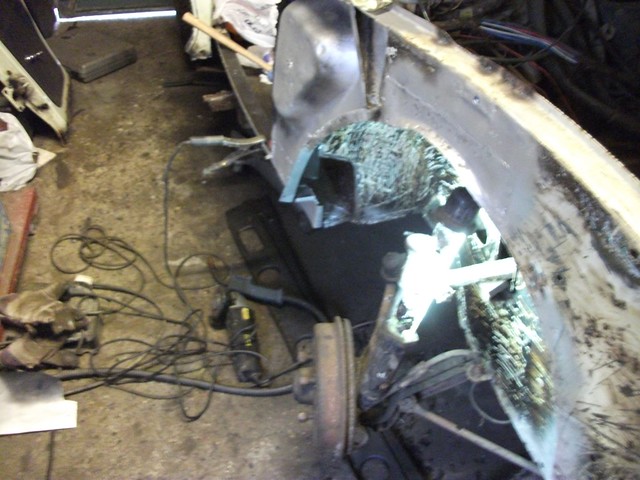
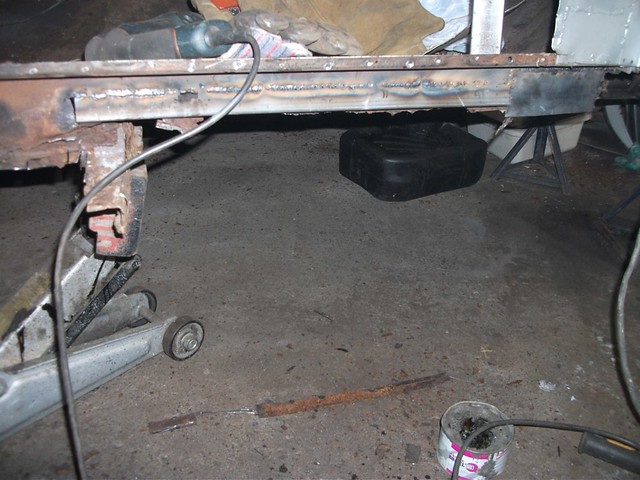
Car is now in the garage

Image

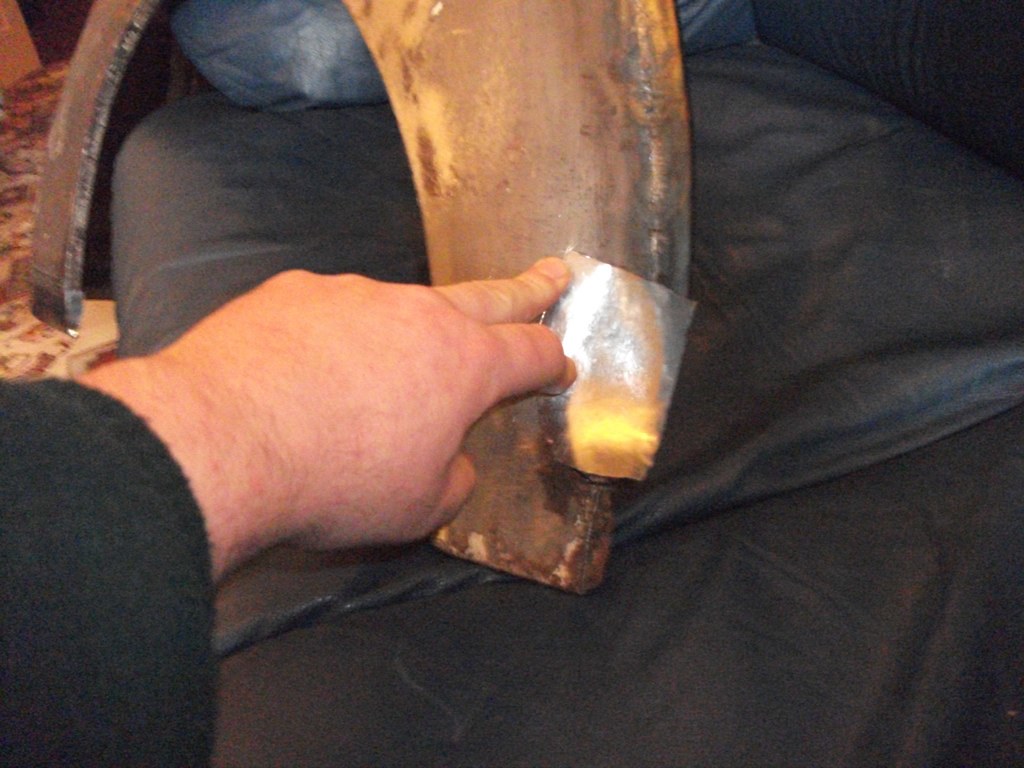
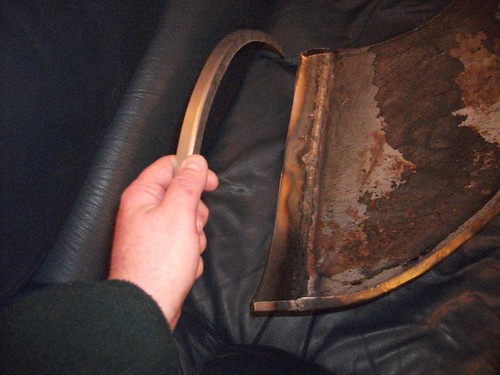
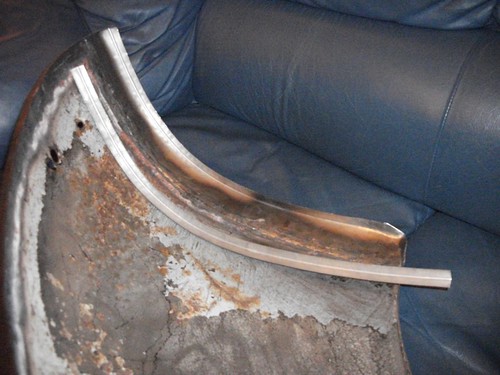
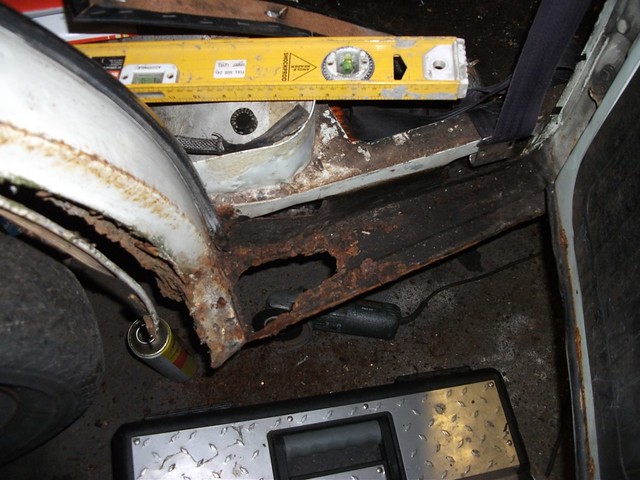
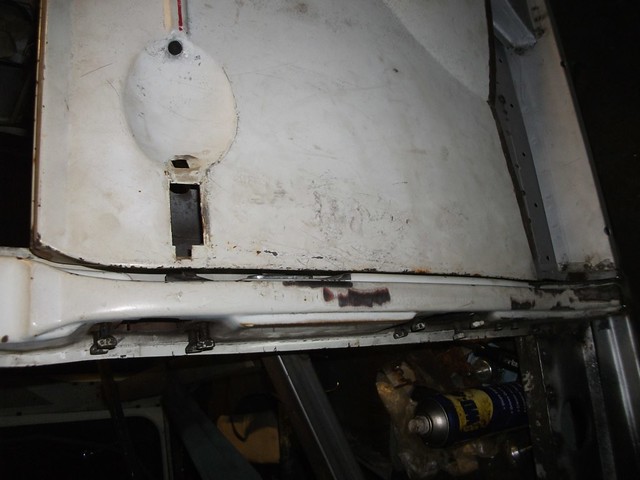
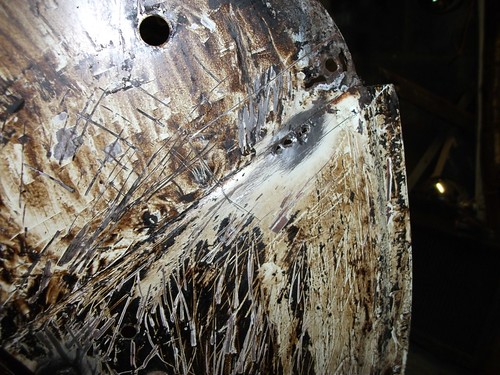
Most challenging bit of rust to repair is the swage below the rear window. I'll have to make that at college as i believe you cannot buy that piece.

Image

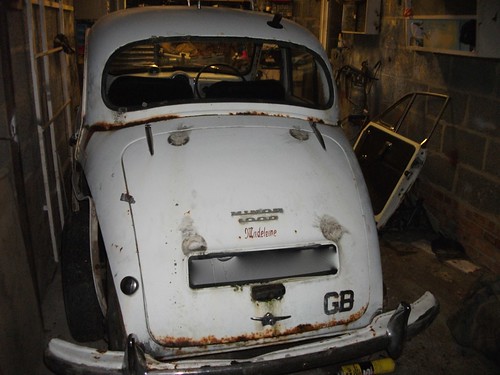
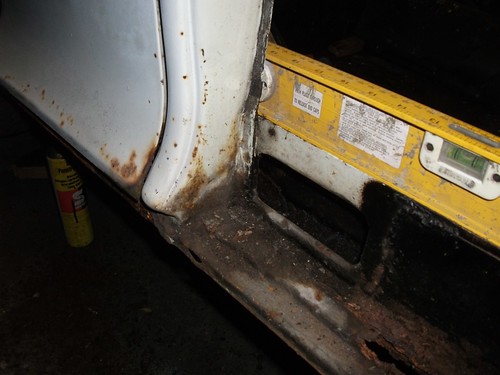
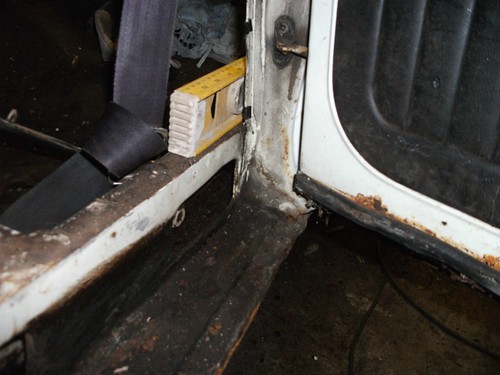
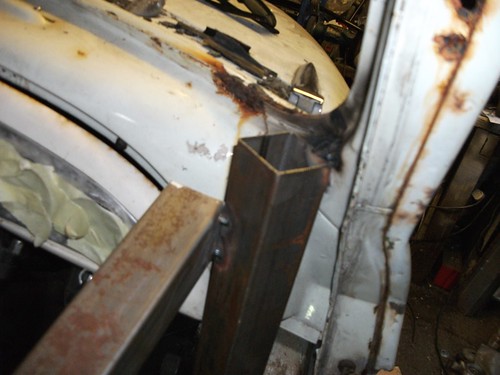
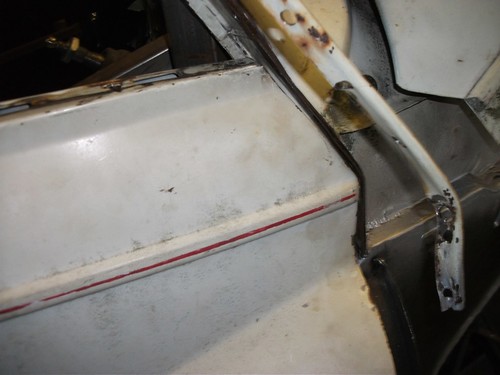
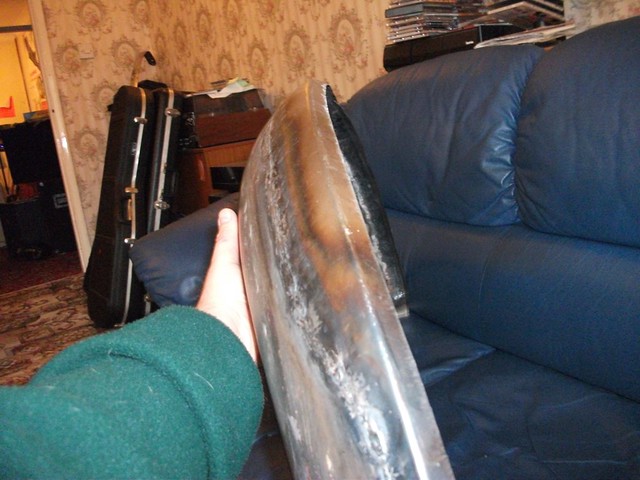
As you can see, I did not need to use either spanner socket or grinder to remove the drivers side door.

OOPS! The door fell off (complete with A pillar)

Image

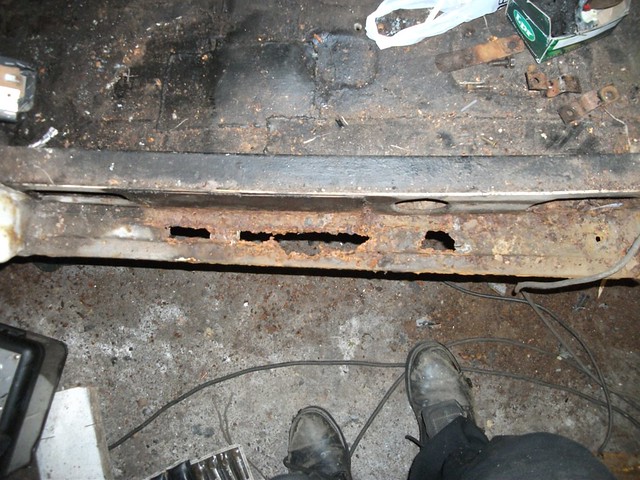
To be honest, most people would scrap this car.

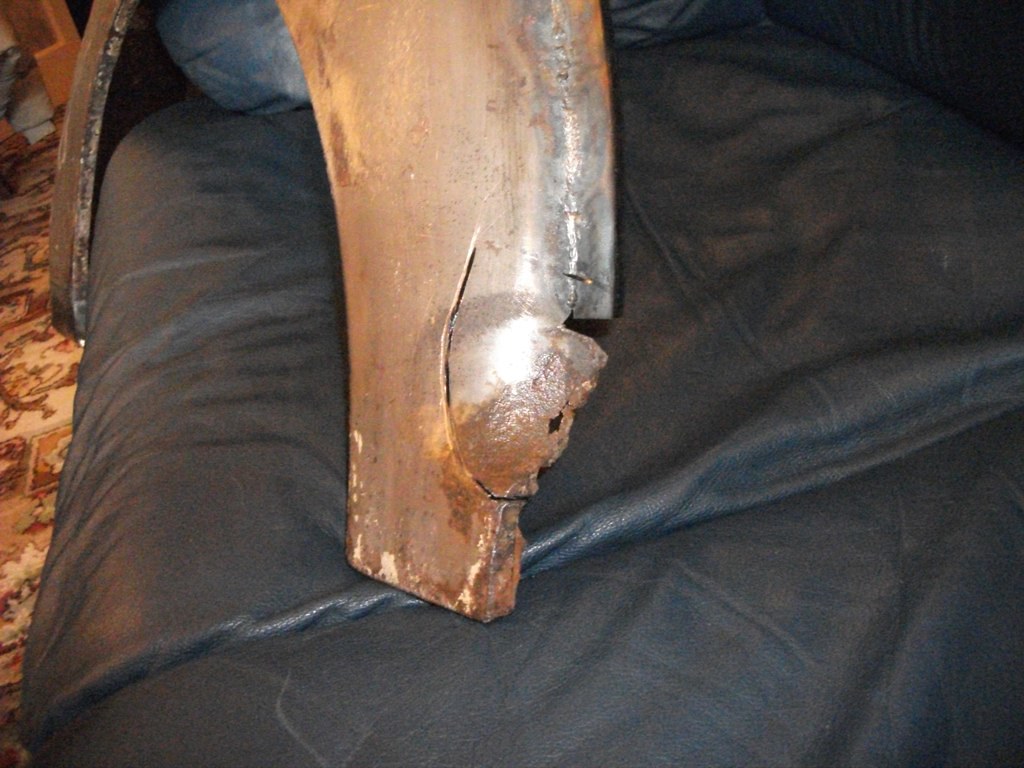
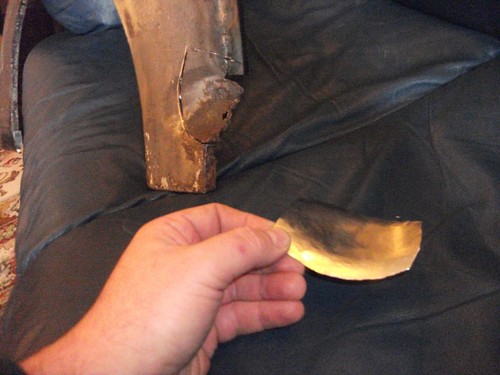
There may be an example of good welding on this car, but I haven't found it yet!
Image
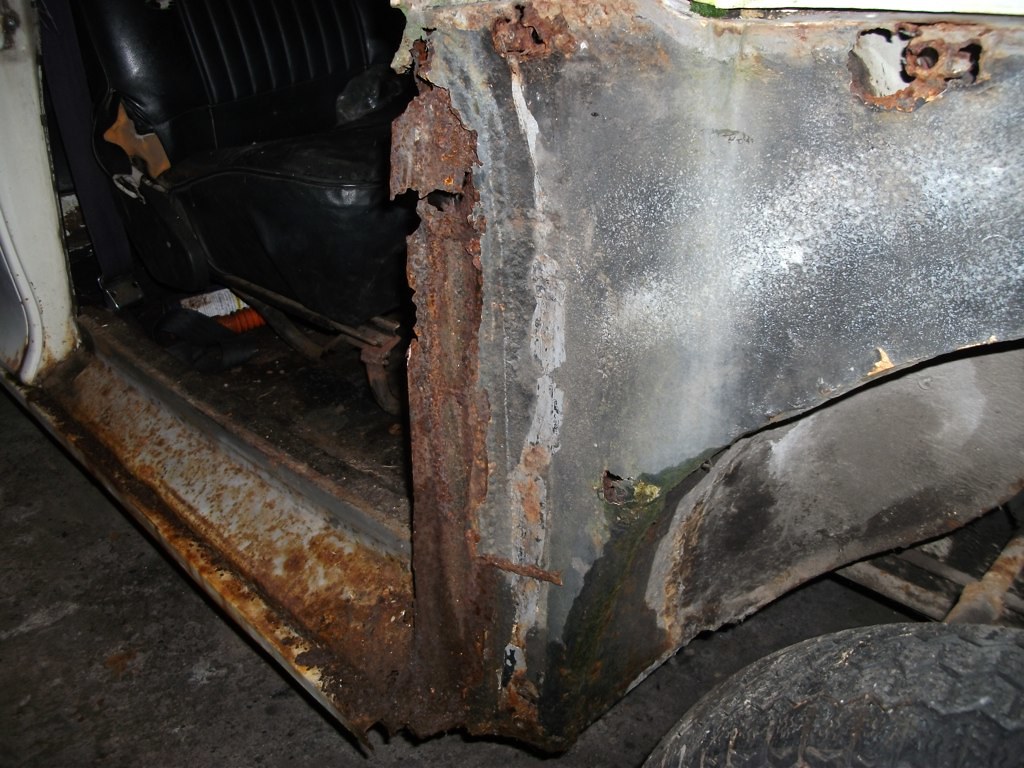
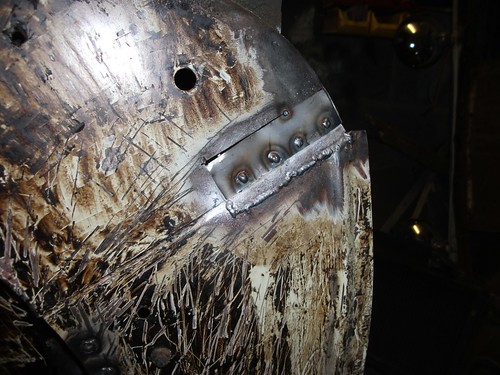
A pillar was not welded on very well, hence a little rust and it falls off!

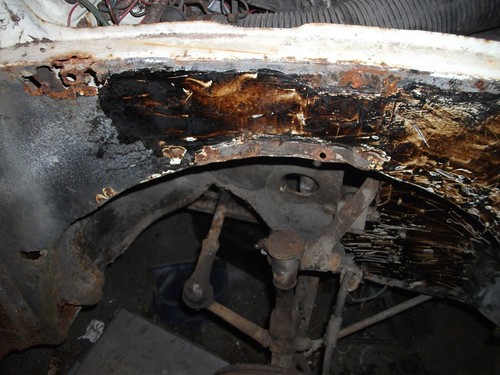
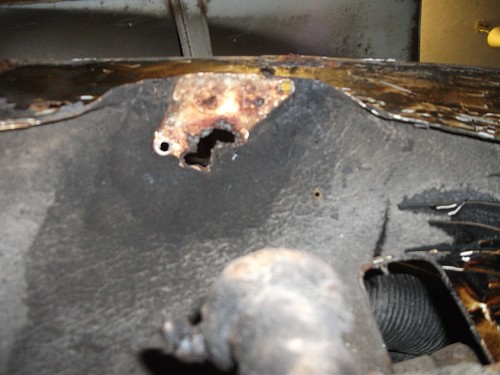
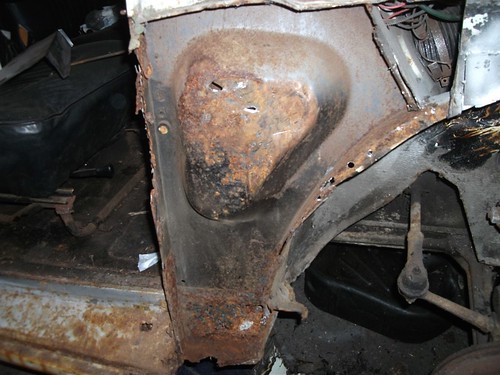
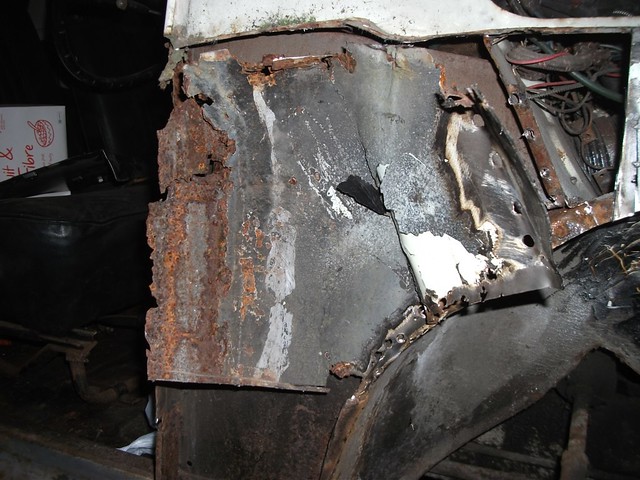
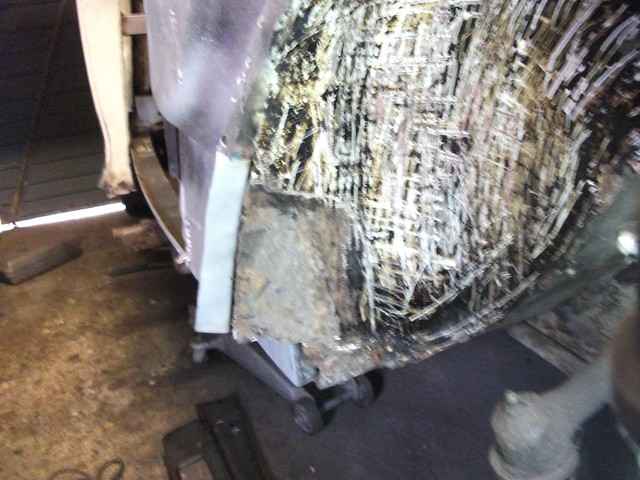
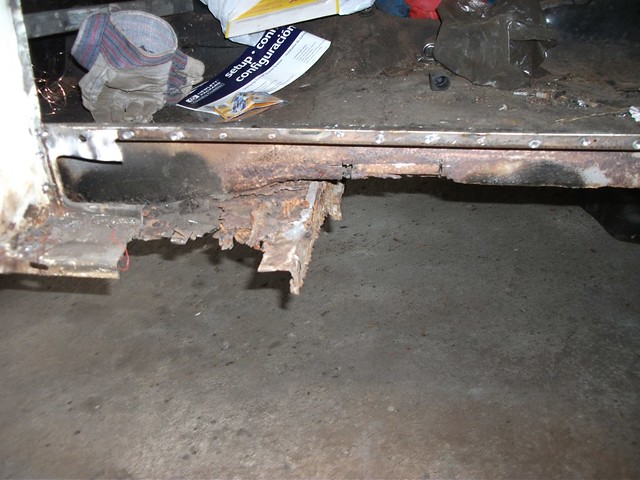
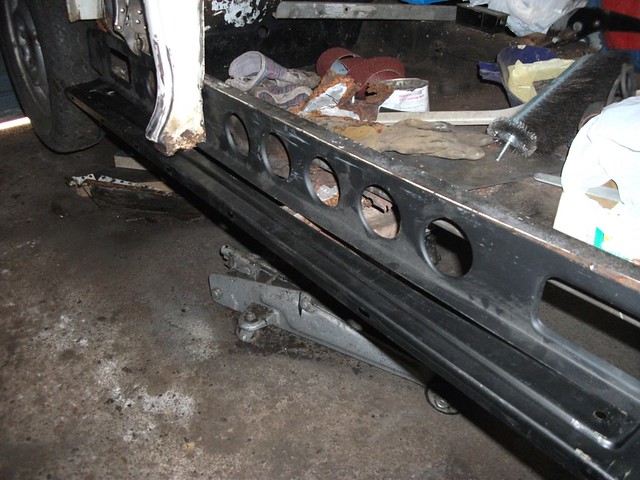
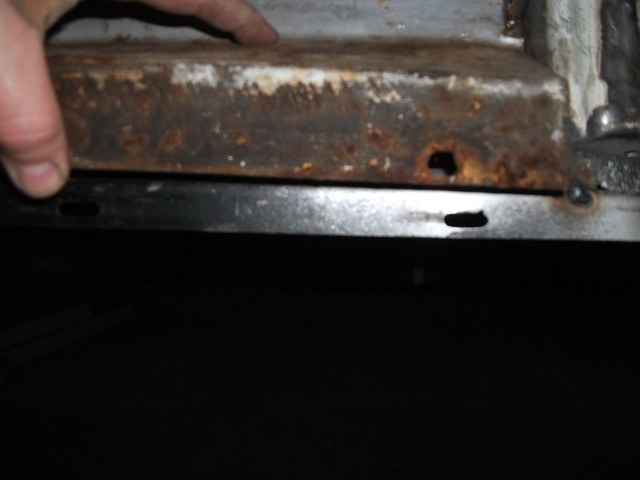
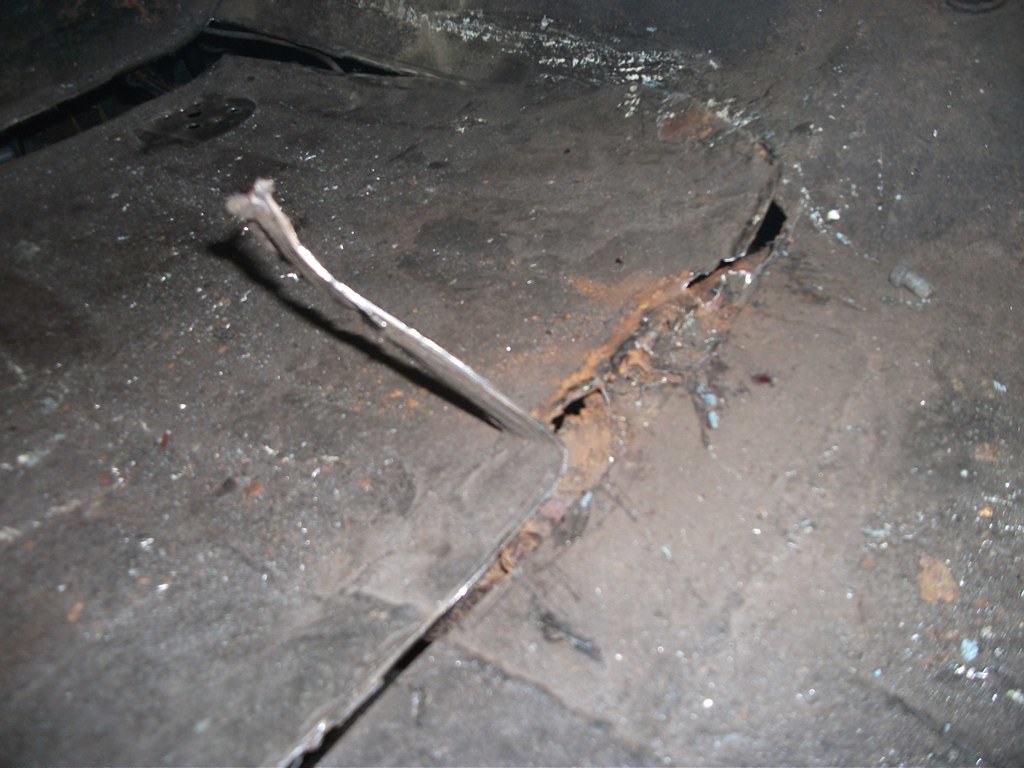
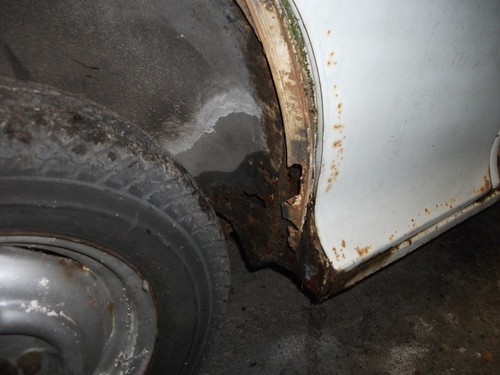
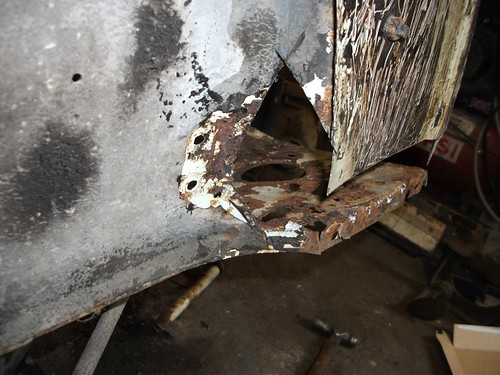
Nice hole at the bottom of the C pillar:-
Image


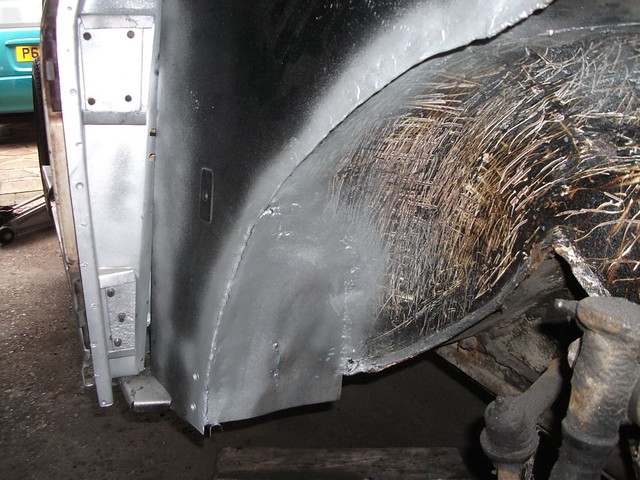
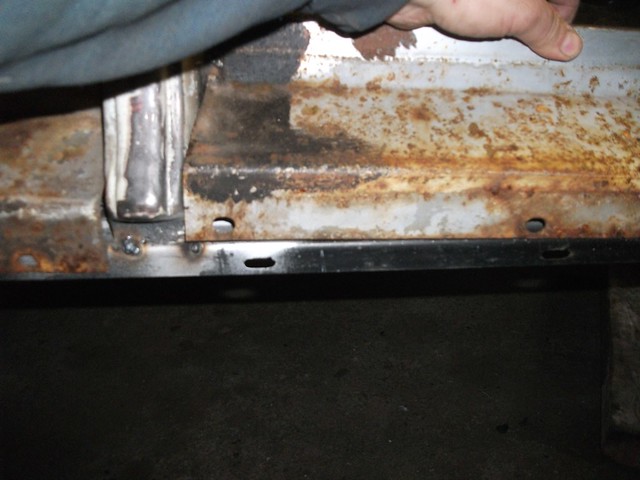
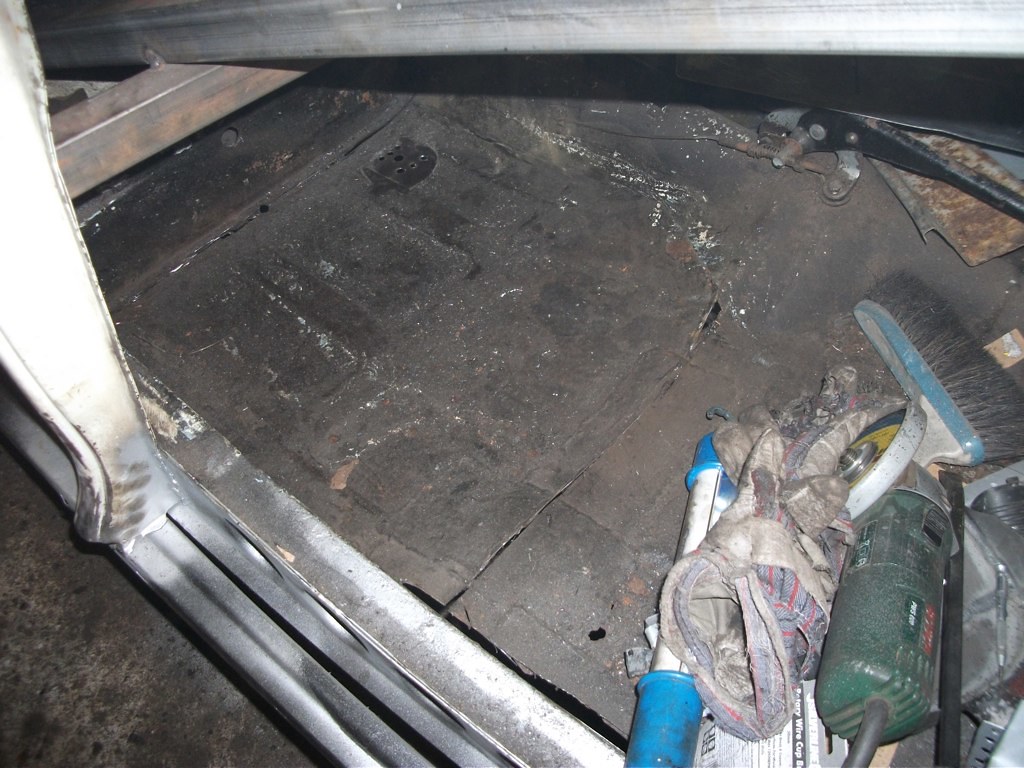
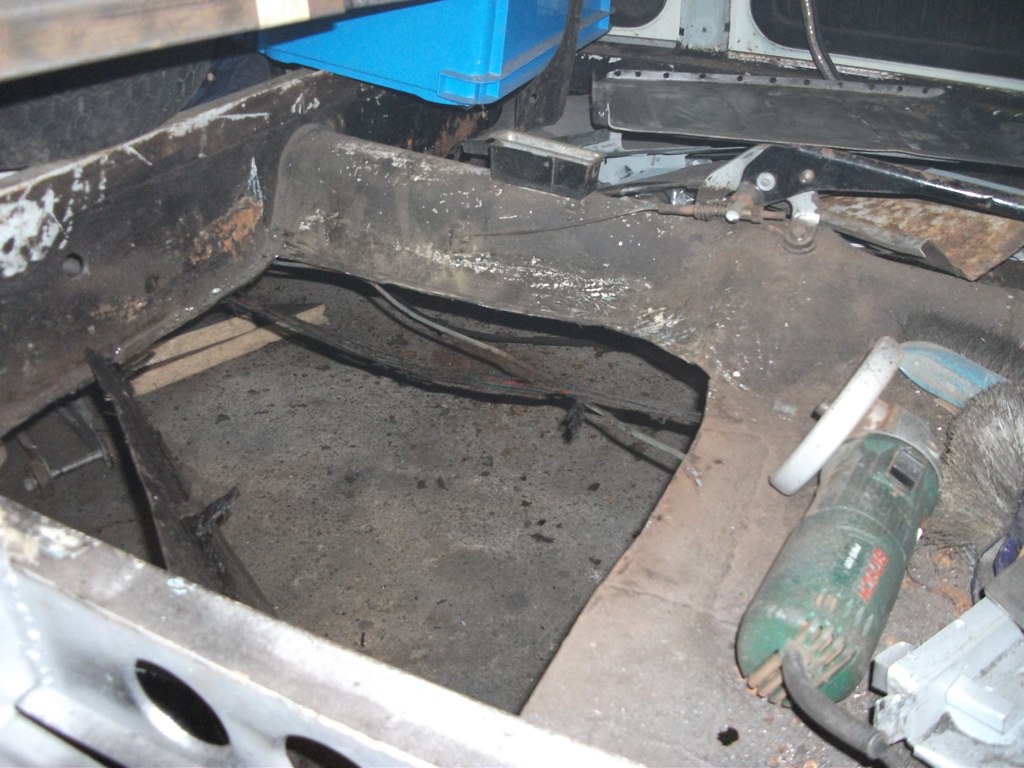
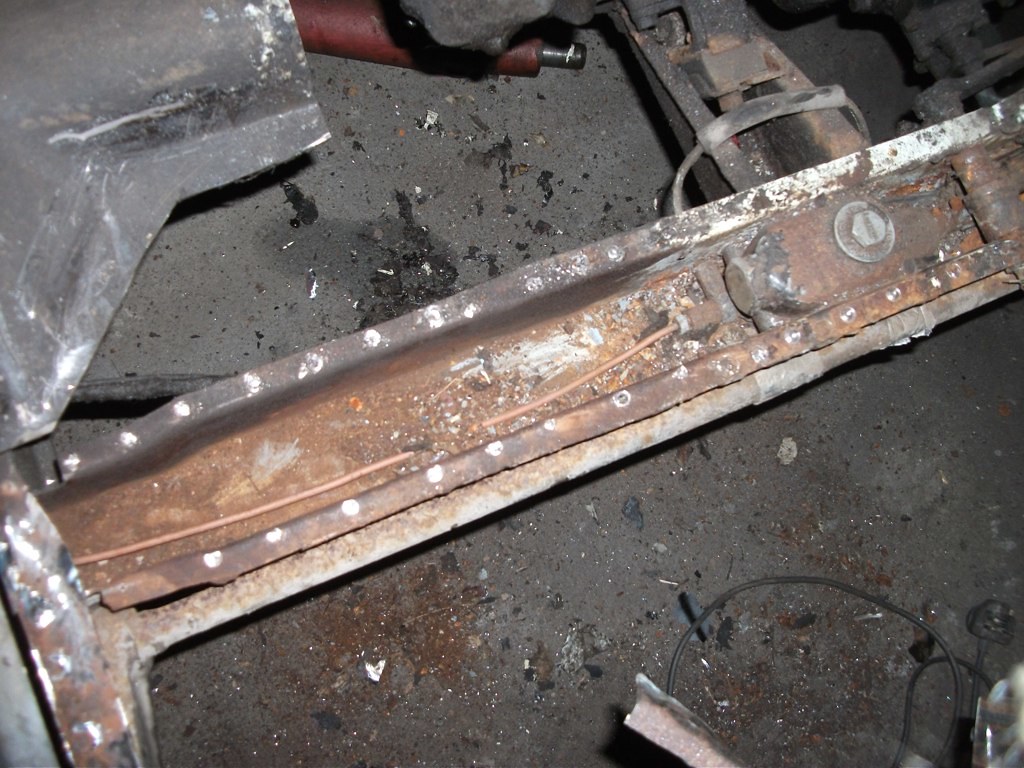
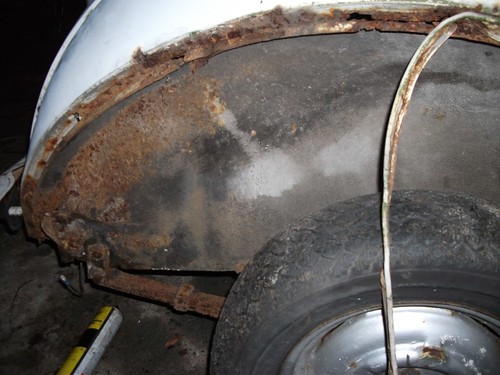
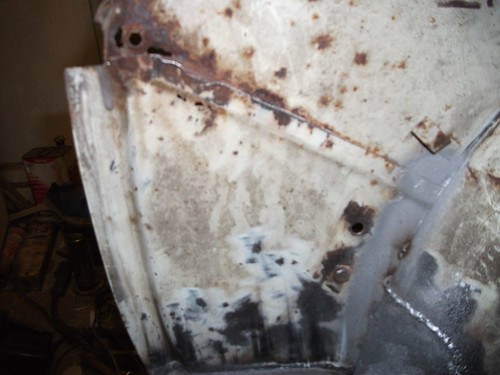
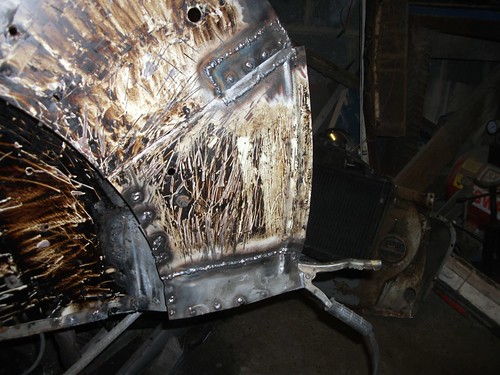
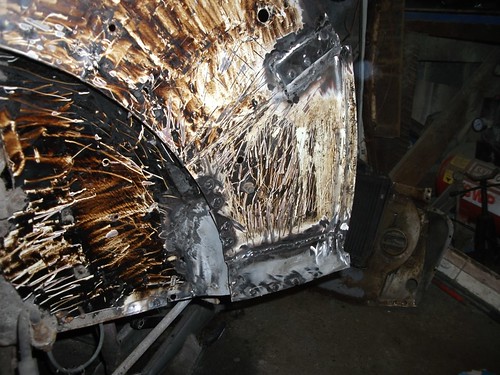
Looking on the bright side- most of the rear inner wing looks sound! (at least before I remove the underseal), rear chassis leg spring hanger will need replacing.
Image

I like to start in one corner of the car and work round, that way only a small area of the car is cut out at a time and it helps the car keep it's shape.

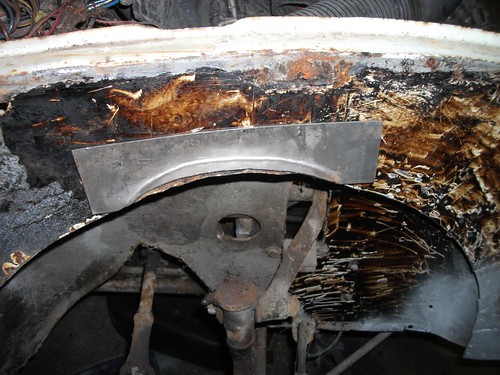
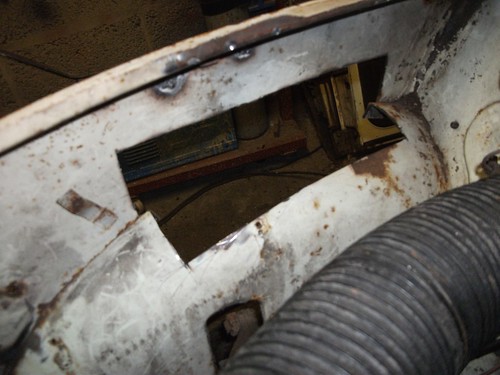
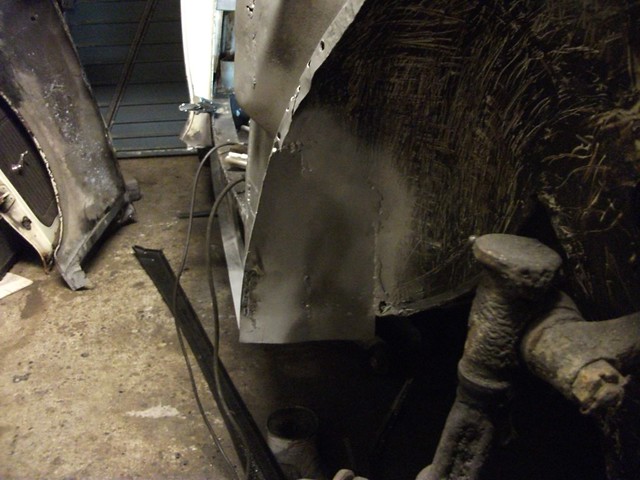
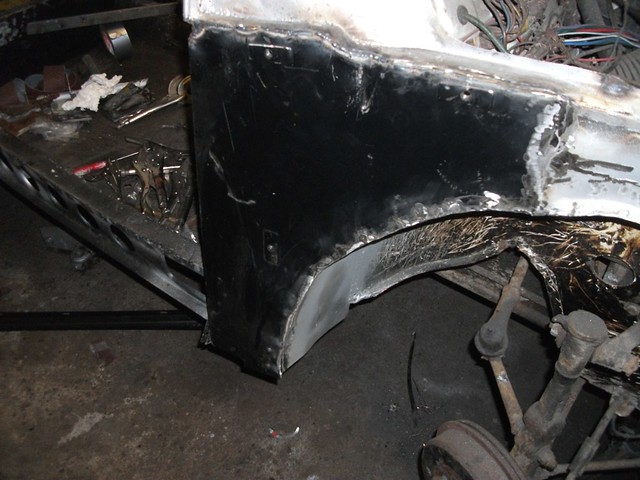
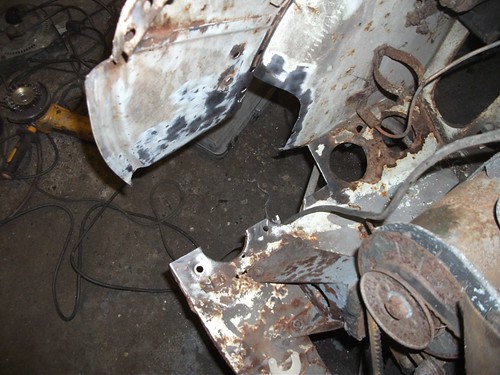
I removed the front panel and.....Image 
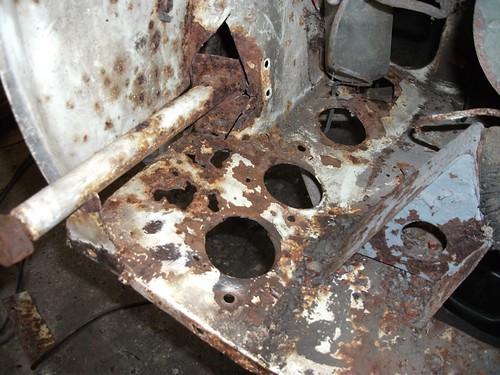
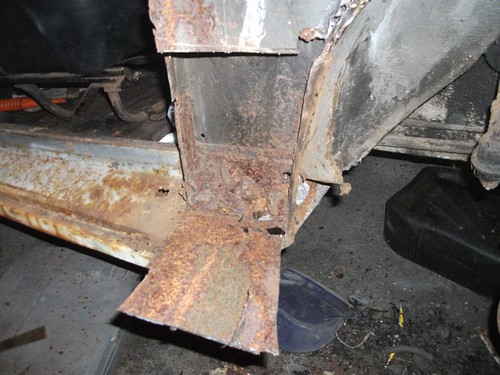
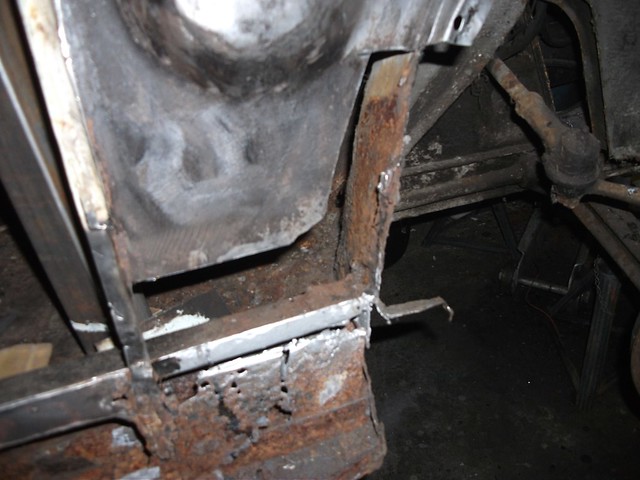
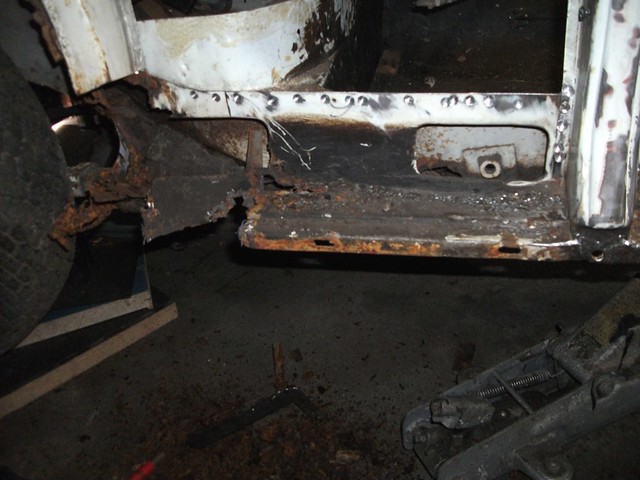
oh dear look at all the rust! What shall we do??
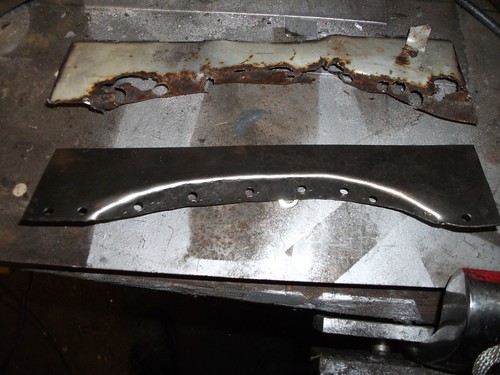
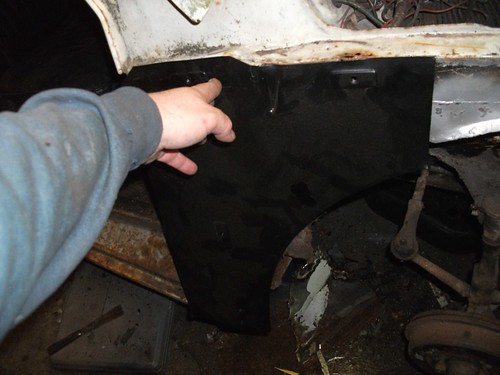
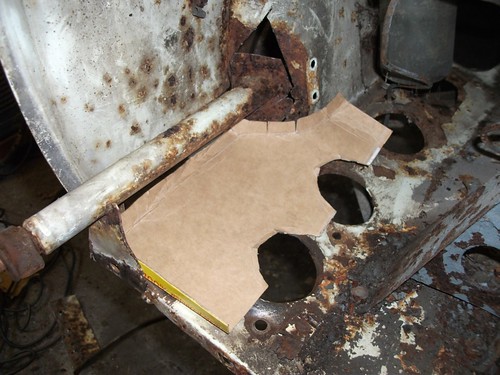
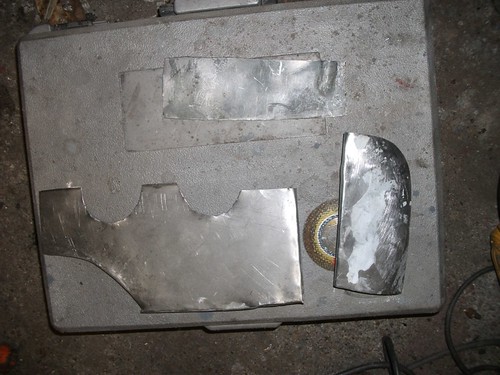
make a template

Image

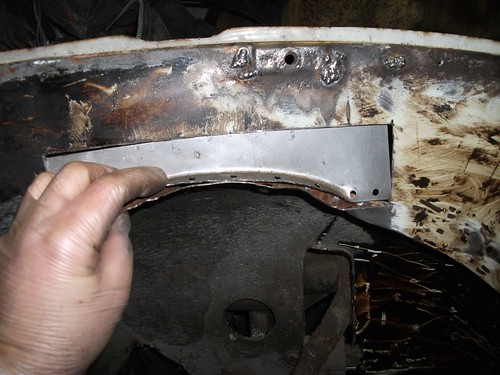
Transfer to ~1mm sheet steel
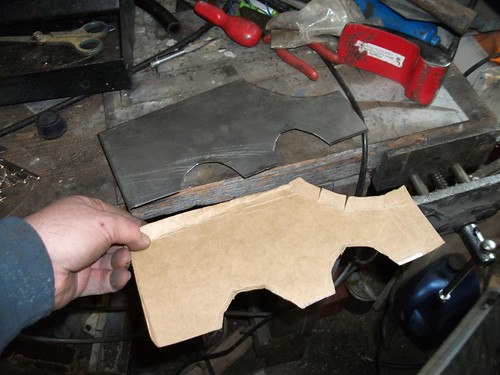
Image

It fits!
Image

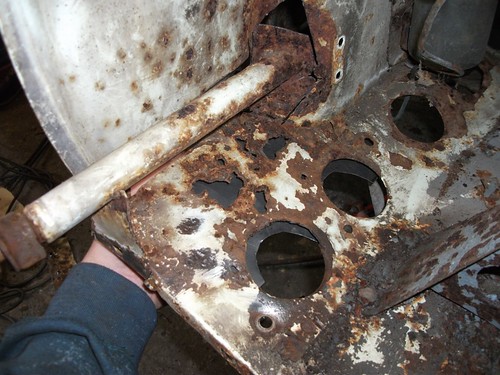
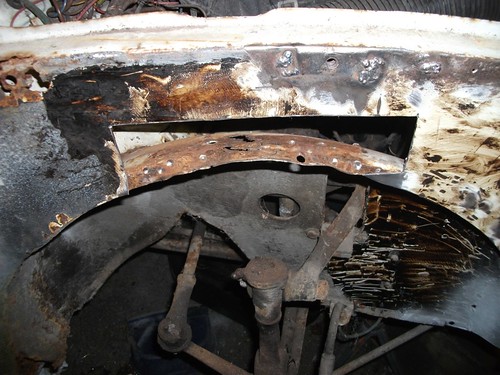
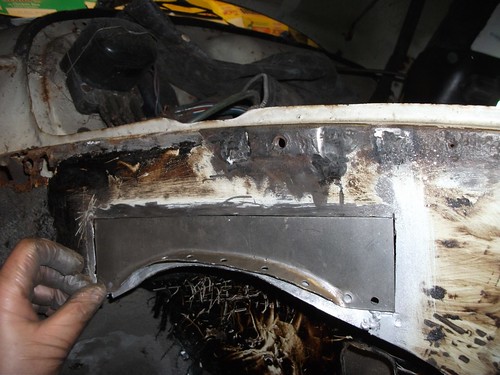
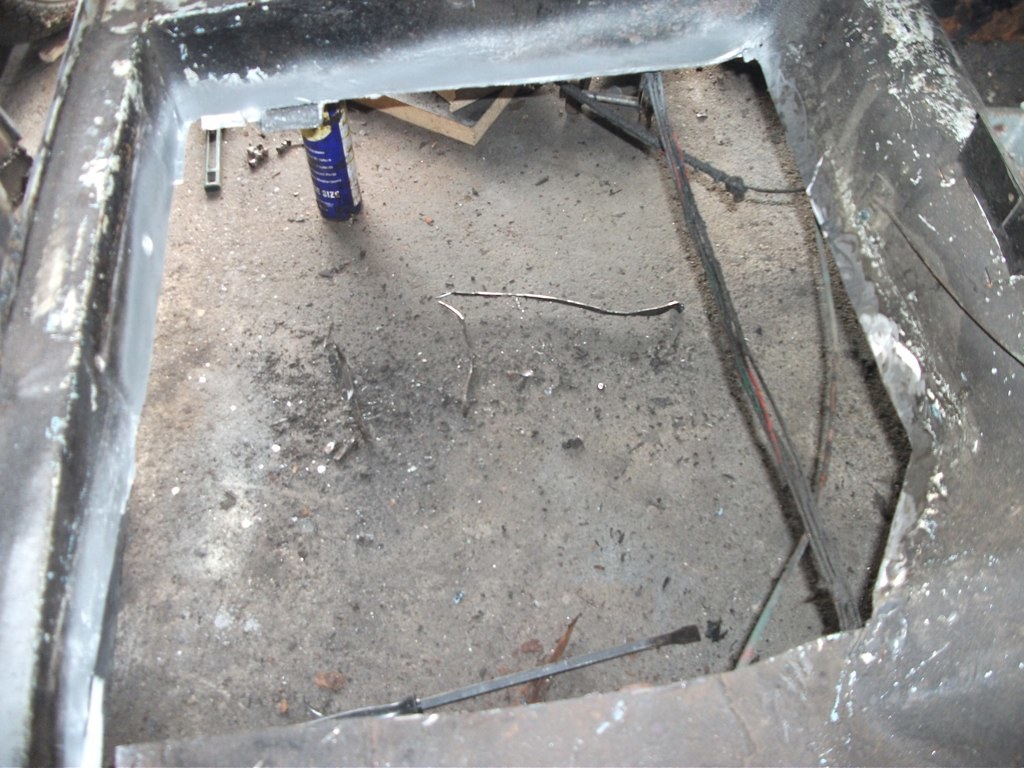
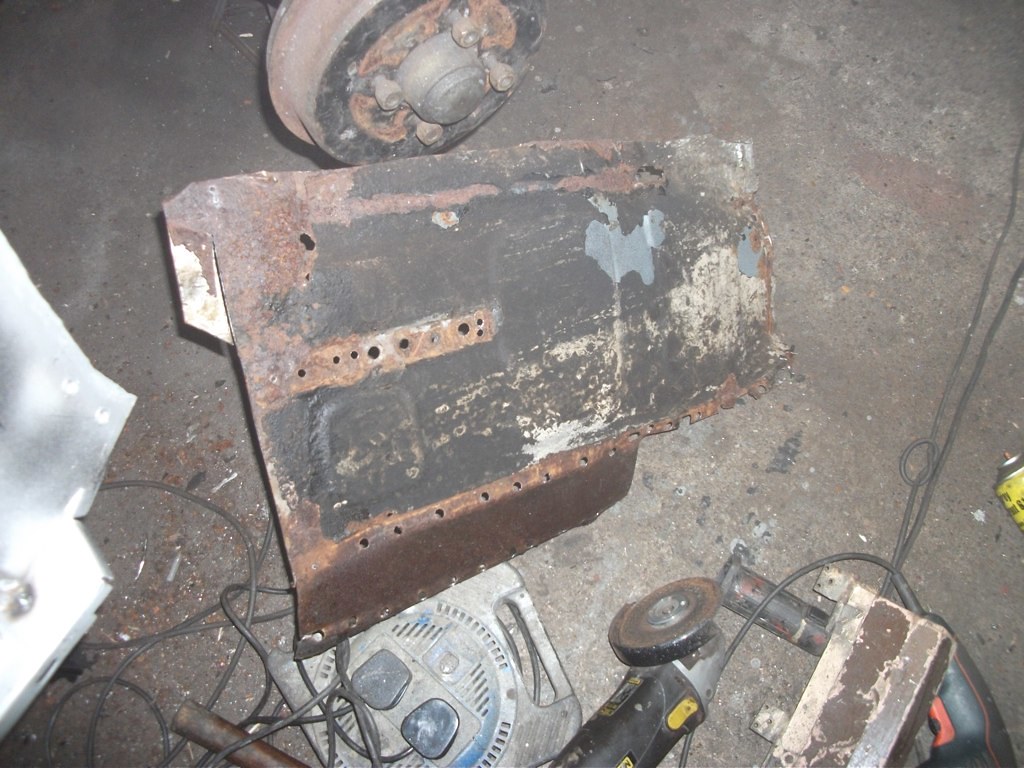
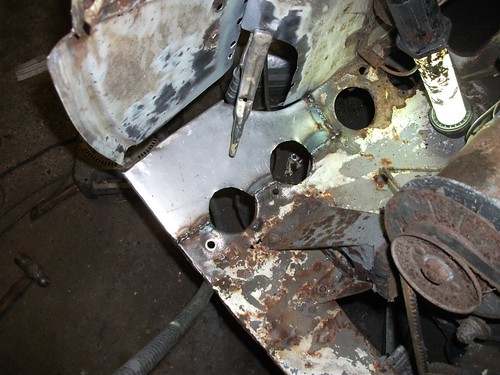
Cut out the other rusty/ dented bits in this area;-
Image

Make a template:-
Image

Image

All the nasty bits cut out!

Image

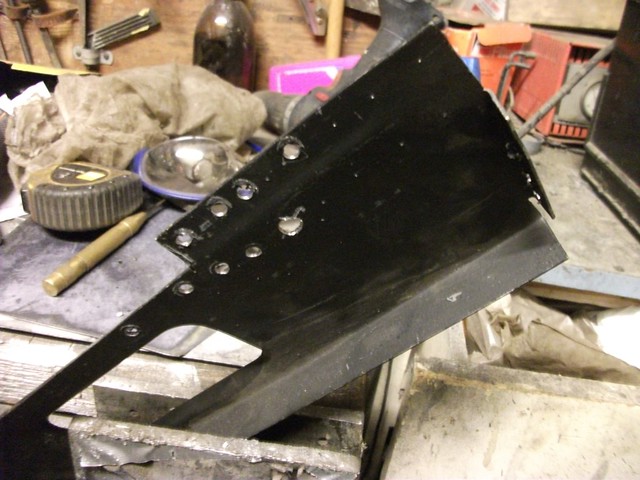
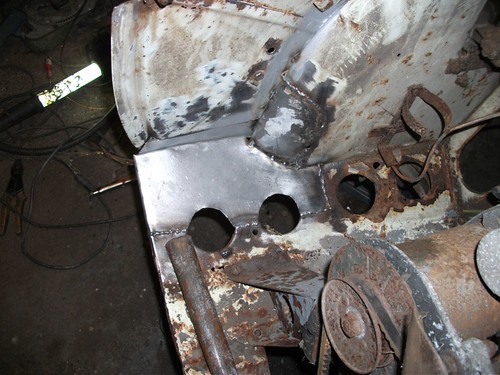
Here are the new pieces (all fabricated in my garage).

Image

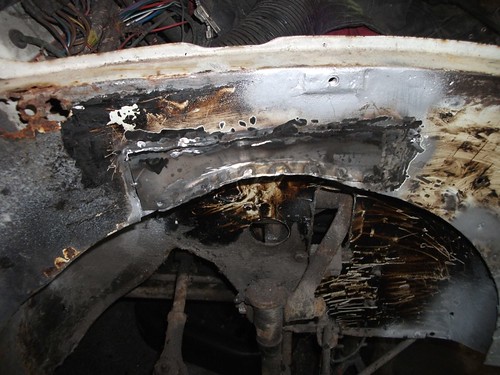
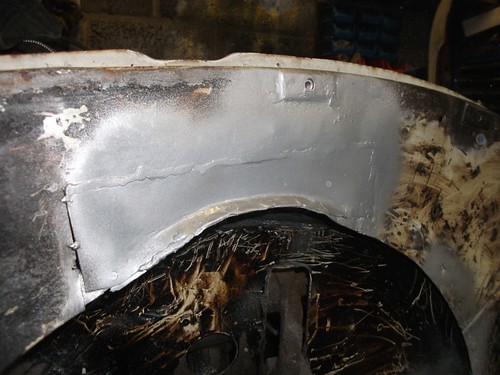
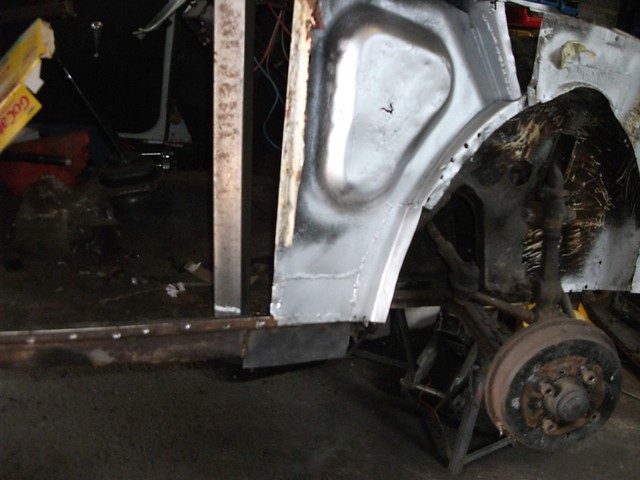
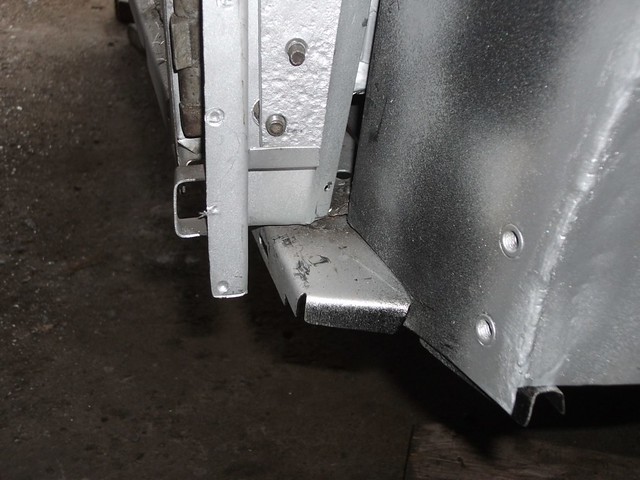
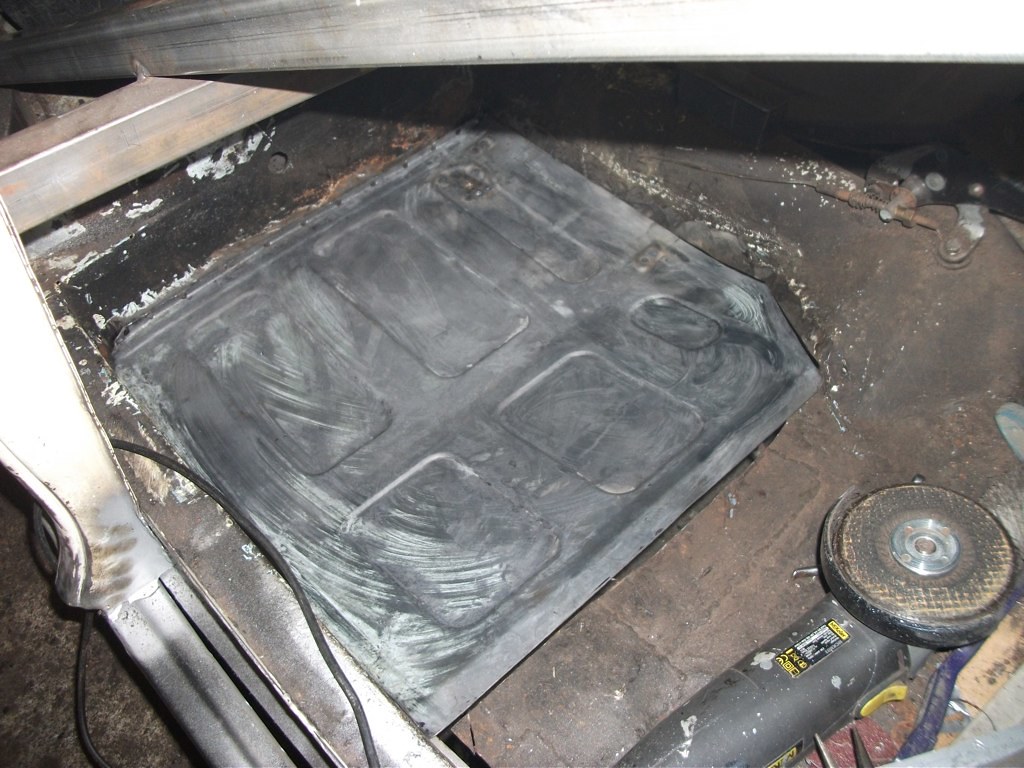
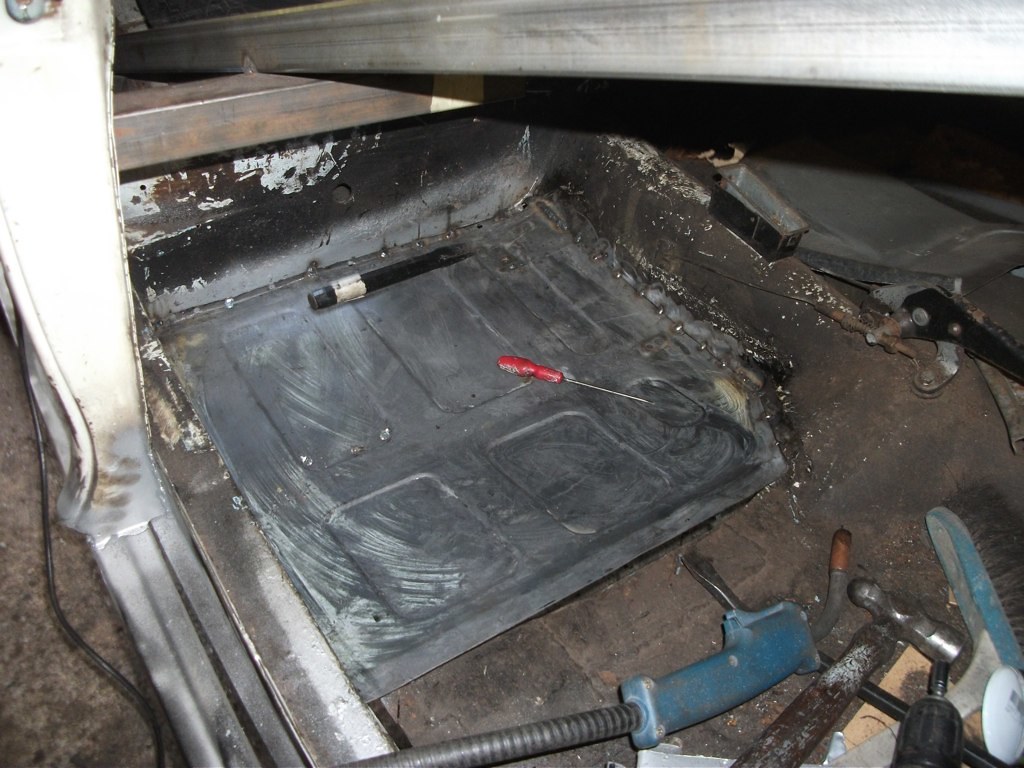
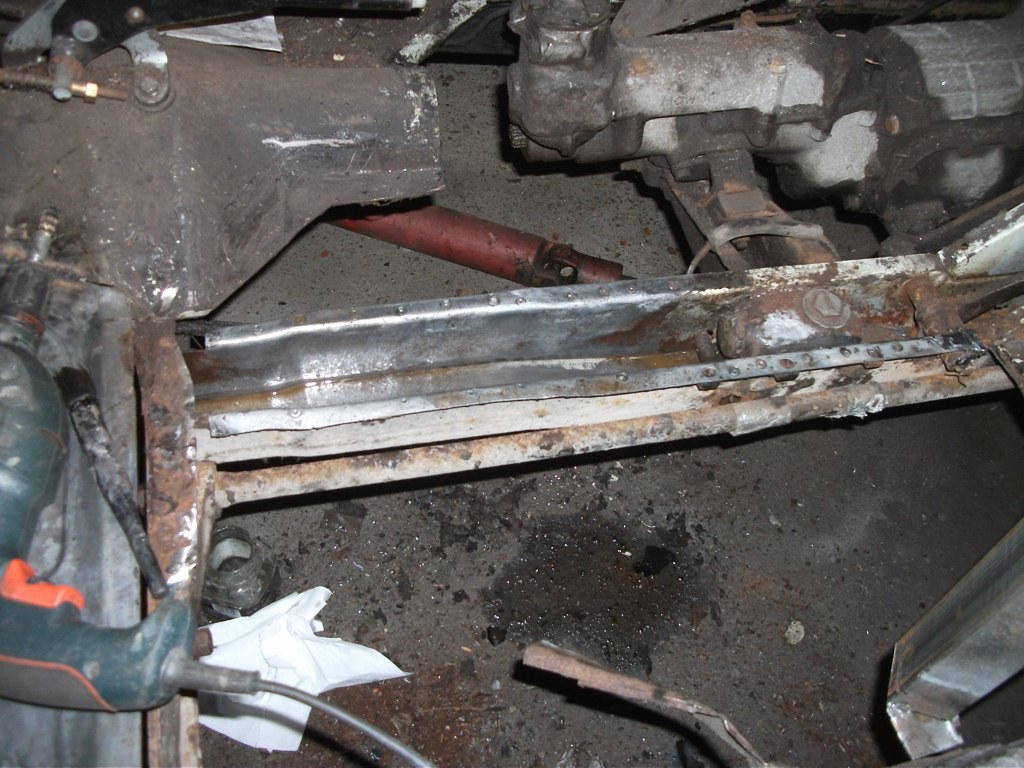
Engine bay floor corner goes in.
Image

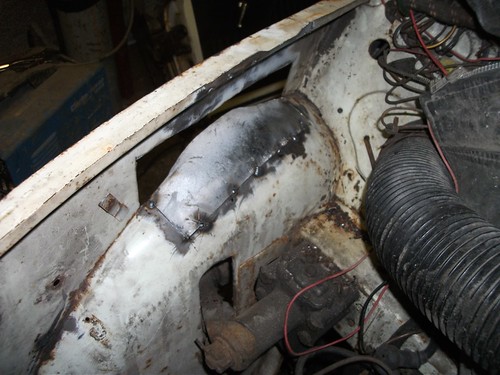
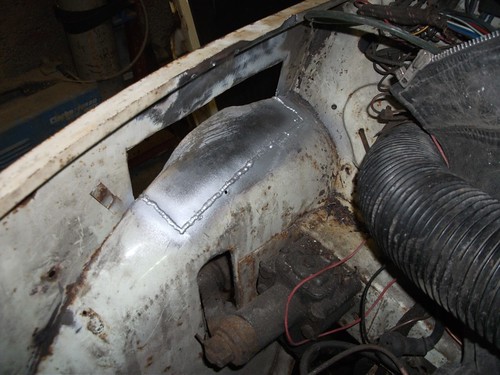
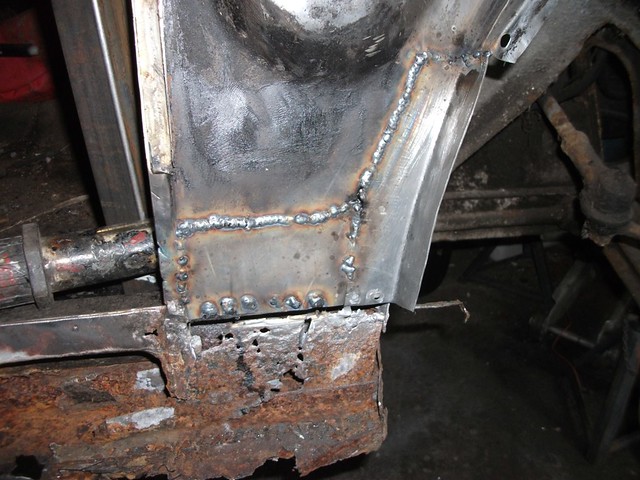
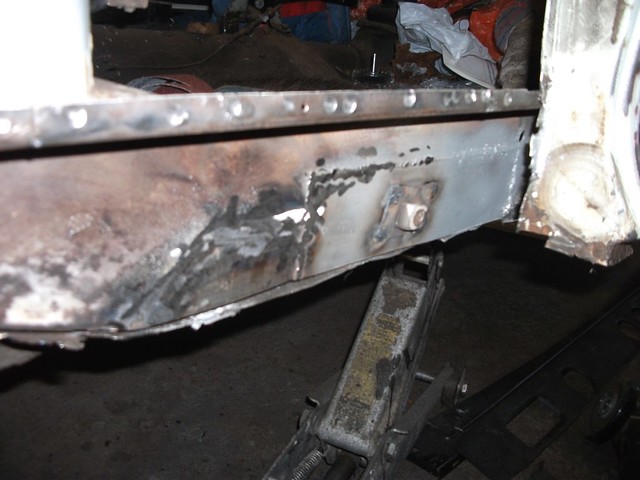
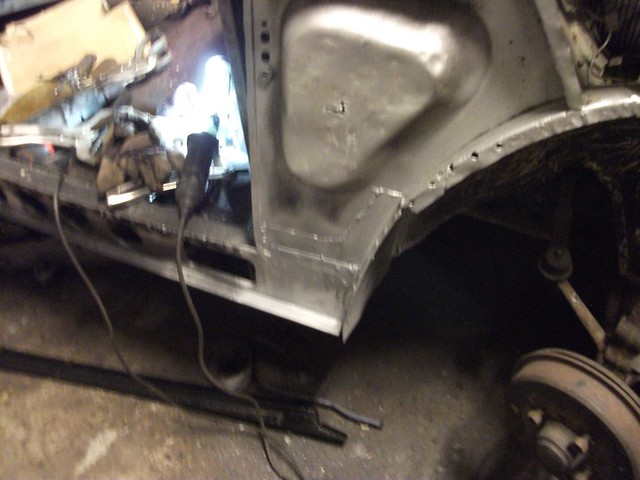
Weld all the pieces in!

Image

Image

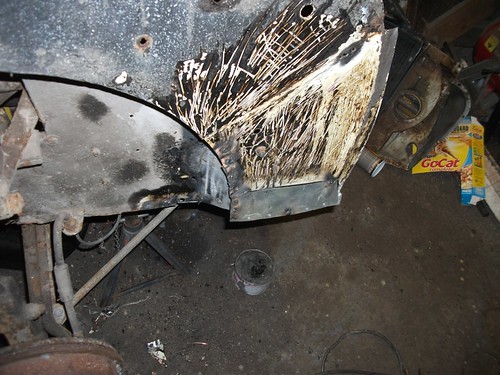
All welded in! Some of the welds look a bit knobbly because my Mig was having wire feed problems. A new liner, swan kneck and tip sorted that.


Image

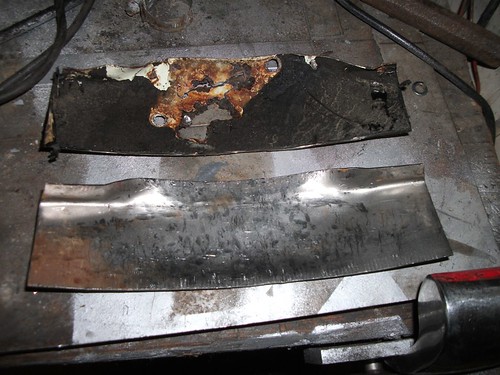
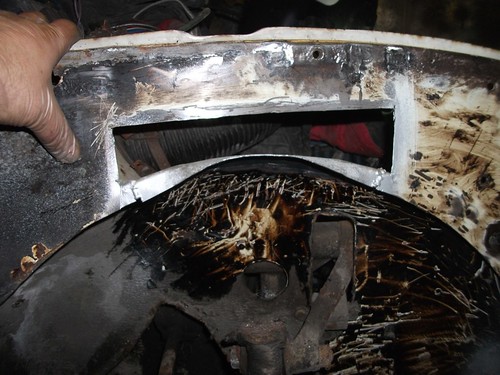
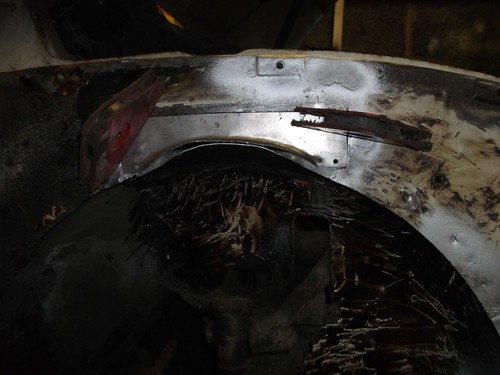
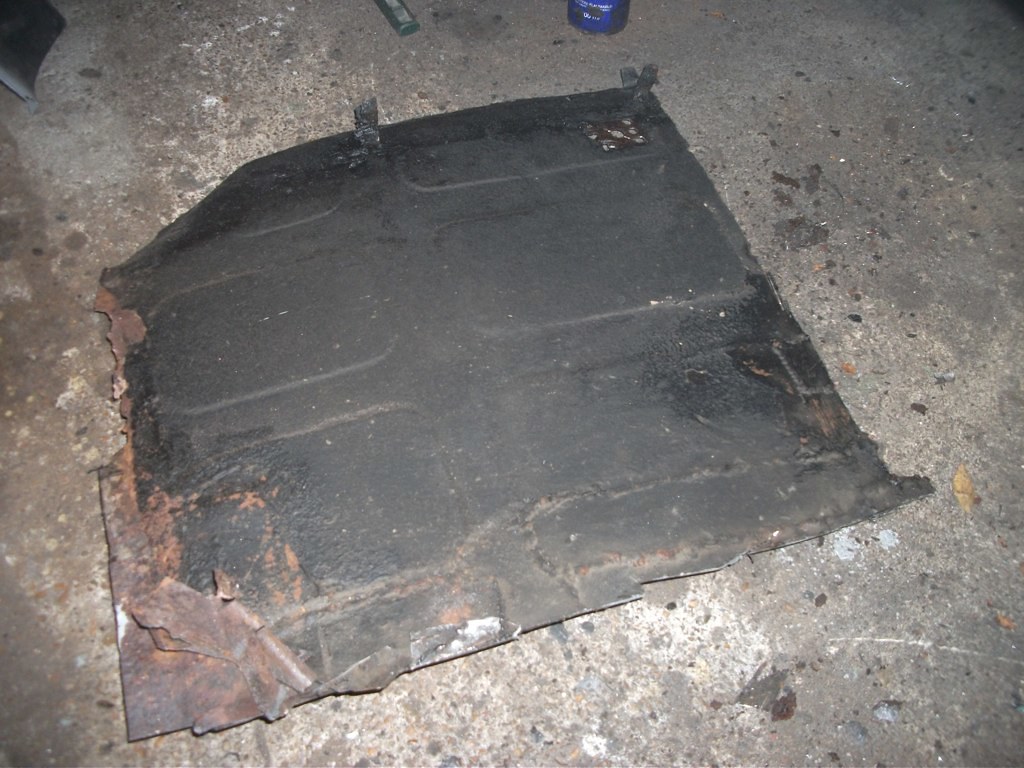
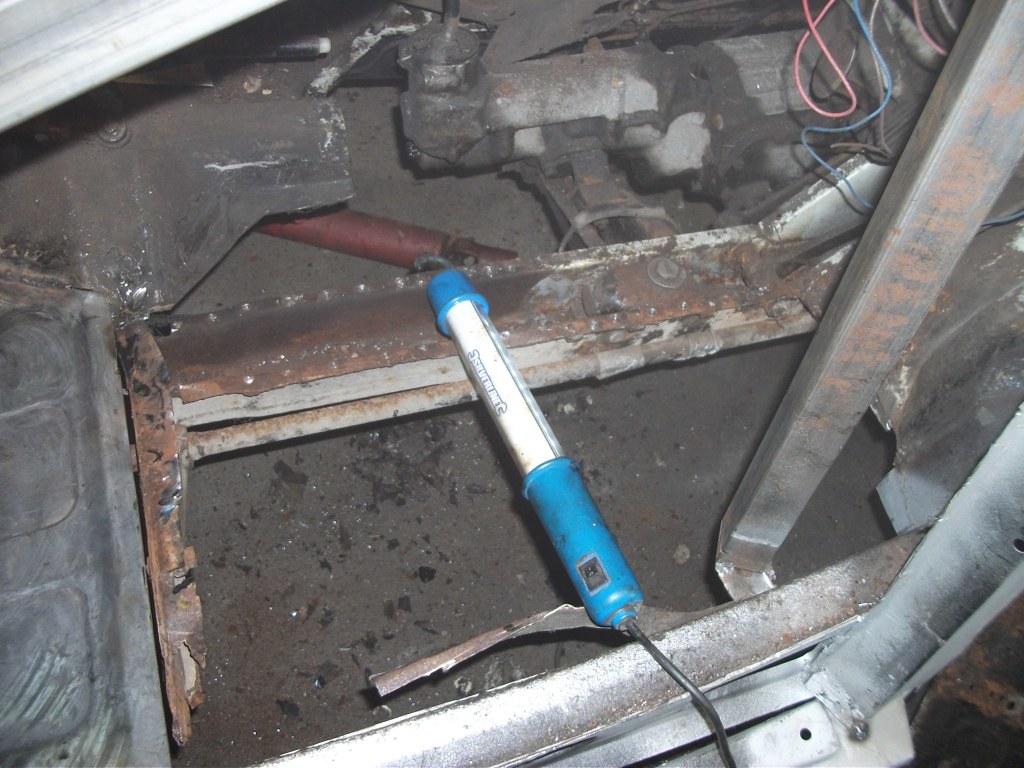
Wire brushing reveals more holes!!

Image

Image

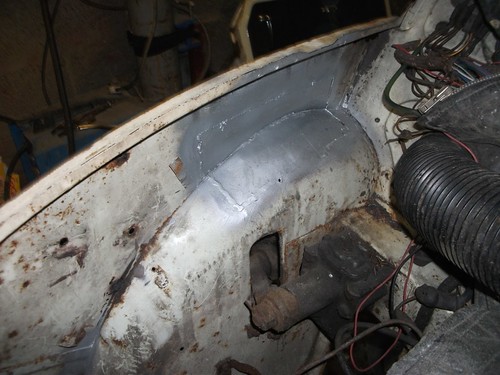
Cut it out and make a new piece! This time by measuring rather than template- and measuring in inches!

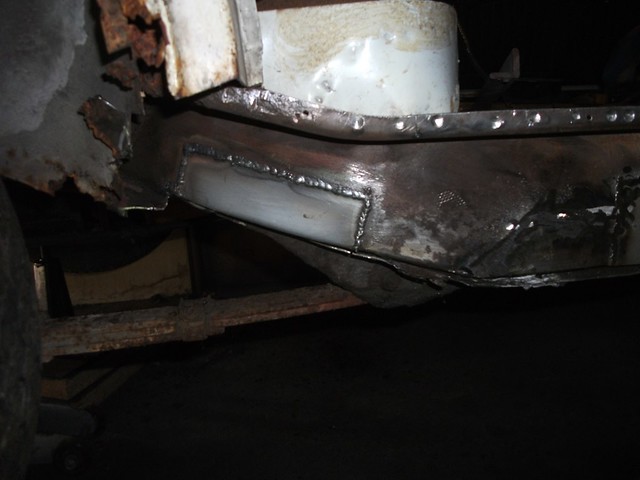
Swage was achieved using my joddler.
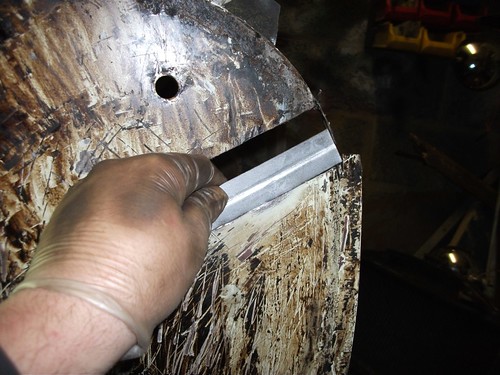
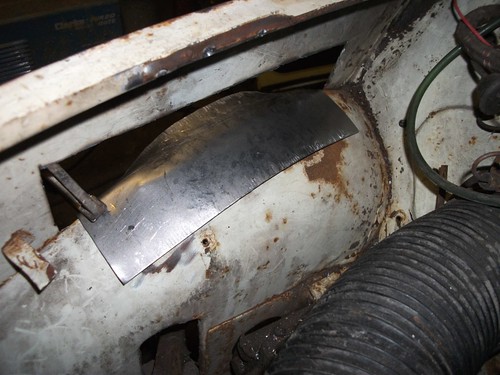
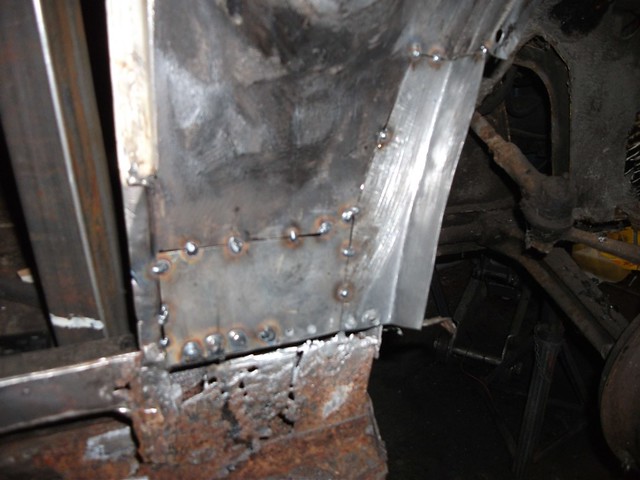
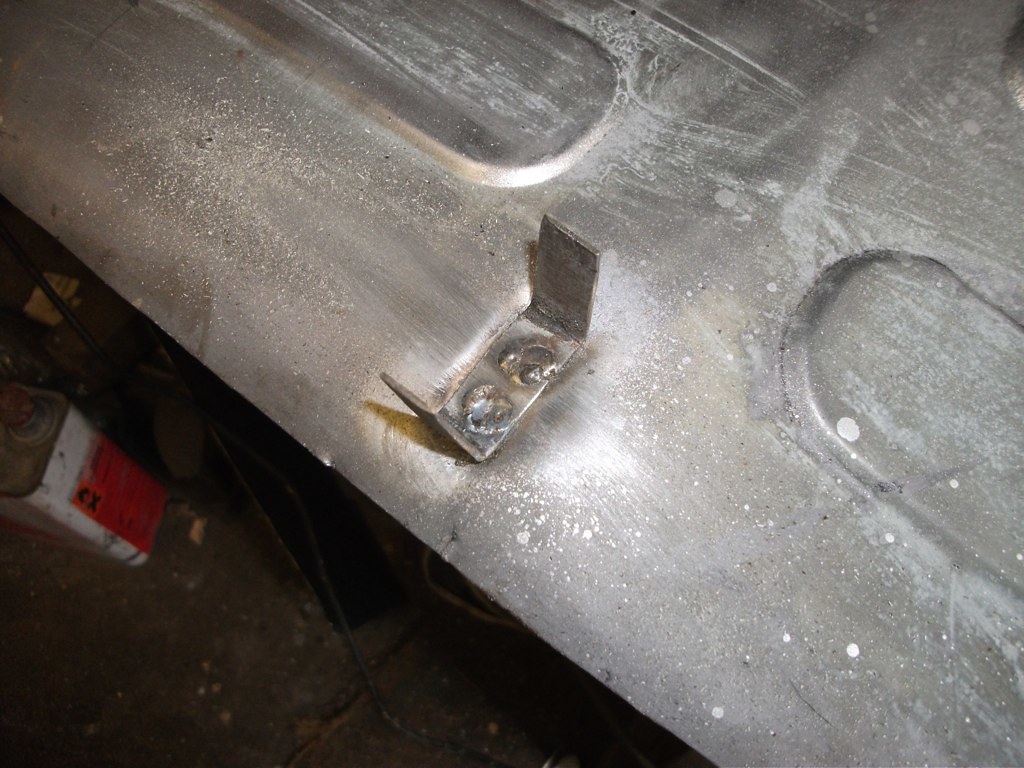
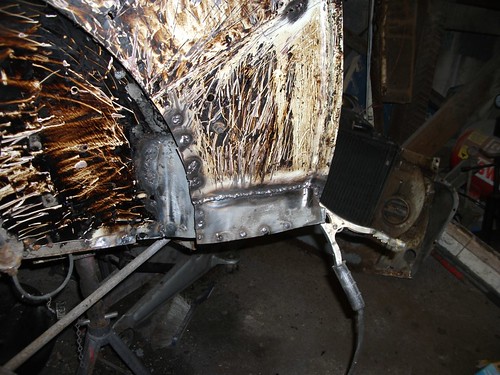
Image

Tack it in.
Image

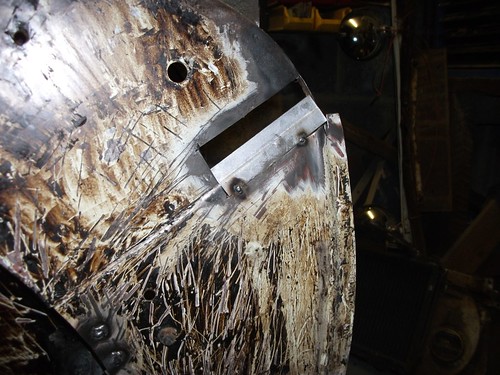
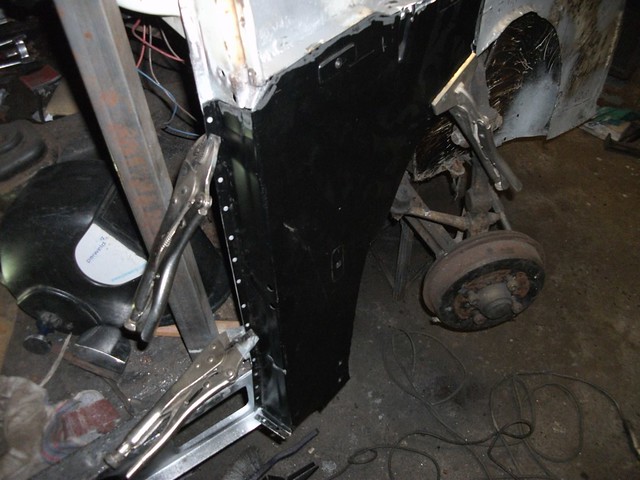
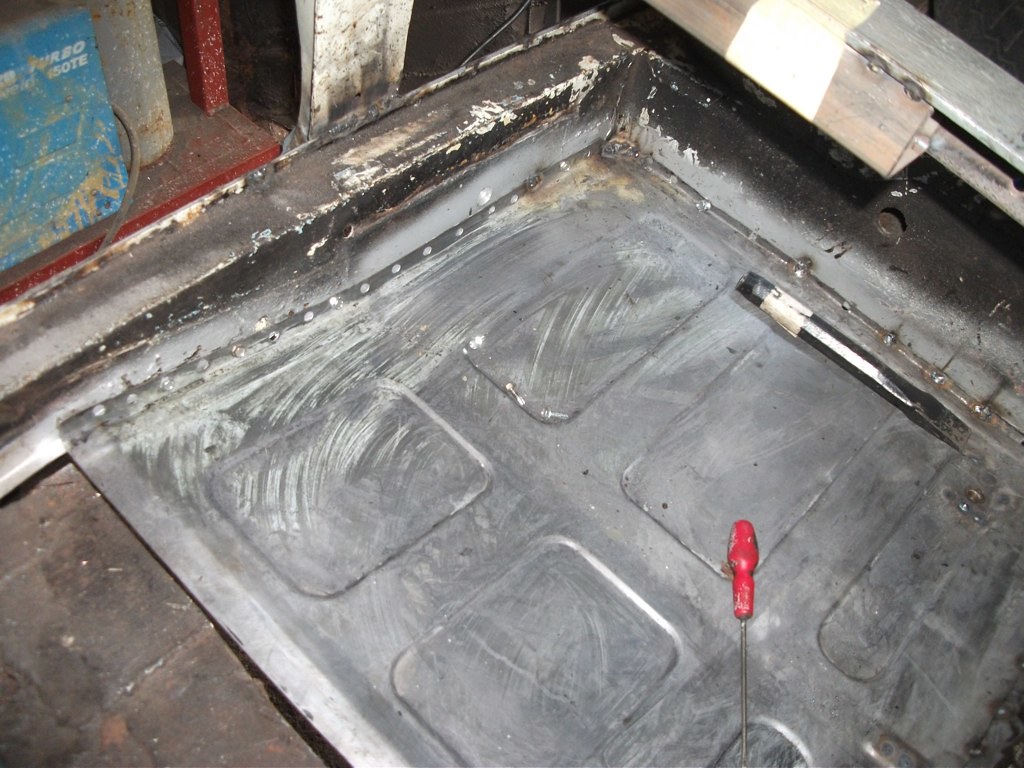
Plug welds where there were spot welds, and seam welds to join the patch to the parent piece.

Image


Image

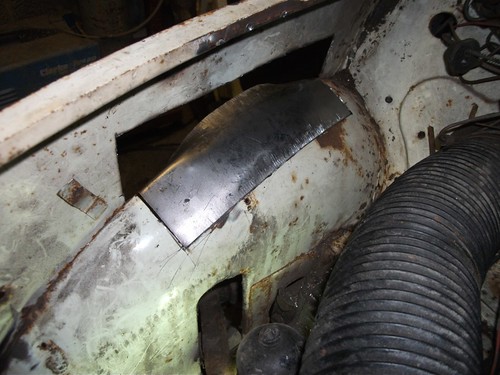
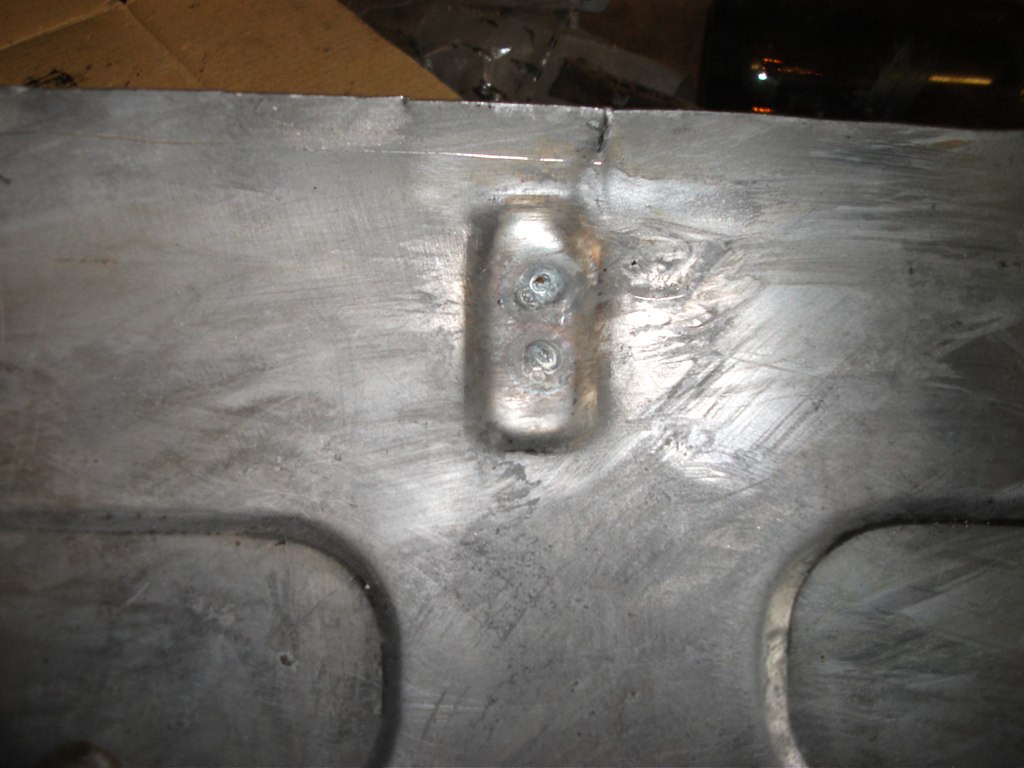
grind down the welds.
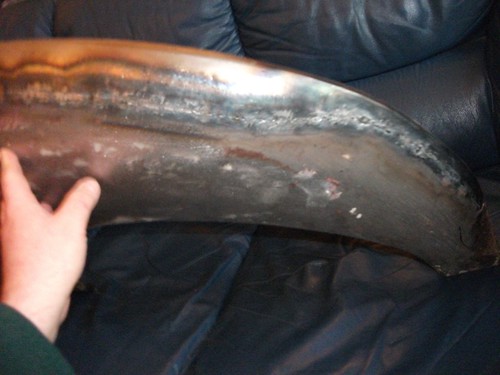
Image
chickenjohn
Minor Legend
Posts: 4064
Joined: Tue Dec 07, 2004 8:50 am
Location: Margate, East Kent
MMOC Member: No

Re: Project "Madelaine" 1970 4-door saloon!

Post by chickenjohn »

The front inner wing bump stop area is prone to rusting on Morris Minors.
Image

More Holes!

Image

Inner wing piece fabricated -formed at home using a vice, a hammer, pliers and a dolly!

Image

New section fits the hole nicely.

Image

Image
Image

Inner wing bowl repair section shaped to fit the inner wing bowl.
Image
Edge needed shrinking on the shrinking machine so the panel sits flush to the wing bowl. The shape was put into this piece by beating over a dolly, folding a flange, shrinking to get a curve and flatenning the centre part of the flange.

Image
New and old pieces:-
Image
Patch panel was clamped to the wing bowl, and a scribe run around the edge to mark it,Image
then carefully cut out with a 1mm disc on grinder.
Image

Panel fits so well, it stays in place when wedged! So i'm happy that the repair panel I made now fits the hole:-

Image
Image

Repair panel is tacked in at 1" intervals.
Image

Accurate panel fit and shape enables neat butt welding:-

Image

Note- the welding is neater now the wire feed problems in my Clarke have been sorted. (Welders do need maintainance from time to time to ensure they work smoothly and the wire feeds well). I use CO2 at home due to cost, but at college the Mig sets use Argon/ CO2 mix and this gives a much neater, smoother weld than CO2. Still, its not too bad!

Image

Outer repair section fits well- I will weld this one in tomorrow with a combination of plug welds and butt-seam welds- note the use of Weld thru primer in any overlap.

Image
chickenjohn
Minor Legend
Posts: 4064
Joined: Tue Dec 07, 2004 8:50 am
Location: Margate, East Kent
MMOC Member: No

Re: Project "Madelaine" 1970 4-door saloon!

Post by chickenjohn »

Outer repair panel held in place with magnetic clamps.
Image

Bump stop area now repaired and painted with zinc to stop rust.

Image

Welds ground down on the outside of bump stop

Image

Repair completed

Image
chickenjohn
Minor Legend
Posts: 4064
Joined: Tue Dec 07, 2004 8:50 am
Location: Margate, East Kent
MMOC Member: No

Re: Project "Madelaine" 1970 4-door saloon!

Post by chickenjohn »

Time to cut off the rear inner wing panel to see the condition of what lies beneath, although lots of previous MOT style overlap welding patches means I can't access the spot welds for drilling out over the kidney panel kidney bowl piece.

Image

Lots of rust at the bottom, but I'm going to replace the sills anyway.

Image

Believe it or not, I'm quite chuffed with this picture, the kidney bowl panel, is actually in pretty good condition for the condition of the car. Dibble the convertible had worse kidney panels requiring replacement of  all the flat areas. I think only the front of the lower section will need replacing, the rest should clean up nicely with a touch of wire brush on grinder.

Image

I have made rear inner wings in the past, but on this occasion will be using a bought rear inner wing panel. This is where it will go.
By the way, have measured up the existing mounting captive nuts and will ensure the new inner wing goes in the right place (plus a test fitting of the outer wing of course!)

Image


Image

Image


The car is evenly jacked up and levelled, next stage before cutting more out is to brace the shell. :D

Quick Madelaine update:-

The O/S of the car is now braced between bulkhead and floor, across both door gaps and the B pillar is braced in three directions. Braces used- a mixture of 2mm thick 2" x2 " box section and angle iron.


Image

Image

Should keep the car in the shape she is meant to be after I cut all the sills out! NOTE- bracing was positioned so I can get to all the welds with a 1mm cutting disk afterwards to release the braces after the new sills are in, oh and the position of the braces was thought through so I can still get inside the car and still get at the areas that need to be worked on. Oh, and also temprarily re-fit the doors to check the gaps!

Image

New sills and A a-pillar first then floors that side. The brace across the car, betyween the B pillars- will be kept in until the other side has been replaced.
chickenjohn
Minor Legend
Posts: 4064
Joined: Tue Dec 07, 2004 8:50 am
Location: Margate, East Kent
MMOC Member: No

Re: Project "Madelaine" 1970 4-door saloon!

Post by chickenjohn »

Now the  car is braced up, time to cut off the rusty inner wing.
Image

I measured the distance between two of the remaining inner wing mount bolt holes and those on the part of the inner wing destined for the skip- this is to ensure that the replacement inner wing section goes back on in the right place!

Sills are clearly past their best.
Image

Rear outer sills too!
Image

Rust cut out of  Kidney panel and new sections welded in.

Image

Tacked in- Image

Fully welded in.

Image

Excess weld ground off and zinc primed!

Image

Time to cut off nasty, rusty old patch in the corner of the inner wing bowl- this should ideally be done before the inner wing is repaired.
Image

Rusty patch cut out!

Image

Repair section cut to shape, shaped with hammer/ dolly and shrinker and welded in place. That's better!


Image

Rusty sills cut out.Image

Repairs made to inner sill step using 1.8mm steel.

Image

Rear of sills also cut away. Image

Repairs let into rear of inner sill step as well.
Image
Image

Test fitting boxing panel and outer sill panel.

Image

Boxing panel prepped for plug welding to inner sill step.

Image

Boxing panel must be fitted to the inner sill step before the rear of the front inner wing can be welded on. Here you can see the boxing panel is welded on to the inner sil step.

Image

another view of boxing panel welded in:-
Image

Rear inner wing section test fitted, trimmed and hole punched ready for welding in. At this point the outer wing and front panel were test fitted- all fits!
:D
Image

Welded in! Image

First test fitting of the A Pillar (held on with self tappers).

Image
Cheers John - all comments IMHO
- Come to this years Kent branches Hop rally! http://www.kenthop.co.uk
(check out the East Kent branch website http://www.ekmm.co.uk )
ImageImage
chickenjohn
Minor Legend
Posts: 4064
Joined: Tue Dec 07, 2004 8:50 am
Location: Margate, East Kent
MMOC Member: No

Re: Project "Madelaine" 1970 4-door saloon!

Post by chickenjohn »

Now the inner sill step is sound, the boxing panel and inner wings are repaired, we can turn our attention to the A pillar and outer sill panel.

Test fitting A pillar and door- A pillar held on with self tappers for this.
Image

Outer sill too far forward.
Image

Here is a clue:-
Image

Can you see what is wrong??

Image
Holes do not match with sill covers, outer sill step too far forward.

Needs to come back about 1/2 "
Image

Door closes but sticks on the peg and socket- here are a few clues as to what is wrong:-

Image

Image

Yes, the hinge pillar is too far forward, this is why we test fit and tack/screw panels on before fully welding! Another problem is that the door hinges are worn which means I cannot fit the door and hence hinge pillar just yet.

In the meantime you can see how I repaired the inside of the bottom of the front door:-
Image

Image

Yes, the bottom two or three inches of the door had to be repaired as well, with a mixture of bought and fabricated sections, again all zinc primed before the outer lower door panel is welded on. Doors and other panels were repaired at college- which enabled me to spot weld many of the repair sections into the bottom of the door.

As an aside- Brian, the instructor at the Vehicle Restoration night course I've been attending for several years now- preparing his mild steel Heron garden sculpture for paint.Image
chickenjohn
Minor Legend
Posts: 4064
Joined: Tue Dec 07, 2004 8:50 am
Location: Margate, East Kent
MMOC Member: No

Re: Project "Madelaine" 1970 4-door saloon!

Post by chickenjohn »

OK, finally up to date now!

Time for floor pans!

Rear floor pan has old MOT style nasty lap welded rust sandwich patches along three sides so time to cut it out and fit a new one.
Image

Nasty Rust patches by the crossmember end.
Image

Rear RHS floor pan gone! Image

Here you can see the nastyness along three edges.

Image

New brake pipe/ wiring clips plug welded into the indents pressed into the floor pan panel.

Image

Here you can see the plug welds have penetrated to the inside of the floor pan.

Image

Floor pan is test fitted.

Image

Edges where the floor pan will be plug welded have been zinc primed- as have the matching areas on the floor pan panel.

Image

Floor pan is tacked in, and screwed in along the plug welded sides.

Image

Plug welding started.

Image

New floor pan is fully seam welded where it meets the transmission tunnel and plug welded where it meets the inner sill step and rear seat support box.

Image

Front floor pan is in a similarly nasty condition with lots of rusty lap-welded MOT patches at the edges. Time to cut it out/ drill out the spot welds and remove the rusty old pan and fit a whole new one.

Floor pan gone:-

Image

Nasty! Why when one is restoring a car that you should never lap weld in repairs, Butt welding is always far preferable as you can paint both sides of the repair and prevent rust. No nasty bare metal overlaps to trap moisture and start rusting from the inside out.
Image

Chassis legs are solid but filled with rust flakes and dirt.
Image

But following vacuuming, wire brushes on drill and copious treatment with 10% phosphoric acid rust remover solution and stabilised solid bare metal chassis legs are visible.

after phosphoric acid and wire brushing treatment:-

Image
Cheers John - all comments IMHO
- Come to this years Kent branches Hop rally! http://www.kenthop.co.uk
(check out the East Kent branch website http://www.ekmm.co.uk )
ImageImage
taupe
Minor Legend
Posts: 1188
Joined: Sun Oct 26, 2008 3:20 pm
Location: Bucks
MMOC Member: No

Re: Project "Madelaine" 1970 4-door saloon!

Post by taupe »

Hi Chickenjohn

Coming on well :D :D

Isnt it satisfying to see all that rusty old metal coming off!!

Taupe

PS Dont forget to fit the threaded plate for the door check strap into the A pillar before you close it up
chickenjohn
Minor Legend
Posts: 4064
Joined: Tue Dec 07, 2004 8:50 am
Location: Margate, East Kent
MMOC Member: No

Re: Project "Madelaine" 1970 4-door saloon!

Post by chickenjohn »

Thanks Taupe! You're right, very satisfying. I'll soon have this half of the car done, then I get to turn it around and do the other side! :D Good point about the check strap captive nuts, I'll weld some in before the A pillar goes on.
Fingolfin
Minor Legend
Posts: 1312
Joined: Thu Jan 28, 2010 4:14 am
Location: Fulton, Missouri, United States
MMOC Member: No

Re: Project "Madelaine" 1970 4-door saloon!

Post by Fingolfin »

Fascinating! I've always wondered what's inside some of these panels! :lol: I do have some tough work to do on my own new floorpan, though...I think I've welded them in wrong. When Mog's on his side, I'll cut away the excess metal and butt-weld it all properly.
The way to a man's heart may be making food, but the way to my heart is buying me car parts!
Come read about my Minor at An American Moggie.

chrisd87
Minor Addict
Posts: 857
Joined: Mon Nov 07, 2005 4:52 pm
Location: Saffron Walden
MMOC Member: No

Re: Project "Madelaine" 1970 4-door saloon!

Post by chrisd87 »

Great work there! That's a nasty looking piece of rot in the windscreen surround above the driver's glovebox, will be interested to see how you tackle that.

How long has the car been off the road? I notice from the 'speeding' thread that you have had it on the road - hopefully that was a while ago looking at all that rot :o :lol:
[img]http://i31.photobucket.com/albums/c390/chrisd87/DSC00749.jpg[/img][img]http://i31.photobucket.com/albums/c390/chrisd87/med_gallery_128_45_1416415.jpg[/img]
Sarah - 1970 Minor 1000 2-dr
Maggie - 1969 Minor 1000 4-dr
chickenjohn
Minor Legend
Posts: 4064
Joined: Tue Dec 07, 2004 8:50 am
Location: Margate, East Kent
MMOC Member: No

Re: Project "Madelaine" 1970 4-door saloon!

Post by chickenjohn »

Thanks for the comments chaps! The car was last on the road in about 2004. She has been waiting patiently since parked on my front drive while I learnt the skills needed the put the Traveller back on the road and then restored the convertible. Some of the work pictured, I have done three or four times on the other cars.

I think the poor old car is glad to be getting the rust cut out and new panels and metal going in rather than going to the scrap yard!

The screen surround will require some sections fabricated as these pieces are not available, on the corners, I will be using the shrinking machine to get the curve. That is why it is a good idea to go on a restoration course if you are intending to rerstore a classic car , as these excellent courses will teach the skills needed. And after the first foundation year, you can go back and take in bits of car (or even a whole car! if on a trailer) to work on with the guidance of the instructor.
Cheers John - all comments IMHO
- Come to this years Kent branches Hop rally! http://www.kenthop.co.uk
(check out the East Kent branch website http://www.ekmm.co.uk )
ImageImage
ASL642
Minor Maniac
Posts: 5200
Joined: Sat Oct 20, 2007 3:14 pm
Location: Warwickshire
MMOC Member: No

Re: Project "Madelaine" 1970 4-door saloon!

Post by ASL642 »

Very interesting. I feel exhausted just looking at the pictures. Brings it all back ... restoring the Traveller then the convertible...... now we're working on the 2dr with a 4 dr waiting. :o :lol: Great detailed photos.

Lou Rocke
MMOC 43512
stag36587
Minor Legend
Posts: 1395
Joined: Sat Jan 06, 2007 3:55 pm
Location: Raunds, Northamptonshire
MMOC Member: No

Re: Project "Madelaine" 1970 4-door saloon!

Post by stag36587 »

Looks like you are making good progress, and it looks to be even more rusty than my own. Here's a thing. I have a vague recollection of being told as a child (1970s) that white cars of the 1960s and 1970s were more prone to rust than other colours - apparently something to do with the pigment in the paint? Has anyone else ever heard that or have evidence for or against?
]
DaisyMayFozz
Minor Fan
Posts: 492
Joined: Tue Jun 02, 2009 7:44 pm
Location: East Yorkshire
MMOC Member: No

Re: Project "Madelaine" 1970 4-door saloon!

Post by DaisyMayFozz »

WOW just read it all through, could put some of us to shame.

any more updates? :D :D

RobThomas
Minor Legend
Posts: 2646
Joined: Thu May 11, 2006 10:34 am
Location: Cardiff
MMOC Member: Yes

Re: Project "Madelaine" 1970 4-door saloon!

Post by RobThomas »

I'm impressed that you can photograph your rear wing on the sofa without being killed. I'm not allowed to even bring shiny bits inside the house without written consent. :D
Cardiff, UK
swithland
Minor Fan
Posts: 164
Joined: Tue May 15, 2007 2:28 pm
Location: Hong Kong
MMOC Member: No

Re: Project "Madelaine" 1970 4-door saloon!

Post by swithland »

You are a VERY brave individual restoring a project that has that much work needed. Your metalwork skills are first class. This will be a fabulous Moggie when done. Will watch as you progress.....good luck !! :D
Daisy's first drive in Hong Kong. 6th December 2010 a great day out : http://www.youtube.com/watch?v=jGN5K1Iik9A

chickenjohn
Minor Legend
Posts: 4064
Joined: Tue Dec 07, 2004 8:50 am
Location: Margate, East Kent
MMOC Member: No

Re: Project "Madelaine" 1970 4-door saloon!

Post by chickenjohn »

Thanks chaps, there are updates- like rear floor pans in and new front spring hanger fitted, but no pics yet as my Flickr account is full. I have to do some jiggery pokery to now make use of free webspace I have to store the next lot of photos.

More updates, by the end of the week, promise!!
Cheers John - all comments IMHO
- Come to this years Kent branches Hop rally! http://www.kenthop.co.uk
(check out the East Kent branch website http://www.ekmm.co.uk )
ImageImage
Post Reply