I really appreciate all the comments:
TvdWerf » Mon Mar 11, 2013 9:12 pm
this is not a restauration, but building a new car, using some old parts
Thanks, but that’s what I call a restoration making the car like new again. The amount of new parts depends on the state of the old ones…
jagnut66 » Mon Mar 11, 2013 9:16 pm
He's doing a very good job though, just shows what can be done, if you put your mind to it.
Cheers!
Wyliecoyote » Wed Mar 13, 2013 4:03 pm
Top work and great photos, I think we have equally rusty Minors!
Yes I saw your restoration thread and videos and we seem to be doing exactly the same things!
Sparticus » Thu Mar 14, 2013 9:49 am
This is mental..i'm so envious of your welding..and speed! It's the only thing holding me back from carrying on with mine
The secret is in the welding equipment. I have a Portamig see http://www.mig-welding.co.uk/ I also learned (still learning) how to weld from that site.
rogerowen » Thu Mar 14, 2013 10:41 am
I like the holding pegs - are they Frost ones?
Yes:
http://www.ebay.co.uk/itm/Intergrips-We ... 589af72d30
brucek » Thu Mar 14, 2013 10:43 am
Seriously neat welding - the car will be a stunner when completed. Enjoying the updates too. Thanks
I am not a welder although I am getting lots of practice. The secret is to have a small gap between panels, clean steel, a good welder with the right setting and a good helmet so you can see what you are doing. If only I always followed those simple rules...
Traveller Restoration
Forum rules
By using this site, you agree to our rules. Please see: Terms of Use
By using this site, you agree to our rules. Please see: Terms of Use
Re: Traveller Restoration
1956 Morris Minor Series II
1959 MGA 1600 Roadster
1966 Jaguar Mk2 3.8 MOD
1959 MGA 1600 Roadster
1966 Jaguar Mk2 3.8 MOD
-
Morris Mike
- Minor Fan
- Posts: 312
- Joined: Mon Jan 30, 2012 6:08 pm
- MMOC Member: No
Re: Traveller Restoration
Just out of interest...what did you pay the seller of this car for all this work.? 
Morris Mike
Morris Mike
Morris Minor Traveller 1961 Modified.
Austin 6cwt Van 1972. Teal Blue
Morris Minor Traveller 1961 Original
Austin A30 Van 1956.
Austin A35 Van 1960
What else is lurking behind those open doors.?.
Austin 6cwt Van 1972. Teal Blue
Morris Minor Traveller 1961 Original
Austin A30 Van 1956.
Austin A35 Van 1960
What else is lurking behind those open doors.?.
Re: Traveller Restoration
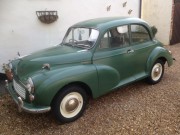
Haha! Can you believe it drove into the shed and although it hadn't been on the road for 33 years it still ran pretty well and the brakes worked! I took a few of our club members down the (private) lane and back. A few patches and a bit of paint and it would have looked ok, passed an MOT and been back on the road like so many others on eBay! So at £450 I could have returned a tidy profit...Morris Mike wrote:Just out of interest...what did you pay the seller of this car for all this work.?
1956 Morris Minor Series II
1959 MGA 1600 Roadster
1966 Jaguar Mk2 3.8 MOD
1959 MGA 1600 Roadster
1966 Jaguar Mk2 3.8 MOD
Re: Traveller Restoration
I welded on the chassis leg and put the crossmember in place to see how it fitted...[frame] [/frame]
1956 Morris Minor Series II
1959 MGA 1600 Roadster
1966 Jaguar Mk2 3.8 MOD
1959 MGA 1600 Roadster
1966 Jaguar Mk2 3.8 MOD
Re: Traveller Restoration
I prepared the area for the patch under the rear seat, I needed to make a small repair patch for the inner front corner area and that is already welded in...[frame] [/frame]
1956 Morris Minor Series II
1959 MGA 1600 Roadster
1966 Jaguar Mk2 3.8 MOD
1959 MGA 1600 Roadster
1966 Jaguar Mk2 3.8 MOD
Re: Traveller Restoration
I formed the depressions in the panel with a plate in the vice and a hammer and blunt chisel. The corners were done by hammering over an edge with a large socket. Not perfect, but should be invisible with a coat of stone chip...[frame] [/frame]
1956 Morris Minor Series II
1959 MGA 1600 Roadster
1966 Jaguar Mk2 3.8 MOD
1959 MGA 1600 Roadster
1966 Jaguar Mk2 3.8 MOD
Re: Traveller Restoration
Welded in...[frame] [/frame]
1956 Morris Minor Series II
1959 MGA 1600 Roadster
1966 Jaguar Mk2 3.8 MOD
1959 MGA 1600 Roadster
1966 Jaguar Mk2 3.8 MOD
Re: Traveller Restoration
and dressed...[frame] [/frame]
1956 Morris Minor Series II
1959 MGA 1600 Roadster
1966 Jaguar Mk2 3.8 MOD
1959 MGA 1600 Roadster
1966 Jaguar Mk2 3.8 MOD
Re: Traveller Restoration
The rear floor outer repair was then fitted...[frame] [/frame]
1956 Morris Minor Series II
1959 MGA 1600 Roadster
1966 Jaguar Mk2 3.8 MOD
1959 MGA 1600 Roadster
1966 Jaguar Mk2 3.8 MOD
-
Daddybear1984
- Minor Fan
- Posts: 177
- Joined: Thu Aug 16, 2012 7:47 pm
- Location: Doncaster,UK
- MMOC Member: No
Re: Traveller Restoration
This is great stuff, well done and keep it coming
When you're in up over your head, the first thing to do is close your mouth.
-
Sparticus
- Minor Fan
- Posts: 205
- Joined: Tue Mar 13, 2012 12:17 pm
- Location: Diss, Norfolk
- MMOC Member: No
Re: Traveller Restoration
ooo quick question if you please!!! Have you done th boxing plate bit that was behind the front lower aluminum panels? Just past the cab pillars? IF SO How?!
Thanks
Thanks
Grant, 23, Morris Minor traveller - Saloon. Merlin traveller 90% finished!
DSN Classics

DSN Classics
-
rogerowen
- Minor Addict
- Posts: 519
- Joined: Thu Aug 09, 2007 7:11 pm
- Location: Lymington, Hampshire
- MMOC Member: No
Re: Traveller Restoration
Seconded! I'm about to start similar work and you photos are going to be a great help. One question - does it make practical sense to start repairing with the car in normal postion - doing the side work first and then rolling over to work on the underside?Daddybear1984 wrote:This is great stuff, well done and keep it coming
That's strange R2, the damage doesn't look so bad from here!
Re: Traveller Restoration
I have done the right hand side, there is a picture on page 4. I will take more pictures when I do the left side so you can see exactly.Sparticus wrote:ooo quick question if you please!!! Have you done th boxing plate bit that was behind the front lower aluminum panels? Just past the cab pillars? IF SO How?! Thanks
Thanks and yes, that makes good sense. In my case that would have entailed doing the front inner wing a rear boxing plate extension/front spring hanger area first and then the sill sections. Otherwise there would have been nothing to weld the sill sections to. Better access to any repairs necessary inside the inner wing and to the spring hanger might be from underneath, but so long as you have some room to get under the car these can be finished when it's on its side.rogerowen wrote:Seconded! I'm about to start similar work and you photos are going to be a great help. One question - does it make practical sense to start repairing with the car in normal postion - doing the side work first and then rolling over to work on the underside?Daddybear1984 wrote:This is great stuff, well done and keep it coming
1956 Morris Minor Series II
1959 MGA 1600 Roadster
1966 Jaguar Mk2 3.8 MOD
1959 MGA 1600 Roadster
1966 Jaguar Mk2 3.8 MOD
Re: Traveller Restoration
Now for the rear inner wing. First the old inner wing was cut, drilled and ground out...[frame] [/frame]
1956 Morris Minor Series II
1959 MGA 1600 Roadster
1966 Jaguar Mk2 3.8 MOD
1959 MGA 1600 Roadster
1966 Jaguar Mk2 3.8 MOD
Re: Traveller Restoration
The bump stop support bracket was replaced...[frame] [/frame]
1956 Morris Minor Series II
1959 MGA 1600 Roadster
1966 Jaguar Mk2 3.8 MOD
1959 MGA 1600 Roadster
1966 Jaguar Mk2 3.8 MOD
Re: Traveller Restoration
The area prepared...[frame] [/frame]
1956 Morris Minor Series II
1959 MGA 1600 Roadster
1966 Jaguar Mk2 3.8 MOD
1959 MGA 1600 Roadster
1966 Jaguar Mk2 3.8 MOD
Re: Traveller Restoration
And the new panel welded on...[frame] [/frame]
1956 Morris Minor Series II
1959 MGA 1600 Roadster
1966 Jaguar Mk2 3.8 MOD
1959 MGA 1600 Roadster
1966 Jaguar Mk2 3.8 MOD
-
rogerowen
- Minor Addict
- Posts: 519
- Joined: Thu Aug 09, 2007 7:11 pm
- Location: Lymington, Hampshire
- MMOC Member: No
Re: Traveller Restoration
Thanks for that - nearly rolled the car first! So now I'll start with it upright on stands. I'm rolling with a Mr Grumpys rig so I've only got 90 degrees of roll each side, and an 8' wide garage (should be interesting rolling and sliding). Thanks for posting all your pictures - these will be invaluable to lots of us I'm sure!Neil MG wrote:I have done the right hand side, there is a picture on page 4. I will take more pictures when I do the left side so you can see exactly.Sparticus wrote:ooo quick question if you please!!! Have you done th boxing plate bit that was behind the front lower aluminum panels? Just past the cab pillars? IF SO How?! Thanks
Thanks and yes, that makes good sense. In my case that would have entailed doing the front inner wing a rear boxing plate extension/front spring hanger area first and then the sill sections. Otherwise there would have been nothing to weld the sill sections to. Better access to any repairs necessary inside the inner wing and to the spring hanger might be from underneath, but so long as you have some room to get under the car these can be finished when it's on its side.rogerowen wrote:Seconded! I'm about to start similar work and you photos are going to be a great help. One question - does it make practical sense to start repairing with the car in normal postion - doing the side work first and then rolling over to work on the underside?Daddybear1984 wrote:This is great stuff, well done and keep it coming
That's strange R2, the damage doesn't look so bad from here!
-
stag36587
- Minor Legend
- Posts: 1395
- Joined: Sat Jan 06, 2007 3:55 pm
- Location: Raunds, Northamptonshire
- MMOC Member: No
Re: Traveller Restoration
Impressive stuff but can I just point out one major flaw?
You are working on your own car , not mine
PS : what etch primer will you be using and is it compatible with filler and whatever topcoat you will choose?
You are working on your own car , not mine
PS : what etch primer will you be using and is it compatible with filler and whatever topcoat you will choose?
]
Re: Traveller Restoration
I will use an epoxy etch primer directly onto the blasted and degreased metal immediately after blasting. That is compatible with all paints and fillers. Something like this:
http://www.ebay.co.uk/itm/Pro-Spray-2K- ... 3a6762c745
Or this:
http://www.ebay.co.uk/itm/Two-Pack-2K-E ... 4ab4b517fd
When I buy the (top coat) paint from the local supplier I will see if they have a good product that is competitively priced and if so will buy it there together with the other primer, etc.
Good paint is expensive, but compared to the cost of having a car sprayed...
1956 Morris Minor Series II
1959 MGA 1600 Roadster
1966 Jaguar Mk2 3.8 MOD
1959 MGA 1600 Roadster
1966 Jaguar Mk2 3.8 MOD