Page 1 of 2

My Traveller (Emilia) - Now with added ZETEC

Posted: Sun Jun 09, 2013 10:19 pm
by Matt
I was given my traveller back in December 2006...

Image

Image

Image

etc ;) and plenty of holes in the gutters too...

I took it back to the university did some dodgy plating over the sills (computer case with a mig & no gas) and got it through and MOT...

Image

I then took it home and did this:

Image

Image

Image

Image

Image

Image

Image

Its gone through a few MOTs since then and had a rebuilt engine marina (which blew up!) so I chucked a 1275 midget engine in which hadn't run since the 80's!.

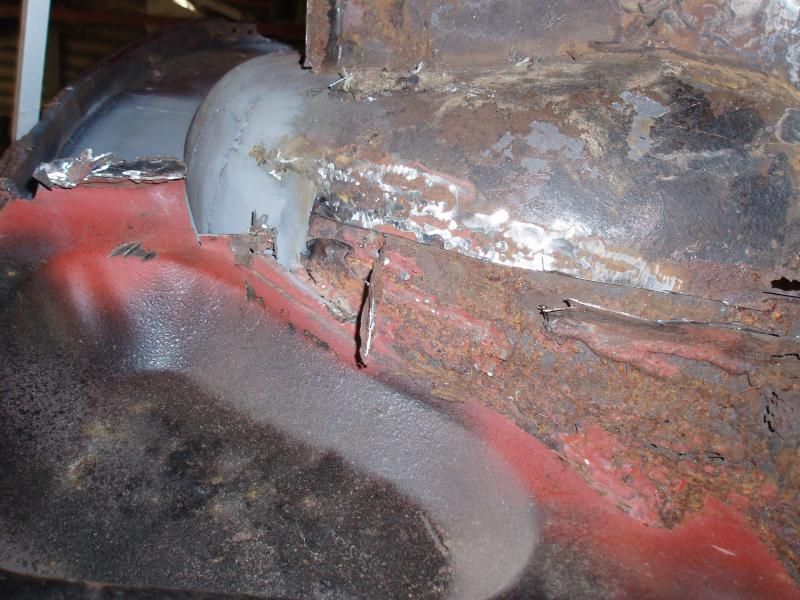
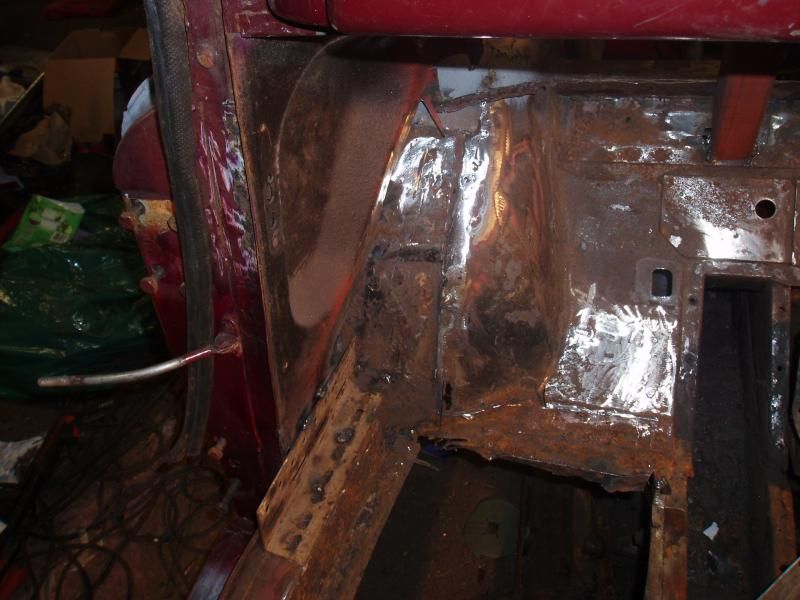
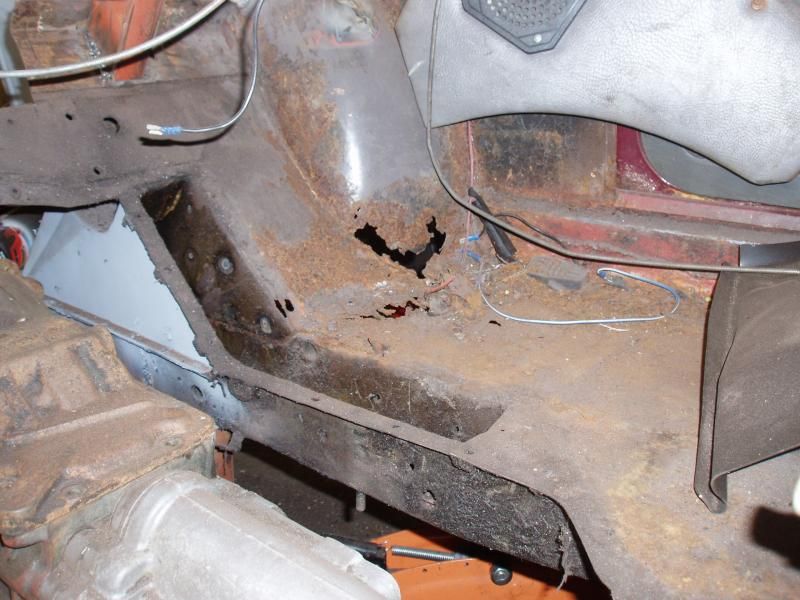
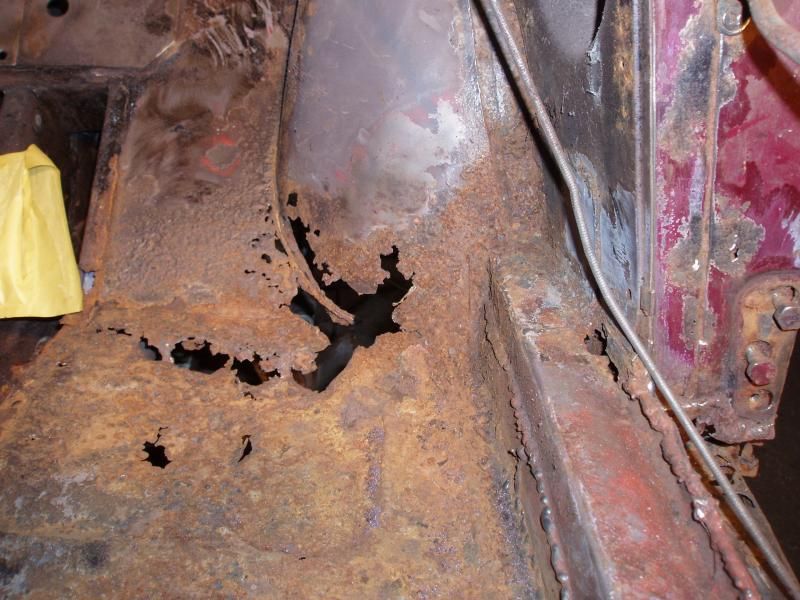
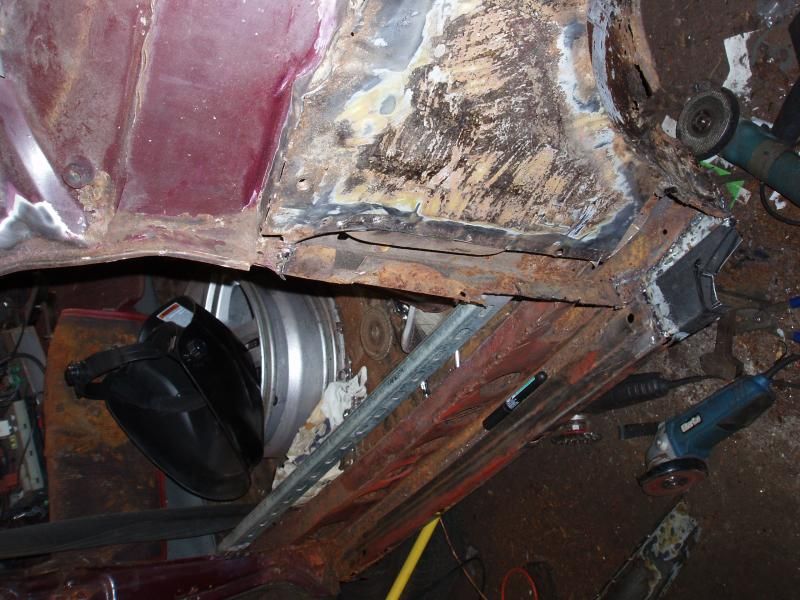
I used it more or less every day until nearly 4 years ago, including being on the website stand at a national rally (Either 2008 or 2009) and it hasn't been used for the last 2 years and was looking rather sorry for itself... so a month ago I took it to my workshop to give it the once over with a view to getting it back on the road. Giving it a going over it would probably have been possible to re-MOT it with a bit of welding where the drivers floor pan meets the front wheel arch, fixing the brakes (one caliper siezed on, one seized off! :lol: ).

So... its gone in to my workshop and work has commenced... im really busy at the moment so my friend Kalkat (Emma) is doing most of the work... and it hasn't gone quite as planned! Im doing what I can in the small amount of time I am at the workshop

We have found that the drivers side chassis leg had been replaced in the past, and wasn't on straight and rather a lot more rust than we expected!

More pics when they are uploaded

Re: My Traveller (Emilia)

Posted: Sun Jun 09, 2013 10:59 pm
by Matt
Drivers Side inner wing repaired

Image

This involved making new panels and letting them in. The support panel above the bump stop will go back soon

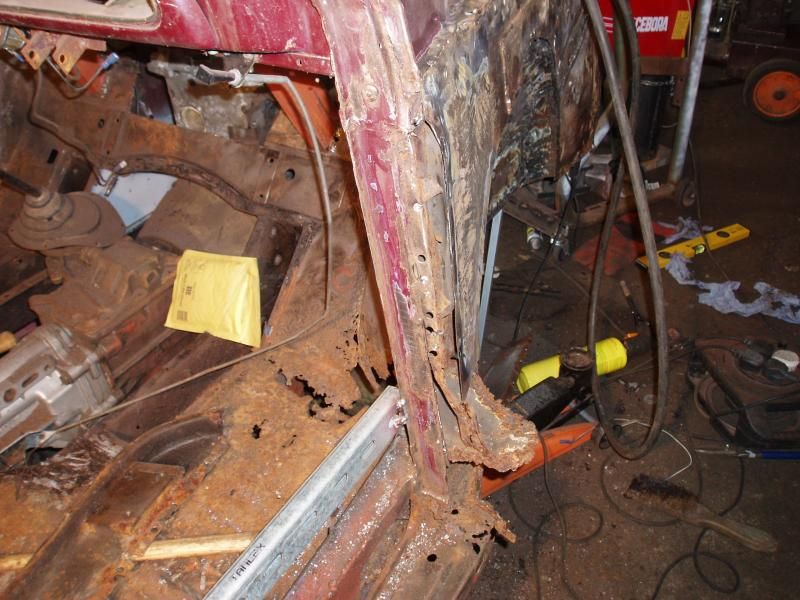
Passenger side A pillar :o

Image

Image

and a few repairs...

Image

Image

Image

Image

Image

And the inner wing (see if you can spot what else is different?)

Image

Image

Image

Image

Image

And the scuttle panel:

Image

And... the engine and bulkhead

Image

And the engine mounts have started to be fabricated

Image

Image

Re: My Traveller (Emilia)

Posted: Tue Jun 11, 2013 3:58 pm
by Matt
Well...

In order to try and get the car a bit less nose heavy we decided to move the engine and gearbox back as far as we practically could. As you can see a new bulkhead will be fabricated, and the crossmember has been cut out and some heavy steel box welded to it to bring some of the strength back. Its also had most of the JLH chassis strengthening kit installed, the only bit left to go in is the part above the gearbox cover.

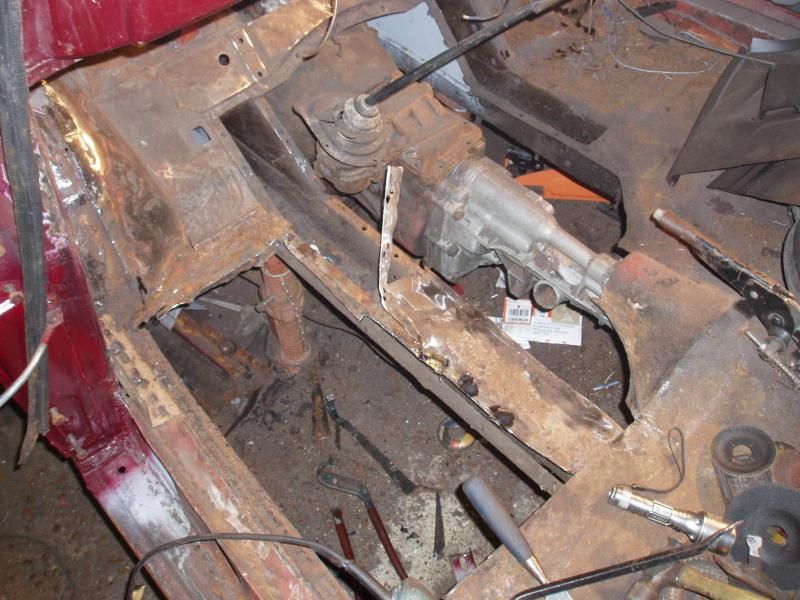
The problem with moving the engine and gearbox further back is the position of the gearstick on a type 9. If you put a type 9 behind and A series, you need to shorten the gearstick and cut about an inch out of the tunnel for clearance. I had already done it on this car, but its now not enough. You can buy gearboxes with the shortened selector mechanism but they are expensive, and wouldn't move the stick far enough forward, so we have had to do something else...

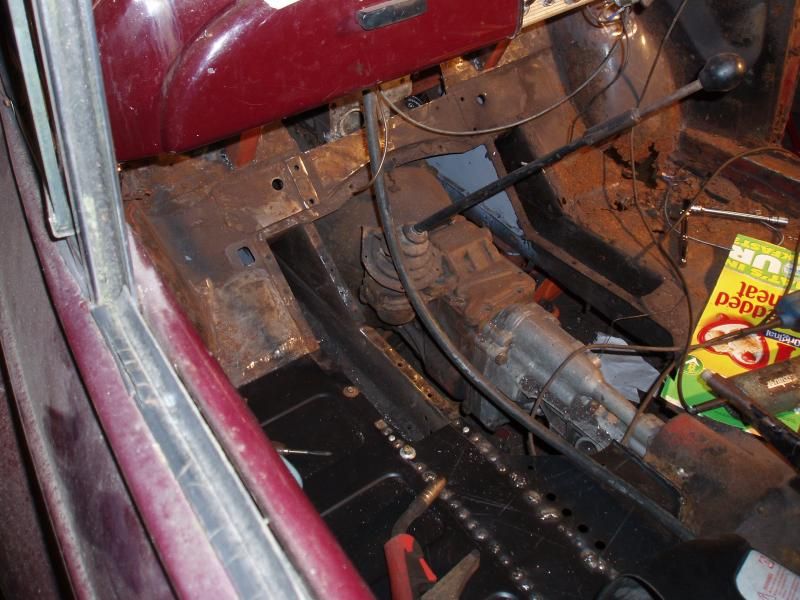
I have aquired a transit type 9 gearstick and selector mechanism... the gearstick is going to be in a position similar to an 803 gearbox :lol: AND I can put a full length handbrake lever back and replace the bit of tunnel that I cut out! Im just hoping that its going to work. There may also be some stripping down to replace the selector mechanism in the car gearbox with the transit one.

Im hoping Kalkat has got some pictures... if not i'm sure she will get some!

Re: My Traveller (Emilia)

Posted: Tue Jun 11, 2013 8:15 pm
by MarkyB
Have you considered fitting an auto box?

Re: My Traveller (Emilia)

Posted: Tue Jun 11, 2013 10:32 pm
by Matt
I don't want an automatic ;) AND the bellhousing is bigger on the auto than the manual, so the engine would be further forward than it is now :lol:

Re: My Traveller (Emilia)

Posted: Tue Jun 11, 2013 11:13 pm
by irmscher
Looks good :D when do you expect to finish her Matt

Re: My Traveller (Emilia)

Posted: Tue Jun 11, 2013 11:22 pm
by KalKat
T'isn't Matt doing this..... it's me 8)

..... she should be ready (fingies x'ed ) for an event in July. This won't include the 'outside' or a decent retrim though.......

Re: My Traveller (Emilia)

Posted: Wed Jun 12, 2013 7:01 am
by Matt
As above Kalkat is doing most of the work. We are aiming to have a solid running car for the test and tune (drag racing) meet at North Weald in July. I will race the transittow vehicle and Kalkat will race the minor!

Re: My Traveller (Emilia)

Posted: Fri Jun 14, 2013 10:21 pm
by Matt
And some more...

What a mess!

Image

and the floor is now missing... and the arch has been repaired properly

Image

Image

and a new floor, this shows the alternate gearstick position as well!

Image

and some more welding needed on the other side too...

Image

Re: My Traveller (Emilia)

Posted: Sat Jun 15, 2013 10:45 pm
by KalKat
Okees....
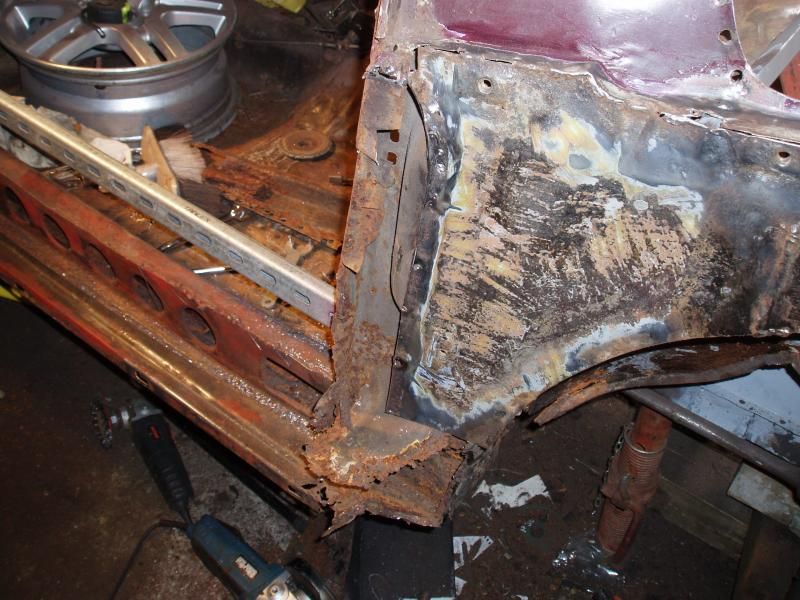
.... after Matts hope the othe A pillar was in better condition I thought a poke aaround before I started on the driver's floor and arch repair would be in order........

Image

... mmmm, a 'bit of metal moth here .. wonder what's in the pilar? .....

Image

Image

AAAAaaaargh! loads of tin worm :cry:

so 'choppity hackity patchilly' ...here we are after rthis afternoons work...

Image

I aim to have this all sorted by tomorrow evening, so as I can start on the arch and heelboard :lol:

Re: My Traveller (Emilia)

Posted: Thu Jul 04, 2013 11:09 am
by Matt
No pics :( because we are working pretty much flat out to get this done in time for the racing on the 13th... (I will try to get some this weekend though)

The engine mounts are almost finised, I just need to do a bit of welding (they are 99% finished, but still need finishing) and paint (but that will wait until the post race strip out and tidy up)

Both inner wings are now solid, and the wings can go back on - along with the front suspension.

We have pretty much finished with the mock-up engine and gearbox (its a completely stripped out engine, with sump, head and water pump attached and a emptied type 9 (car type) gearbox. If anyone can use it give me a shout.

The flanges have arrived (I drew them up in CAD and got them laser cut by a friend on another forum) for me to make my water rail and to fit an escort fuel pump in to the minor tank (because there is a lack of baffles etc in the tank I will have to make sure there is enough fuel in it, so it doesn't suck air)

The new engine should be going in this weekend, but I doubt it will get wired up...

The steering rack has been relocated (slightly further back) so we can get the weight off the front a little

The drivers side floor pan has been cut out and replaced, the driver side A pillar repairs are also finished.

The windscreen is out... and the rust isn't as bad as I thought. We might be able to fix it before racing, if not I will just put the screen back in and worry about it later!

A new

Rear axle is off... and with any luck work on replacing the front hangers should start today... once thats done the car is back to being solid underneath 8).

We have also found that there is no way the standard zetec inlet manifold will fit (plastic one) and we are dubious whether there will be clearance for the metal type that goes over the rocker cover... so I am going to be making a plenum - hopefully that will get done this weekend, along with the water rail!

Still to do in the next 9 days (I have taken some time off work, but can still only be there for 5 of them!)

Make front Cross Member
Make and weld in a new bulkhead panel
Put pedal box (marina one) back
Install wings, front panel etc
Install new radiator
Make water rail
Install plumbing
Install electrics (engine only - don't need any lights etc)
Install engine and gearbox
Make Inlet plenum
Put suspension back
Put brakes back
Put rear axle back
Install brake pipes
Make Plenum
Shorten propshaft
Put doors back on
Put windscreen back
Make and install seat subframe
Design and make gear stick assy (or mod what we have).
Lots of "tidying up" welding to finish bits and pieces off.
Modify gearbox cover

Its definately going to be close. We may end up doing some of the work on the Saturday evening when we arrive at the track!

Re: My Traveller (Emilia)

Posted: Thu Jul 04, 2013 10:54 pm
by davidmiles
go you guys go, get that machine welded up ready for the race track, looking forward to seeing a pic of Kalkat in her crash, sorry, hard hat, behind the wheel.

Re: My Traveller (Emilia)

Posted: Fri Jul 05, 2013 2:00 pm
by Matt
I will do my best... but Im going to be racing too (in the Transitt)

Re: My Traveller (Emilia)

Posted: Mon Jul 08, 2013 8:43 am
by Matt
So when I got to the workshop on Saturday...

A new pedal box mounting had been made, along with some additional bulkhead strengthening being added

Image

Image

The drivers side floorpan has been put in

Image

And the passenger side front spring hanger replacement almost finished

Image

It just needs finishing off inside the car

Image

This is what was left of the drivers side spring hanger (which didn't look that bad with the spring still in place!) which was removed on Saturday

Image.

Oh, and here is one of the engine mounts (welding to be finished when the dummy engine is removed)

Image

I have done a few bits this weekend...

Sorted out the new radiator and its mountings

Image

Made a water rail (but forgot to take pictures :( ) That took nearly all of Saturday

Modified the fuel tank to take an escort zetec fuel pump (there are no baffles in the tank, so I am going to have to do that in the future so the EFI system doesn't pick up air, but in the short term I will just run with enough fuel in the tank!)

Image

The pump is now fitted, it sandwiches between the welded in plate and another one with cap heads securing the 2 together.

I have also "fabricated" the downpipe. Its a 2L focus exhaust manifold, with the flange cut off, and a section of transit exaust pipe (which just happens to have exactly the right shape!) welded together.

Image

Image

I'm pretty confident I have worked out all the coolant piepwork too... I have had to buy a few more bits.

As I left for the journey to Wales, the new bulkhead was starting to go in. Once thats done, the dummy engine can come out, the proper one go in, and I can start putting all the brakes/suspension/wiring back togther. (bearing in mind it will have to come out again so everything can be tidiest up and painted nicely!)

I have also got some heated rear windows from a member here to go in - once its back from the racing!

Re: My Traveller (Emilia) - Now with added ZETEC

Posted: Wed Jul 10, 2013 10:06 pm
by Matt
Image

fuel tank with sender bolted in...

Image

new smooth bulkhead and old wings back on...

and Kalkat operating the spark maker..

Image

the steering rack has also been relocated and a car type 9 has had the transit selector mechanism put ibn...

tomorrow the new engine goes in front suspension goes back on and all the internal bulkhead bits should be done...

Re: My Traveller (Emilia) - Now with added ZETEC

Posted: Thu Jul 11, 2013 8:24 am
by jagnut66
Looks like a good solid job that you are doing there................. Sorry, she is doing there!!
I think Kalkat deserves her picture on here next to the finished article when done.

I like your idea for the gearstick position, it will hopefully make redesigning the tunnel cover easier and, depending on how close to original you keep the interior / exterior, it will look like it's pretty much where it they would expect it to be (in an older car) to the average person on the street.
Which means you could end up with a nice little 'sleeper' classic.....
That should surprise a few of those 'boy racers' who think they're 'God's gift' to driving! :lol:

Now it's time you made Kalkat a cuppa and passed her the biscuits!!

Best wishes,
Mike.

Re: My Traveller (Emilia) - Now with added ZETEC

Posted: Thu Jul 11, 2013 11:15 pm
by Matt
unfortunately we arnt going to make it racing ... we have a problem with the steering rack... that means progress is going to stop for a little while whilst Kalkat has a break.

Shame really... the engine and box are in along with the front suspension etc. which will all need to come out again to be painted. This is goibg to be tidied up a lot but may run round as a snotter for a while to iron out any problems!

Re: My Traveller (Emilia) - Now with added ZETEC

Posted: Tue Jul 16, 2013 7:41 am
by Matt
Whilst it didn't make it...

I spent Sunday racing anyway... in a '95 Transit Diesel :lol: just got an added turbo and the fuelling tweaked (all standard transit parts)

18.82 seconds across the 1/4 @ 71mph - thats pretty quick for a 2 tonne vehicle and has beaten the time posted by almost all the V6 transits.

We will have to race it sometime in the future!

Kalkat is having a bit of a break, then we are going to work a bit slower until its sorted into a tidy road car

Re: My Traveller (Emilia) - Now with added ZETEC

Posted: Mon Jul 22, 2013 7:35 am
by Matt
We have a new target...

The 60th anniversary of the Traveller celebrations at Gaydon in September... here's hoping! :o

Re: My Traveller (Emilia) - Now with added ZETEC

Posted: Mon Jul 22, 2013 3:54 pm
by morrisfixer
Hi mate. I've been reading your post excellent stuff. Looking at your pedal box and the distance between the inlet manifold it's gonna be tight for carbs or injection system ? I've got an st170 in my Morris running bike carbs and the pedal box is made up from marina pedals and fiesta servo and I'm struggling for space. Would it not be easier to keep the pedals in the floor and a remote servo?? I'm thinking of changing mine back to give me more space. :)
Google my full build Morris minor st170

Stevie